Stair Climber Home Guide: Setup vs PaceRocker Walking Pad Treadmill
Master your home gym with our complete stair climber setup guide. Compare space, installation, and costs against the PaceRocker walking pad treadmill.

The Dual-Zone Home Cardio Strategy for 2026
Designing a comprehensive home gym in 2026 requires more than just buying equipment; it demands strategic spatial planning and precise installation. Many fitness enthusiasts struggle to balance high-intensity vertical training with low-impact daily movement. This guide provides a complete setup and installation walkthrough for a dual-zone cardio system: anchoring your high-intensity workouts with a stair climber machine, while integrating the PaceRocker walking pad treadmill for active recovery and under-desk mobility.
According to Centers for Disease Control and Prevention (CDC) guidelines, adults need a mix of moderate and vigorous aerobic activity. A stair climber provides the vigorous, bone-density-building vertical load, while a walking pad ensures you hit your daily moderate step goals without joint degradation. Below, we break down the exact measurements, electrical prerequisites, and mechanical assembly steps to get both machines running flawlessly in your home.
Space Planning Matrix: Vertical vs. Horizontal Footprints
| Equipment Type | Model Example | Footprint (L x W) | Ceiling Req. | Avg. Cost |
|---|---|---|---|---|
| Motorized Stair Climber | Bowflex Max M9 | 49" x 30.5" | User Height + 15" | $1,999 |
| Hydraulic Mini Stepper | Sunny Health SF-S9002 | 16" x 12" | User Height + 10" | $85 |
| Ultra-Slim Walking Pad | PaceRocker Walking Pad Treadmill | 50" x 20" | N/A (Floor level) | $219 |
Pre-Installation Checklist for Stair Climbers
Before unboxing your stair climber, you must prepare the physical environment. Stair climbers—whether full-size motorized units or compact hydraulic steppers—exert immense downward and lateral force. Skipping these prerequisites is the leading cause of premature mechanical failure.
1. Electrical and Circuit Prerequisites
Motorized stair climbers like the NordicTrack FS14i or Bowflex Max series draw significant current, especially during high-incline intervals. They require a dedicated 15-amp, 120-volt circuit. Plugging a motorized climber into a shared bedroom circuit alongside an air conditioner or space heater will cause voltage drops, leading to console reboots and potential motor board burnout. For hydraulic mini-steppers, no electrical outlet is required, though you will need a grounded space for the console's AC adapter if it features an electronic display.
2. The 15-Inch Ceiling Clearance Rule
The most common installation mistake occurs when users forget to account for the step height. At the peak of the pedal stroke, your body will be elevated by 10 to 15 inches. The Formula: Measure your exact height while wearing your thickest workout shoes, then add 15 inches. If you are 6'0" (72"), plus 3" for shoes, plus 15" for step height, you need a minimum ceiling clearance of 90" (7'6"). If your room has an 8-foot ceiling (96"), you have a safe 6-inch buffer.
3. Subfloor Leveling and Vibration Dampening
Hydraulic cylinders on mini-steppers are highly sensitive to uneven weight distribution. If the floor is sloped by even 2 degrees, one piston will bear up to 75% of your body weight, leading to blown O-ring seals and silicone fluid leaks within the first month. Lay down a 3/4-inch thick, high-density EVA foam equipment mat. Use a carpenter's spirit level on the base frame and adjust the rubber leveling feet until the bubble is perfectly centered before tightening the lock nuts.
Step-by-Step Stair Climber Assembly Walkthrough
Follow this exact sequence to assemble a standard motorized or heavy-duty hydraulic stair climber. Always use the included torque wrench or a calibrated socket set; overtightening M8 bolts can strip the aluminum alloy threads on the main uprights.
- Base Frame Positioning: Lay the main base frame on the mat. Do not attach the uprights yet. Ensure the front transport wheels are facing your designated 'forward' direction.
- Upright Installation: With a second person supporting the vertical mast, insert the M8 x 60mm bolts through the base flange. Hand-tighten only. This allows for micro-adjustments when attaching the console.
- Console Wiring Routing: Feed the data cable through the upright mast. Critical Warning: Ensure the cable is routed on the side opposite the moving pedal arms. Pinched data cables account for 40% of all 'dead console' warranty claims.
- Handlebar and Torque Phase: Attach the moving handlebars to the lower pivot points. Apply a thin layer of white lithium grease to the pivot bearings. Now, go back and torque all M8 base and upright bolts to exactly 25 Nm (Newton-meters).
- Pedal and Strap Calibration: Attach the foot pedals. For hydraulic models, pump the pedals slowly for 2 minutes without standing on them to circulate the hydraulic fluid and bleed any trapped air from the cylinders.
Setting Up the PaceRocker Walking Pad Treadmill
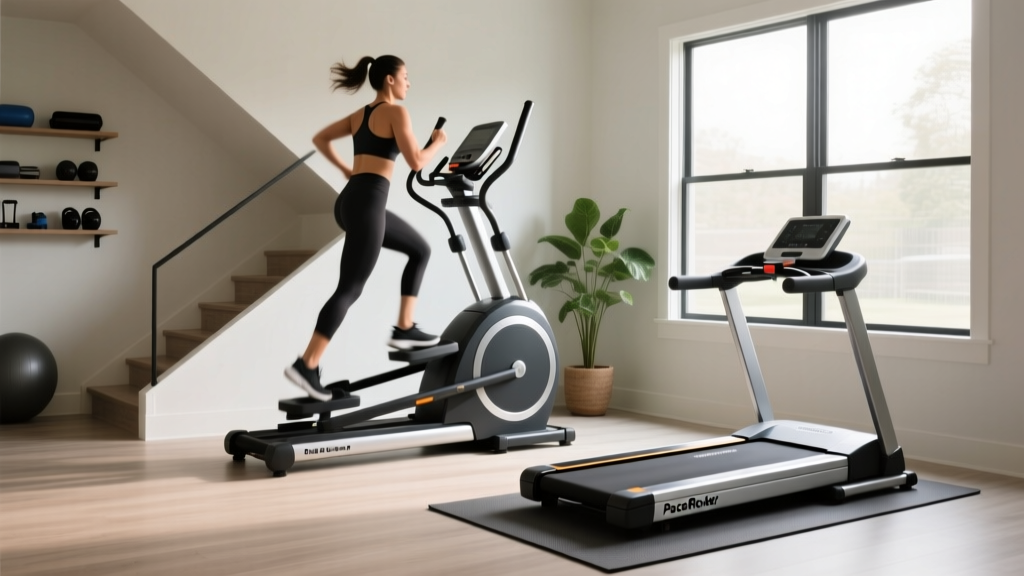
While the stair climber serves as your high-intensity anchor, the PaceRocker walking pad treadmill is designed for seamless integration into living spaces or home offices. Its setup is less about heavy lifting and more about precise belt calibration and software pairing.
Unboxing and Initial Placement
The PaceRocker weighs approximately 48 lbs and arrives fully assembled, but it requires careful handling. Lift it from the center gravity point (usually marked near the front motor housing) to avoid bending the rear roller axle. When placing it under a standing desk, ensure you have a minimum width clearance of 22 inches and a depth of 55 inches to allow for a natural arm swing without hitting the desk legs.
Belt Tension and Tracking Calibration
Out of the box, walking pad belts are often slightly loose to prevent motor strain during shipping. Before your first walk:
- Plug in the PaceRocker and turn it on at the lowest speed (1.0 mph).
- Observe the belt tracking. If it drifts to the left, insert the included 6mm Allen key into the right rear roller bolt and turn it clockwise by exactly one-quarter (1/4) turn.
- If the belt slips underfoot when you step on it, tighten both left and right rear bolts by one-quarter turn clockwise. Do not exceed a full turn total, or you will over-tension the belt and burn out the 2.5 HP motor.
App Integration and Smart Modes
Download the proprietary 2026 PaceRocker companion app. Pair via Bluetooth 5.2. The app features an 'Auto-Adaptive' mode that uses your smartphone's accelerometer to match the belt speed to your walking cadence. This is highly effective for under-desk use, as the treadmill will automatically slow to 0.5 mph when you stop to type, and resume when you resume walking.
Expert Biomechanical Insight: According to Mayo Clinic's guidelines on aerobic exercise, varying your movement planes is crucial for joint health. The stair climber forces deep knee and hip flexion under load, building glute and quad strength. The PaceRocker walking pad treadmill provides low-impact, continuous sagittal plane movement, promoting blood flow and active recovery without central nervous system fatigue. Using both in a single week creates a perfectly periodized home cardio routine.
Troubleshooting Common Installation Failures
Even with careful setup, environmental factors can cause issues. Here is how to diagnose and fix the most common post-installation problems for both machine types.
Troubleshooting Matrix
| Symptom | Machine | Root Cause & Fix |
|---|---|---|
| Squeaking on downstroke | Stair Climber | Dry pivot bearings. Apply 2 drops of PTFE (Teflon) lubricant to the upper and lower handlebar pivots. Never use WD-40. |
| Hydraulic fluid leak | Mini Stepper | Uneven floor caused O-ring blowout. Re-level the base feet and replace the cylinder (approx. $35 part). |
| Belt stalls when stepped on | PaceRocker | Under-tensioned belt or motor overheating. Tighten rear rollers 1/4 turn. Ensure 4 inches of clearance around the motor hood for airflow. |
| Console shuts off randomly | Motorized Climber | Voltage drop on shared circuit. Move to a dedicated 15A breaker line. |
Long-Term Maintenance Schedule
To protect your investment and ensure both machines operate safely through years of daily use, adhere to this strict maintenance calendar:
- Weekly: Wipe down the PaceRocker belt edges with a damp microfiber cloth to remove dust that can slip under the deck and increase friction. Vacuum around the stair climber's motor housing.
- Monthly: Check the stair climber's M8 bolts for loosening caused by high-frequency vibration. Re-torque to 25 Nm if necessary. Inspect the PaceRocker's power cord for fraying.
- Bi-Annually: Lift the PaceRocker walking pad treadmill deck and apply a 100% silicone treadmill lubricant strip directly to the deck surface. For hydraulic stair climbers, inspect the cylinder shafts for micro-abrasions and apply a light coat of silicone grease.
Final Thoughts on Your Home Cardio Ecosystem
Building a home gym is an exercise in spatial and biomechanical engineering. By meticulously installing a heavy-duty stair climber for your vigorous, muscle-building sessions, and strategically placing the PaceRocker walking pad treadmill for seamless daily step accumulation, you create a comprehensive, joint-friendly cardio ecosystem. Pay strict attention to the electrical prerequisites, ceiling clearances, and belt tensioning protocols outlined above, and your equipment will deliver reliable, sweat-inducing performance for years to come.
More gear to consider
All reviews
Treadmill Abuse Trends 2026: Belt Maintenance & Market Data

12/3/30 Treadmill Belt Maintenance: Space Layouts & Lube Guide

T6.5s Treadmill Buying Guide: 2026 Feature Comparison & Alternatives

Stair Climber Guide: Home Picks vs the 6.0 RT Treadmill

Beyond the Star Trac Treadmill: Under Desk Office Reviews