
Olympic vs Standard Plates Setup & Most Effective Dumbbell Exercises
Master your home gym setup with our walkthrough on Olympic vs standard plates, plus a guide to the most effective dumbbell exercises.

The Foundation: Why Your Plate Choice Dictates Your Gym Layout
Building a comprehensive home gym in 2026 requires more than just buying equipment; it demands a strategic approach to spatial planning and infrastructure. The most critical fork in the road for any home gym owner is choosing between Olympic and standard weight plate types. This decision doesn't just affect the barbells you buy—it dictates the footprint of your plate storage, the type of power rack you install, and how you integrate secondary free weights into your layout.
While barbell training builds absolute strength, a complete free-weight zone must also accommodate unilateral and isolation work. Once your heavy infrastructure is bolted down, you must seamlessly integrate dumbbells. In this complete setup and installation walkthrough, we will cover the physical installation of your plate storage systems and then transition into the most effective dumbbell exercises to maximize your newly built training space.
⚠️ Critical Installation Warning: Never attempt to mix 1-inch standard plates on a 2-inch Olympic bar sleeve without a specialized machined adapter. Furthermore, standard cast-iron plates often feature inconsistent center holes that can scratch and ruin the zinc or cerakote finish on premium Olympic bars.Step-by-Step Setup Walkthrough: Olympic vs. Standard Infrastructure
Before unboxing your equipment, you must understand the physical dimensions and structural limitations of the two primary plate standards. According to specifications outlined by USA Weightlifting, Olympic plates feature a standardized 50.8mm (2-inch) center hole, whereas standard plates utilize a 25.4mm (1-inch) hole.
| Feature | Standard Plates (1-Inch) | Olympic Plates (2-Inch) |
|---|---|---|
| Center Hole Diameter | 1 inch (25.4mm) | 2 inches (50.8mm) |
| 45lb Plate Diameter | Varies (Often 14-15 inches) | 17.7 inches (450mm) |
| Barbell Yield Point | ~200-250 lbs (Bending risk) | 700-1,500+ lbs |
| Avg. Cost Per Pound (2026) | $1.00 - $1.50 / lb | $1.80 - $3.50 / lb |
| Storage Peg Size | 1-inch solid steel | 2-inch solid steel or banding |
Step 1: Flooring and Rack Placement
Your setup begins from the ground up. If you are utilizing Olympic plates—specifically rubber bumper plates for deadlifts or cleans—you must install 3/4-inch thick vulcanized rubber mats. Standard plates, which are typically lifted on a bench or in a rack, can suffice with 1/2-inch interlocking foam or rubber tiles. When positioning your power rack or squat stand, ensure you leave a minimum of 36 inches of clearance on all sides for loading plates and performing emergency bail-outs.
Step 2: Installing Plate Storage (Trees vs. Wall Mounts)
Proper plate storage is a safety imperative. A fully loaded A-frame plate tree can weigh over 500 pounds.
- Olympic Plate Trees: Position these in the corner of your rack footprint. Always load the heaviest plates (45s and 25s) on the bottom pegs to lower the center of gravity and prevent tipping. If your tree features a wall-mount bracket, secure it using 3/8-inch x 3-inch lag screws driven directly into wall studs.
- Standard Plate Storage: Because 1-inch plates are lighter and often feature cement-filled vinyl casings that are 20% thicker than cast iron, standard trees require deeper, longer pegs. Ensure your tree's base footprint is at least 24x24 inches to counterbalance the wider load distribution.
Step 3: Integrating the Dumbbell Zone
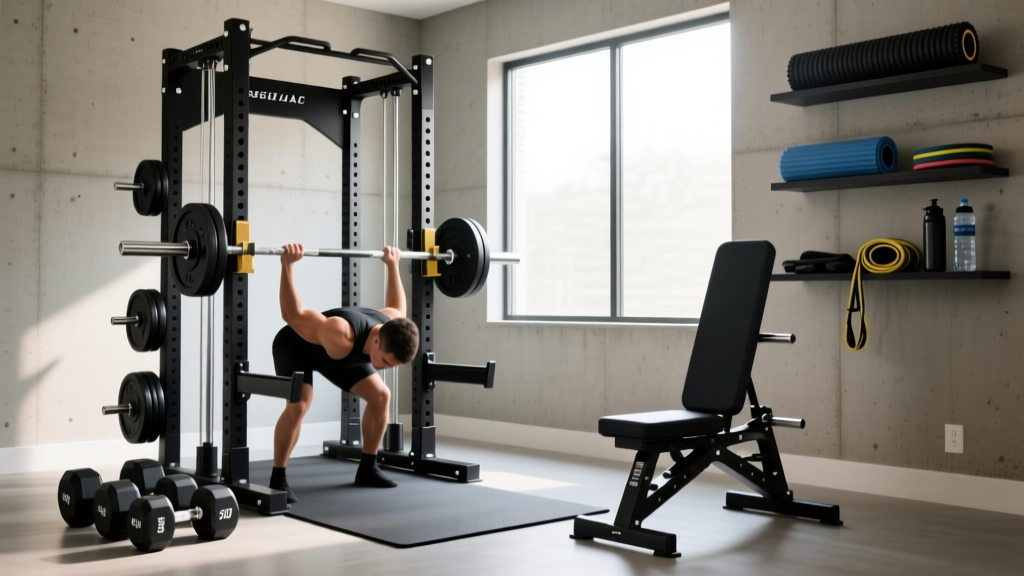
A common mistake in home gym layouts is treating dumbbells as an afterthought. To create an efficient flow, place a 3-tier dumbbell rack exactly 4 feet away from your plate tree. This specific distance allows you to transition from heavy barbell squats to dumbbell accessory work without crossing paths with loaded barbell sleeves or tripping over plate tree bases.
Bridging the Gap: Why Dumbbells Are Non-Negotiable
While Olympic plates and barbells are unmatched for central nervous system overload and absolute strength, they lock your body into a fixed, bilateral path. The National Strength and Conditioning Association (NSCA) frequently highlights the necessity of unilateral training to correct muscular imbalances, improve joint stabilization, and increase the range of motion. This is where your dumbbell zone becomes the most utilized square footage in your gym.
The Most Effective Dumbbell Exercises to Break In Your New Setup
Now that your flooring is laid, your plate trees are bolted, and your dumbbell rack is positioned, it is time to test the space. Below are the most effective dumbbell exercises to perform in your newly configured free-weight zone, complete with setup cues specific to your home gym environment.
1. The Dumbbell Romanian Deadlift (RDL)
The Setup: Stand on your 3/4-inch rubber mats, holding heavy dumbbells at your sides. Position yourself facing your power rack so you can use the uprights as a visual cue for your hip hinge.
Execution: Push your hips back until the dumbbells pass your knees, maintaining a neutral spine. The dumbbell RDL allows for a deeper stretch in the hamstrings compared to a barbell, as the weights are not blocked by your shins.
Pro-Tip: Use lifting straps if your grip fails before your posterior chain. Store the straps on the peg of your plate tree for easy access.
2. Incline Dumbbell Press
The Setup: Adjust your adjustable bench to a 30-degree or 45-degree incline. Position the bench inside your power rack or directly in front of your dumbbell rack to minimize the distance you have to carry heavy dumbbells before lifting them.
Execution: According to the American Council on Exercise (ACE), the incline dumbbell press recruits the clavicular head of the pectoralis major more effectively than a flat bench, while the independent dumbbells force each side of the chest to work symmetrically.
Safety Note: Always kick the dumbbells up from your thighs. Never attempt to curl heavy weights into position, which risks a bicep tear.
3. Single-Arm Dumbbell Row
The Setup: Utilize your flat bench and the J-cups of your power rack. Place one knee and one hand on the bench, keeping your torso parallel to the floor.
Execution: Pull the dumbbell toward your hip pocket, not your armpit. This movement builds the latissimus dorsi and rhomboids, crucial for stabilizing the scapula during heavy barbell bench pressing.
Space Management: Perform this exercise perpendicular to your plate tree to ensure the dumbbell's path of motion isn't obstructed by protruding plate pegs.
4. Dumbbell Goblet Squat
The Setup: Hold a single heavy dumbbell vertically against your chest, cupping the top head with both hands. Stand in the center of your open floor space, away from the rack.
Execution: Descend deeply, using your elbows to push your knees outward at the bottom of the movement. The goblet squat acts as a perfect mobility drill and core stabilizer, bridging the gap between bodyweight squats and heavy Olympic barbell back squats.
Final Inspection Checklist
Before starting your first official workout in 2026, run through this final installation checklist:
- [ ] Hardware Check: Verify all bolts on your plate tree and squat rack are tightened with a socket wrench.
- [ ] Clearance Test: Lie flat on your bench and extend your arms fully with dumbbells to ensure you won't strike the rack uprights or plate tree pegs.
- [ ] Collar Inventory: Ensure you have at least two pairs of Olympic spring collars and two pairs of standard spin-lock collars stored on the accessory pegs.
More gear to consider
All reviews
Best Loadable Dumbbells for the Dumbbell Shoulder Fly (2026)

2026 Kettlebell Market: Cast Iron vs Competition & Skull Crusher Data
Power Rack vs Squat Stand: Bent Over Dumbbell Rear Delt Row Setup

Home Gym Setup Walkthrough: Integrating a 45 lb Dumbbell Pair

Buying vs Driven: Why Equipment Weight Isn’t Just About the Scale
