
Olympic vs Standard Plates Setup & Dumbbell Single-Arm Row Guide
Master your home gym setup with our Olympic vs standard plates installation guide, featuring clearance tests for the dumbbell single-arm row.

The Foundation: 1-Inch Standard vs 2-Inch Olympic Plates
Building a resilient home gym in 2026 requires making a definitive choice on your iron ecosystem: the 1-inch standard plate or the 2-inch Olympic plate. While beginners often gravitate toward standard cast-iron sets due to their lower upfront cost and availability at big-box retailers, serious lifters quickly encounter the mechanical limitations of standard equipment. According to industry pricing trends, standard plates average $1.20 to $1.50 per pound, whereas high-quality Olympic cast iron or urethane plates range from $2.20 to $3.50 per pound. However, the true cost difference extends far beyond the price tag—it fundamentally dictates your equipment's load capacity, barbell whip, and, crucially, the ergonomics of your accessory movements.
This complete setup and installation walkthrough will guide you through preparing your space, assembling your storage and rack infrastructure, and validating your equipment choices. We will culminate this installation process with a highly specific functional test: using the dumbbell single-arm row to measure range-of-motion (ROM) clearance and validate your loadable dumbbell configuration.
Phase 1: Site Preparation and Flooring Installation
Before unboxing your weight plate tree or power rack, you must establish a protective foundation. Dropping 45-pound cast iron plates on bare concrete or standard subflooring will cause catastrophic structural damage over time.
- Material Selection: Opt for 3/4-inch thick vulcanized rubber horse stall mats (typically 4x6 feet). In 2026, these cost approximately $55 to $75 per mat from agricultural suppliers, offering superior shock absorption compared to cheap interlocking foam tiles.
- Layout Strategy: Lay down a minimum of three mats to create a 12x6 foot platform. Stagger the seams like brickwork and use heavy-duty double-sided carpet tape to prevent the mats from separating when you drag a loaded barbell.
- Clearance Zones: Measure exactly 48 inches of lateral clearance on both sides of your planned rack location. This ensures you have adequate space to load and unload Olympic plates without striking adjacent walls or equipment.
Phase 2: Rack Assembly and Plate Tree Anchoring
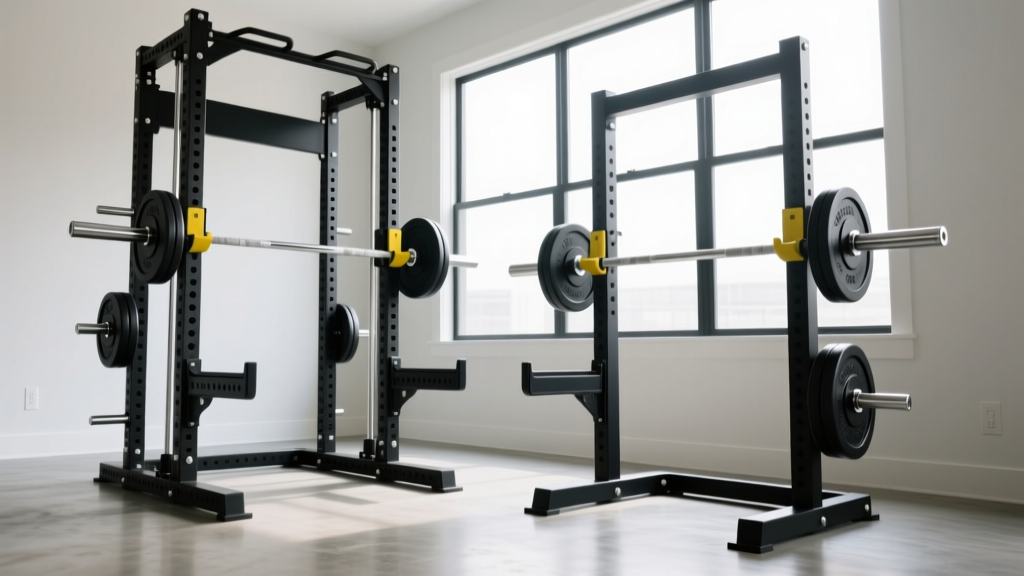
Whether you are running a full power rack or a freestanding squat stand paired with a vertical plate tree, proper assembly is critical for safety. Olympic plate trees, in particular, bear immense concentrated loads that can tip if not balanced correctly.
- Sort the Hardware: Lay out all 3/8-inch and 1/2-inch Grade 5 steel bolts. Do not fully tighten any bolts during the initial framing phase; leave them at 70% torque to allow the steel uprights to square up.
- Square the Frame: Use a carpenter's square and measure the diagonal distance between opposite corners of the rack base. Adjust the frame until the diagonal measurements are identical, ensuring a perfectly square footprint.
- Torque Specifications: Using a calibrated torque wrench, tighten all structural bolts to the manufacturer's specifications (usually between 60 and 80 ft-lbs for commercial-grade racks).
- Tree Loading Protocol: Always load your heaviest plates (45lb/20kg) on the lowest pegs of your plate tree. This lowers the center of gravity. A standard vertical tree holding 800 lbs of Olympic iron can easily tip forward if top-heavy during a plate removal sequence.
Phase 3: Loadable Dumbbells and the Ergonomic Divide
The choice between Olympic and standard plates profoundly impacts your dumbbell training, especially if you utilize loadable dumbbell handles to save space. Standard loadable handles (like the CAP Barbell 14-inch models) accept 1-inch plates, while Olympic handles (such as the Rogue Loadable Dumbbell Handle, retailing around $195) feature 50mm sleeves with rotating bushings.
While Olympic handles offer superior wrist comfort due to the spinning sleeves, the physical diameter of the plates required to load them creates a hidden biomechanical problem. This is where we introduce our functional installation test.
The Functional Test: Dumbbell Single-Arm Row Clearance
The dumbbell single-arm row is a staple unilateral back exercise that requires a flat bench, a neutral spine, and a full range of motion to properly stretch the latissimus dorsi at the bottom of the movement. According to the American Council on Exercise (ACE), achieving full muscular stretch at the bottom of the row is critical for hypertrophy and shoulder health.
Here is where your plate selection dictates your setup's viability:
- The Standard Advantage: A standard 10-pound cast iron plate has a diameter of roughly 5.5 inches. When loaded onto a standard handle, the distance from the handle's center to the floor is minimal. If your flat bench is 17 inches high, you can achieve a full, deep stretch during the dumbbell single-arm row without the plates scraping the rubber matting.
- The Olympic Disadvantage: Olympic plates are scaled to maintain a 450mm (17.7-inch) diameter for the 45lb/20kg plates, but smaller fractional plates are still disproportionately wide. An Olympic 10-pound plate often measures 9 inches in diameter. When executing the dumbbell single-arm row, the bulky Olympic plate will strike the floor before your lat reaches full extension, artificially truncating your ROM and altering the movement's biomechanics.
"When setting up a home gym with loadable dumbbells, always perform a floor-clearance test with your smallest working weight. If your Olympic 10lb plates clip the floor during a dumbbell single-arm row, you must either invest in expensive, low-profile urethane Olympic fractional plates or switch to fixed hex dumbbells for unilateral rowing variations."
Specification and Ergonomics Matrix
Use the following comparison matrix to finalize your purchasing decisions based on your specific spatial and ergonomic requirements.
| Feature | Standard (1-Inch) | Olympic (2-Inch) |
|---|---|---|
| Center Hole Diameter | 1 inch (25.4mm) | 2 inches (50.4mm) |
| Average Cost Per Pound | $1.20 - $1.50 | $2.20 - $3.50 |
| Max Barbell Capacity | ~300 lbs (Bending risk) | 1,000+ lbs (Yield strength) |
| 10lb Plate Diameter | ~5.5 inches | ~9.0 inches |
| Dumbbell Row Clearance | Excellent (Full ROM) | Poor (Truncates ROM) |
| Sleeve Rotation | Fixed / Solid | Bushing / Bearing |
Phase 4: Collars, Locking Mechanisms, and Safety
The final step in your setup walkthrough is securing the plates. Never rely on the lip of a loadable dumbbell handle to keep plates in place during dynamic movements.
- For Standard Bars: Use heavy-duty chrome spring collars. While they can be difficult to pry off with sweaty hands, they provide sufficient inward pressure for standard cast iron plates, which typically have a flat mating surface.
- For Olympic Bars and Dumbbells: Invest in lock-jaw collars (such as the OSO Pro or Rogue HG 2.0). These utilize a cam-lever action that generates hundreds of pounds of inward clamping force, completely eliminating plate rattle and lateral shift during exercises like the dumbbell single-arm row or walking lunges.
Long-Term Maintenance and Rust Prevention
Cast iron plates, whether standard or Olympic, are highly susceptible to oxidation, especially in humid garages or basement gyms. Once your installation is complete, establish a bi-annual maintenance protocol. Wipe down all bare cast iron plates with a microfiber cloth lightly dampened with 3-in-One oil or a specialized rust-inhibiting barbell oil. Avoid WD-40, as it is a solvent that strips away existing protective layers and leaves a residue that transfers to your hands and knurling.
By carefully selecting your plate ecosystem, properly anchoring your storage, and validating your clearances with functional tests like the dumbbell single-arm row, you ensure your home gym is not only safe and organized but biomechanically optimized for years of progressive overload.
More gear to consider
All reviews
Rubber Hex vs Urethane Care for Chest and Tricep Dumbbell Exercises

Cast Iron vs Competition KB Care: 30 Min Glute Workout with Dumbbells
Power Rack vs Squat Stand: Setup for Single Dumbbell Deadlifts

Barbell Collar Types & Setup for a Dumbbell Lateral Raise Drop Set

Olympic vs Standard Plates: Sizing for Alternate Dumbbell Curls
