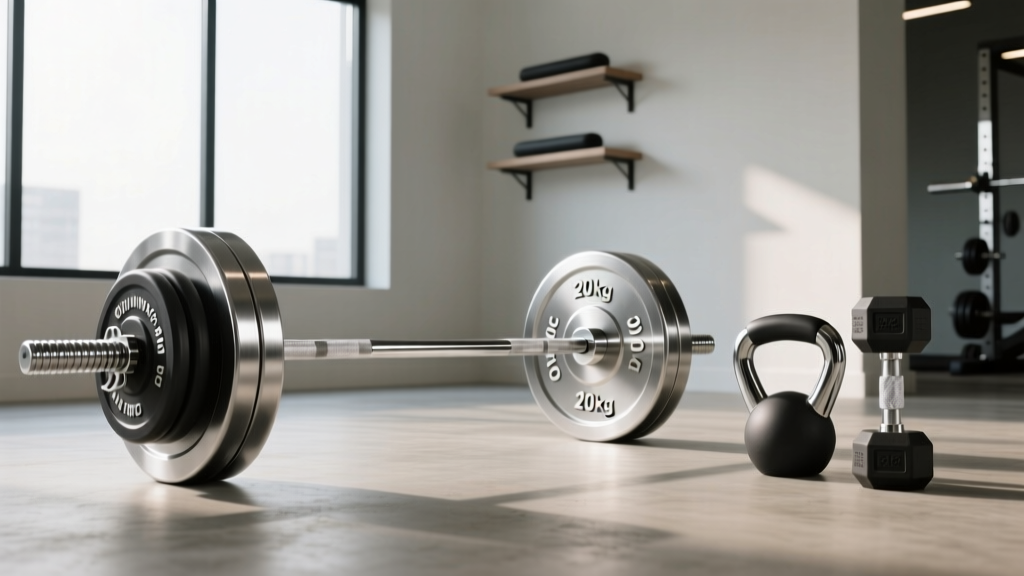
Olympic Barbell Setup: Weight, Knurling & Standing Dumbbell March
Master your home gym installation with our 2026 walkthrough on Olympic barbell weight tolerances, knurling profiles, and spatial setup for accessory lifts.

Phase 1: Spatial Planning and Rack Installation
Building a functional free-weight zone in 2026 requires more than just bolting a power rack to a plywood floor. A proper installation walkthrough begins with spatial mapping. The standard footprint for a competition-style power rack is 48 inches by 48 inches, but your operational clearance must extend significantly beyond the uprights.
When planning your floor layout, you must allocate a dedicated 'accessory lane' adjacent to the rack. This 6-by-4-foot footprint is critical for unilateral movements and functional core work. For example, when you step out of the rack to perform a standing dumbbell march, you need unobstructed forward clearance to maintain hip stabilization and spinal alignment without risking a collision with your dumbbell rack or plate storage.
Installation Warning: Floor Load Limits
Before installing your rack and dropping a 300lb barbell setup, verify your floor joists. A standard residential garage slab can handle 3,000+ PSI, but second-story home gyms require structural reinforcement. Always use 3/4-inch horse stall mats over plywood to disperse kinetic impact.
Phase 2: Selecting the Olympic Barbell (Weight & Tolerances)
The centerpiece of your installation is the Olympic barbell. In the current market, understanding weight tolerances and tensile strength is what separates a lifetime investment from a bent piece of steel. According to the International Weightlifting Federation, a standard men's Olympic bar must weigh exactly 20kg (44.09 lbs) and measure 2200mm in total length.
Weight Calibration and Tensile Strength
Cheap import bars often weigh 42 or 43 lbs, throwing off your progressive overload tracking. When buying in 2026, demand the following specifications:
- IPF/IWF Calibration: Look for a +/- 1% weight tolerance (standard for multi-purpose bars) or +/- 10 grams (competition grade).
- Tensile Strength: Measured in PSI, this dictates the bar's yield point. A minimum of 190,000 PSI is required to prevent permanent deformation during heavy squats. Premium bars like the Rogue 29mm Ohio Bar sit at 190k PSI, while elite weightlifting bars push 215k PSI.
- Shaft Diameter: 28mm for women's Olympic lifting, 28.5mm for men's weightlifting, and 29mm for powerlifting and general strength.
Phase 3: The Knurling Matrix and Finish Selection
Knurling is the diamond-patterned machining on the barbell shaft. It is the single most important tactile factor in your setup. The depth and geometry of the knurl dictate grip security during heavy pulls and skin preservation during high-volume accessory work.
| Knurl Profile | Geometry & Feel | Best Application | Example Model |
|---|---|---|---|
| Volcano | Sharp peaks with a small crater in the center. Grippy but not skin-tearing. | Powerlifting, Hypertrophy, Multi-purpose | Rogue Ohio Bar |
| Mountain | Flat-topped peaks. Moderate grip, highly forgiving on the hands. | High-volume Olympic lifting, CrossFit | American Barbell SS |
| Hill | Rounded, shallow peaks. Feels almost smooth when chalked. | Budget bars, Technique practice | Generic Import Bars |
Expert Setup Tip: If your programming includes heavy front squats, ensure your barbell features a center knurl. This small textured strip prevents the bar from sliding down your sternum during the catch phase of a clean or the bottom of a front squat.
Finish and Corrosion Resistance
The environment of your gym dictates the barbell finish. Bare steel oxidizes rapidly in humid garages. Zinc offers baseline protection but wears off over time. In 2026, Cerakote (a ceramic-polymer coating) is the industry standard for corrosion resistance, offering over 100 color options and near-total immunity to rust. For purists, Stainless Steel shafts provide the ultimate bare-steel feel with zero oxidation risk, though they command a premium price tag upwards of $900.
Phase 4: Hardware Assembly and J-Cup Alignment
Once your barbell is selected, the physical installation of the rack hardware must be calibrated to the bar's sleeve length and knurl marks.
- Mount the J-Cups: Install your UHMW-lined J-cups at the lowest setting to ensure you can safely unrack the barbell during bench presses without excessive shoulder extension.
- Align Safety Straps: Set your spotter arms one inch below the bottom of your squat depth. This allows the bar to rest safely if you fail a rep, without the plates crashing onto the safety pins from a height.
- Sleeve Clearance Check: Load a 45lb bumper plate and a collar on each side. Ensure you have at least 2 inches of sleeve space remaining to prevent the collars from slipping off during lateral bar whip.
Phase 5: Integrating the Accessory Lane
Your barbell setup handles the heavy bilateral loads, but a complete installation requires a seamless transition to unilateral dumbbell work. This is where the spatial planning from Phase 1 pays off.
Setting Up for the Standing Dumbbell March
The standing dumbbell march is a premier anti-extension and hip-stabilizer exercise. To execute it safely in your home gym, your setup must accommodate the following:
- Dumbbell Rack Placement: Position a tiered dumbbell rack exactly two steps away from your walking lane. You should not have to navigate around plate trees to pick up your weights.
- Clearance Metrics: The march requires a 10-foot forward walking path. If your garage bay limits this, program the march as a 'march in place' variation, focusing on a 3-second isometric hold at the top of the knee drive.
- Weight Selection: For core stabilization, utilize urethane-coated hex dumbbells in the 25lb to 50lb range. The hex shape prevents rolling if you need to drop them quickly at the end of a fatiguing set.
Maintenance Protocol
To preserve your barbell's knurling and prevent chalk buildup, brush the shaft with a nylon-bristle brush and apply 3-in-1 oil to the sleeve bushings once a month. Never use a wire brush on a Cerakote or Zinc finish, as it will strip the protective layer and expose the underlying steel to moisture.
Final Walkthrough Checklist
Before loading your first working set, run through this final installation checklist:
- [ ] Power rack is lag-bolted to the floor or heavily sandbagged.
- [ ] Barbell weight tolerance verified (weighed on a digital scale if necessary).
- [ ] J-cups and safety straps adjusted to user's specific anthropometrics.
- [ ] Accessory lane cleared of trip hazards for movements like the standing dumbbell march.
- [ ] Collars, chalk, and nylon brush stored within arm's reach of the platform.
By meticulously planning your spatial layout, understanding the metallurgical realities of Olympic barbells, and dedicating specific zones for functional accessories, your 2026 free-weight installation will support elite performance and withstand decades of heavy use.
More gear to consider
All reviews
Bumper vs Iron Plates: What Dumbbell Exercise Is Good for Chest?

Cast Iron vs Competition Kettlebells: Sumo Squat with Dumbbells 2026
Neoprene Dumbbell Workouts for Weight Loss: A Beginner's Home Guide

Power Rack vs Squat Rack vs Stand: Guide & Dumbbells for Chest Muscles

Rubber Hex vs Urethane: Care Tips for Heavy 1 Arm Dumbbell Rows
