Olympic Barbell Weight & Knurling Guide + Dumbbell Blocks Setup
Master your 2026 free weights zone with our Olympic barbell weight and knurling guide, plus a complete setup walkthrough for tiered dumbbell blocks.

The Core of Your Free Weights Zone: Barbell and Block Integration
Building a premium free weights zone in 2026 requires more than just dropping iron onto the floor. It demands a calculated approach to biomechanics, equipment longevity, and spatial ergonomics. Whether you are outfitting a high-end garage gym or a commercial strength facility, the foundation of your lifting area relies on two critical components: the Olympic barbell you grip and the storage infrastructure you lift from. This comprehensive guide bridges the gap between selecting the perfect Olympic barbell—focusing heavily on weight tolerances, tensile strength, and knurling profiles—and executing a complete, step-by-step installation walkthrough for heavy-duty dumbbell blocks to finalize your lifting ecosystem.
Olympic Barbell Buying Guide: Decoding Weight and Tensile Strength
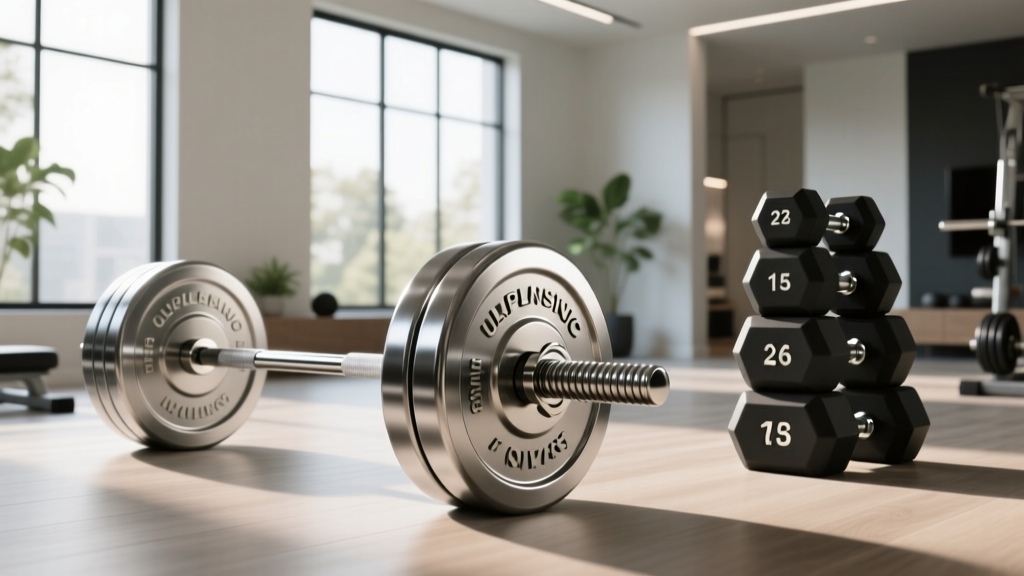
When shopping for an Olympic barbell, the standard 20kg (44lb) weight is merely the starting point. The true differentiator in barbell quality lies in the steel's tensile strength (measured in PSI) and the shaft diameter. Tensile strength dictates how much force the bar can endure before permanently bending or snapping. For a serious lifter in 2026, accepting anything below 165,000 PSI is a disservice to your training.
- 165,000 - 180,000 PSI: Entry-level. Prone to permanent deformation (whip fatigue) under heavy squats or deadlifts exceeding 315 lbs.
- 190,000 PSI: The gold standard for multi-purpose and Olympic weightlifting bars. Offers the perfect balance of 'whip' (elastic deformation) and rigidity.
- 210,000 - 215,000+ PSI: Elite powerlifting territory. Extremely rigid, designed to minimize whip during heavy bench presses and squats.
| Barbell Model (2026 Lineup) | Tensile Strength | Shaft Diameter | Knurl Profile | Estimated Price |
|---|---|---|---|---|
| Rogue Ohio Bar (Stainless) | 190,000 PSI | 28.5mm | Volcano | $345 - $395 |
| Eleiko IPF Powerlifting Bar | 215,000 PSI | 29.0mm | Aggressive Mountain | $950 - $1,100 |
| Rep Fitness Excalibur II | 190,000 PSI | 28.5mm | Mild Volcano | $279 - $329 |
According to Rogue Fitness barbell engineering specs, the transition from 190k to 215k PSI steel drastically alters the bar's yield strength, meaning powerlifters will feel a much stiffer, more predictable transfer of force from the floor to lockout. Conversely, Olympic weightlifters rely on the 190k PSI whip to aid in the 'turnover' phase of the clean and jerk.
The Science of Knurling: Matching the Grip to the Lift
Knurling is the cross-hatched pattern machined into the steel shaft. It is arguably the most subjective yet vital element of barbell selection. In 2026, manufacturers have refined their CNC machining to offer three distinct knurl profiles, each with specific depth measurements ranging from 0.012 to 0.018 inches.
1. The Volcano Profile
Pioneered and popularized by American manufacturers, the volcano knurl features a sharp peak that is machined flat at the very top. This creates a 'rim' that bites into the skin without tearing it. It is the ultimate multi-purpose knurl, providing aggressive grip for heavy deadlifts while remaining comfortable enough for high-rep front squats.
2. The Mountain Profile
Commonly found on elite European powerlifting bars, such as those detailed in Eleiko's IPF-certified powerlifting lineup, the mountain profile features sharp, pointed peaks with no flattened top. It is notoriously aggressive, designed to tear through calluses and lock the bar into the lifter's back and hands during maximal attempts. It is not recommended for high-rep conditioning.
3. The Hill Profile
Hill knurling features rounded, smooth peaks. It feels almost passive in the hands and is typically reserved for beginner bars, women's Olympic bars (where grip fatigue during the snatch is a factor), or dedicated high-rep CrossFit bars where hand tearing must be avoided at all costs.
💡 Center Knurling Protocol: If you are competing in the IPF (International Powerlifting Federation), a center knurl is mandatory to grip the back of your shirt during squats. If you are an Olympic weightlifter or general fitness enthusiast, opt for a bar without a center knurl to prevent neck abrasion during cleans.Complete Setup Walkthrough: Installing Tiered Dumbbell Blocks
Once your barbell is selected, you must address the dumbbell zone. Lifting 100lb+ dumbbells off the floor destroys the lumbar spine and damages flooring. Tiered dumbbell blocks (such as the Rogue 3-Tier Urethane Dumbbell Blocks) elevate the weights to an ergonomic height, creating a safe, organized lifting station. Here is the complete installation and setup walkthrough for integrating heavy-duty dumbbell blocks into your free weights zone.
Step 1: Subfloor Preparation and Load Distribution
A fully loaded 3-tier dumbbell block system can easily exceed 1,500 lbs. Point-loading this weight onto bare concrete or standard laminate will cause catastrophic structural failure.
- Lay the Base: Install 3/4-inch thick vulcanized rubber horse stall mats over your lifting area. Ensure the seams are tightly butted and sealed with heavy-duty flooring tape to prevent shifting.
- Positioning: Place the base tier of the dumbbell blocks at least 36 inches away from your squat rack or power cage to allow for safe lateral movement when carrying heavy dumbbells.
Step 2: Assembling and Securing the Tiers
Most premium dumbbell blocks feature interlocking peg systems or heavy-duty M10 hex bolt configurations to prevent tier shifting during weight retrieval.
- Align the Tiers: Stack the second and third tiers, ensuring the steel or reinforced urethane alignment pins drop perfectly into the base receivers.
- Torque the Hardware: If your block system requires bolting, use a calibrated torque wrench to tighten the M10 bolts to 35-40 ft-lbs. Over-torquing can crack the urethane housing or strip the threads in the steel inserts.
- Leveling Check: Place a 24-inch carpenter's level across the top tier. If your floor has a slight slope (common in garages), insert high-density rubber shims under the lower side of the base block until perfectly level. An unlevel block will cause round urethane dumbbells to roll off the top tier.
Step 3: The Loading Sequence Protocol
To maintain a low center of gravity and prevent tip-overs, always load your dumbbell blocks using the bottom-up protocol:
- Bottom Tier: Heaviest pairs (e.g., 80 lbs - 120 lbs).
- Middle Tier: Mid-range pairs (e.g., 45 lbs - 75 lbs).
- Top Tier: Lightest pairs (e.g., 10 lbs - 40 lbs).
Spatial Integration: Clearances and Ergonomics
Integrating your Olympic barbell station with your newly installed dumbbell blocks requires strict spatial planning. The 'triangle of movement' dictates that the distance between the barbell platform, the dumbbell blocks, and the pull-up/rack station should form an equilateral triangle with sides measuring no less than 4 feet. This ensures that when a lifter is carrying a pair of 100lb dumbbells to a flat bench, they have a minimum 24-inch clearance on either side of their elbows, preventing collisions with the barbell sleeves or the uprights of the squat rack.
Long-Term Maintenance for Iron and Urethane
To protect your 2026 equipment investment, implement a strict monthly maintenance schedule:
Barbell Care: Use a stiff nylon brush to remove chalk from the knurling weekly. Once a month, apply two drops of 3-in-One synthetic oil to the sleeve bushings or needle bearings to maintain smooth rotation. Never use WD-40, as it attracts dust and degrades the internal grease.
Dumbbell Block Care: Urethane is highly resistant to sweat and oils, but harsh chemical cleaners (like bleach or ammonia) will cause the material to dry out and micro-crack over time. Wipe down the block tiers with a damp microfiber cloth and a pH-neutral soap solution.
Final Thoughts on Your Free Weights Zone
Designing a complete free weights zone is an exercise in precision. By understanding the nuanced differences in barbell tensile strength and knurling profiles, you ensure that every rep with the Olympic bar is safe, comfortable, and mechanically sound. Pairing that barbell with a properly installed, ergonomically tiered dumbbell block system transforms a chaotic room full of iron into a professional-grade strength facility built for decades of heavy lifting.
More gear to consider
All reviews
Loadable Dumbbell Care: Exercise for Flabby Arms with Dumbbells

Pectoral Dumbbell Workouts & Kettlebell ROI: Cast Iron vs. Competition

Power Rack vs Squat Rack vs Stand & Back Workout With One Dumbbell
Power Rack vs Squat Rack vs Squat Stand: Bowflex 1090 Dumbbell Setup
2026 Trends: Bumper vs Iron Plates and the Kickback Dumbbell Market