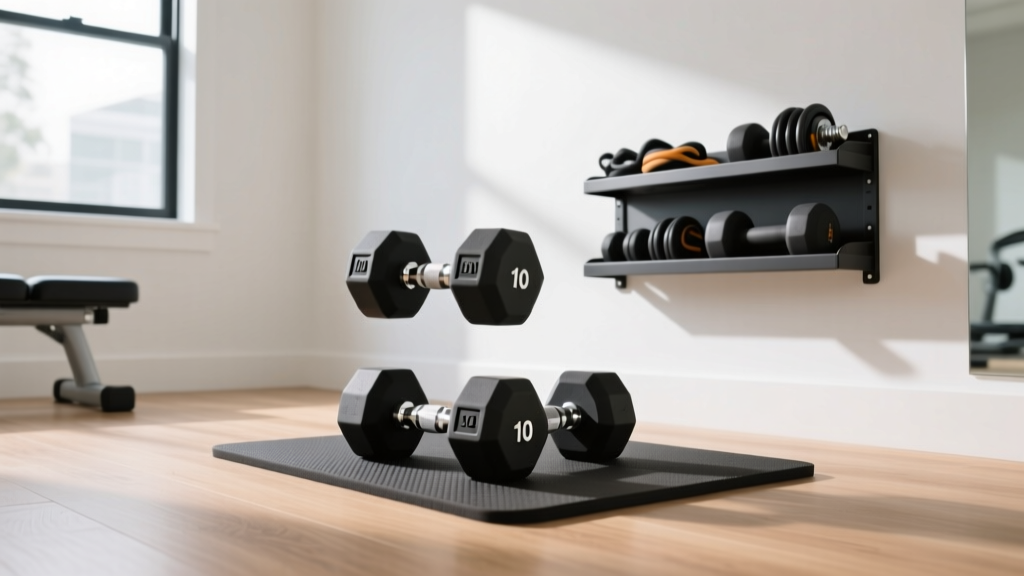
Setup Guide: How to Exercise With 10 Pound Dumbbells at Home
Learn how to set up your home gym space and safely exercise with 10 pound dumbbells. Includes neoprene storage, flooring, and routine walkthroughs.

The Complete Home Gym Setup for Neoprene Dumbbells
When transitioning to a home fitness environment, the physical 'installation' of your workout space is just as critical as the workout itself. While heavy power racks require bolting to floor joists, setting up a dedicated zone to exercise with 10 pound dumbbells requires a nuanced approach to spatial planning, material care, and biomechanical programming. Neoprene-coated dumbbells are the undisputed kings of the home gym due to their quiet impact, grip-friendly texture, and floor-safe design. However, as of 2026, the market is flooded with varying grades of chloroprene rubber, making proper equipment selection and environmental setup essential for longevity and safety.
This comprehensive walkthrough will guide you through the physical installation of your home gym footprint, the assembly of neoprene-safe storage, and the precise programming setup required to maximize hypertrophy and endurance using light-weight implements.
Phase 1: Spatial 'Installation' and Flooring Requirements
Before you unbox your weights, you must 'install' the physical footprint of your workout zone. A 10-pound dumbbell is relatively light, but repetitive dropping and lateral movements require specific spatial clearances and flooring tolerances.
Calculating Your Footprint
To safely exercise with 10 pound dumbbells, particularly during dynamic movements like dumbbell snatches or walking lunges, you need a minimum clear space of 6 feet by 6 feet. This 36-square-foot zone prevents you from striking walls or furniture during the eccentric and concentric phases of your lifts.
Flooring Selection Matrix
Neoprene is softer than cast iron, but it still transfers kinetic energy upon impact. Here is how to choose the right subfloor for your setup:
- 3/8-Inch (8mm) EVA Foam Interlocking Tiles: The most cost-effective solution for strictly light-weight neoprene setups. Priced at roughly $1.20 to $1.80 per square foot in 2026, EVA foam absorbs the acoustic shock of 10 lb drops. Warning: EVA foam compresses under heavy static loads, making it unsuitable if you plan to add a heavy squat rack later.
- 1/2-Inch (12mm) Vulcanized Rubber Mats: The premium choice. While overkill for just 10 lb weights, rubber provides superior traction for your shoes during unilateral movements like Bulgarian split squats, preventing the slipping that often occurs on slick EVA foam.
Phase 2: Neoprene Storage Rack Assembly and Material Care
Neoprene (polychloroprene) is highly durable, but it has specific environmental vulnerabilities. Improper storage installation will lead to coating delamination and structural degradation.
⚠️ CRITICAL MATERIAL WARNING: UV and Wire DegradationNeoprene breaks down when exposed to prolonged ultraviolet (UV) light and extreme temperature fluctuations. Never install your dumbbell storage rack directly in front of a sun-facing window. Furthermore, avoid wire-grid storage racks. The thin metal wires slice into the neoprene coating over time, causing it to peel. Always install flat-shelf or cradle-style racks.
Recommended Storage Configurations
For a standard home set ranging from 5 lbs to 25 lbs, a 3-Tier A-Frame Dumbbell Rack is the optimal spatial solution. Models like the CAP Barbell 3-Tier A-Frame Rack (typically retailing around $65-$85) feature a 22-inch footprint width, making them ideal for tight apartment corners. Ensure the rack is assembled on a level surface; an uneven floor will cause the A-frame to torque, eventually snapping the welds under the asymmetrical load distribution.
Phase 3: Equipment Comparison for Home Use
Why choose neoprene over other coatings for your 10-pound setup? The table below breaks down the material science and practical application of the three most common home dumbbell coatings available on the market today.
| Coating Type | Cost per lb (2026) | Durability & Edge Cases | Best Home Use Case |
|---|---|---|---|
| Neoprene | $1.40 - $2.10 | Excellent grip, quiet. Degrades in direct UV/sunlight. | Indoor living rooms, high-rep endurance work. |
| Urethane | $2.50 - $4.00 | Near-indestructible, UV resistant. Higher initial cost. | Garage gyms, commercial-grade home setups. |
| Vinyl (PVC) | $0.90 - $1.30 | Prone to cracking in cold temperatures. Slippery when sweaty. | Budget temporary setups, light aerobics. |
Phase 4: Programming Setup to Exercise With 10 Pound Dumbbells
The most common failure mode when users attempt to exercise with 10 pound dumbbells is applying a heavy-weight, low-rep mindset to a light-weight implement. Ten pounds is generally insufficient to trigger mechanical tension-based hypertrophy in large muscle groups (like the chest or back) for intermediate lifters. Therefore, your routine setup must pivot toward metabolic stress and unilateral instability.
According to research highlighted by the Harvard Health Publishing division, lifting lighter weights to the point of muscle fatigue can be just as effective for building muscle endurance and tone as lifting heavier weights, provided the time-under-tension is manipulated correctly. Furthermore, the Mayo Clinic emphasizes that proper form and controlled tempo are vastly superior to sheer load when protecting joint integrity during home workouts.
The 'Setup' Protocol: Tempo and Proximity to Failure
To make a 10 lb neoprene dumbbell feel like 25 lbs, you must install a strict tempo protocol into your workout tracking app or logbook. Use a 3-1-2-1 Tempo:
- 3 Seconds Eccentric: Lower the weight slowly, focusing on the stretch.
- 1 Second Pause: Eliminate the stretch reflex at the bottom of the movement.
- 2 Seconds Concentric: Lift the weight with controlled force.
- 1 Second Squeeze: Isometric contraction at the peak of the movement.
Phase 5: Step-by-Step Routine Walkthrough
Below is a highly effective, full-body 'installation' routine designed specifically for a 10 lb neoprene dumbbell setup. Perform this circuit 3 times, resting exactly 60 seconds between rounds.
1. Unilateral Lower Body: Bulgarian Split Squats
Setup: Stand two feet in front of a couch or sturdy chair. Hold a 10 lb dumbbell in each hand (goblet or suitcase grip). Place one foot behind you on the elevated surface.
Execution: 12 reps per leg using the 3-1-2-1 tempo. The 10 lb weight in each hand shifts the center of gravity, forcing the stabilizing muscles in the ankle and knee to work overtime.
2. Posterior Chain: Single-Leg Romanian Deadlifts (RDLs)
Setup: Hold both 10 lb dumbbells in front of your thighs. Shift your weight entirely to your left leg, keeping a micro-bend in the knee.
Execution: Hinge at the hips, lowering the dumbbells toward the floor while extending your right leg backward. 10 reps per leg. The light weight allows you to focus purely on the hamstring stretch without overloading the lumbar spine.
3. Upper Body Push: Deficit Push-Ups
Setup: Place your 10 lb neoprene dumbbells hex-side down on the floor, shoulder-width apart. Grip the handles.
Execution: Perform push-ups, lowering your chest past the level of the dumbbell handles to achieve a deeper stretch in the pectorals. 15-20 reps. The neoprene coating ensures the dumbbells won't scratch your hardwood or laminate flooring during this setup.
4. Upper Body Pull: Chest-Supported Dumbbell Rows
Setup: Lie face down on an incline bench (or lean over a sturdy kitchen counter at a 45-degree angle). Let the 10 lb dumbbells hang straight down.
Execution: Row the weights to your hip pockets, squeezing the scapulae together. 20 reps. Because 10 lbs is light for the latissimus dorsi, focus on the 1-second isometric squeeze at the top of every rep to induce metabolic burn.
Troubleshooting Common Home Setup Failures
Even with a perfect physical installation, users encounter specific edge cases when training exclusively with light implements. Here is how to troubleshoot them:
Problem: Grip Fatigue Precedes Muscle FailureDiagnosis: Holding 10 lb dumbbells for high-rep sets (30+ reps) can cause forearm fatigue before the target muscle (like the shoulders during lateral raises) fails.
Solution: Utilize neoprene's high-friction surface. Avoid chalk, which actually degrades the chloroprene rubber and makes it slick. Instead, wipe your hands and the dumbbell handles with a damp microfiber cloth between sets to restore the natural tackiness of the neoprene.
Problem: Neoprene Coating Tearing at the Handle JunctionDiagnosis: This occurs when users repeatedly drop the dumbbells directly onto the handle edge or use them for floor-supported exercises (like renegade rows) on abrasive surfaces like concrete or rough tile.
Solution: Always place the dumbbells down gently on the flat hex-head. If doing floor exercises, ensure your EVA foam or rubber matting is completely free of embedded debris that could act like sandpaper against the rubber coating.
Final Thoughts on Your 10-Pound Setup
Setting up a home gym to effectively exercise with 10 pound dumbbells is an exercise in precision, not brute force. By properly installing your spatial footprint, selecting flat-shelf storage to protect the polychloroprene coating, and programming your routines around metabolic stress and unilateral instability, you can build a highly effective, joint-friendly physique. The 10 lb neoprene dumbbell is not merely a beginner's tool; when manipulated with strict tempo and intelligent exercise selection, it is a masterclass in biomechanical control.
More gear to consider
All reviews
Power Rack vs Squat Rack: How to Build Biceps Without Dumbbells

1-Arm Dumbbell Row Setup: Barbell Collar and Clamp Types Compared

Upgrading From Wood Dumbbells: Olympic Barbell Knurling Mistakes

Best Loadable Dumbbells 2026: Reviews & Dumbbell Exercises PDF

Kettlebell Care & the Dumbbell Pull Exercise: Cast Iron vs Competition
