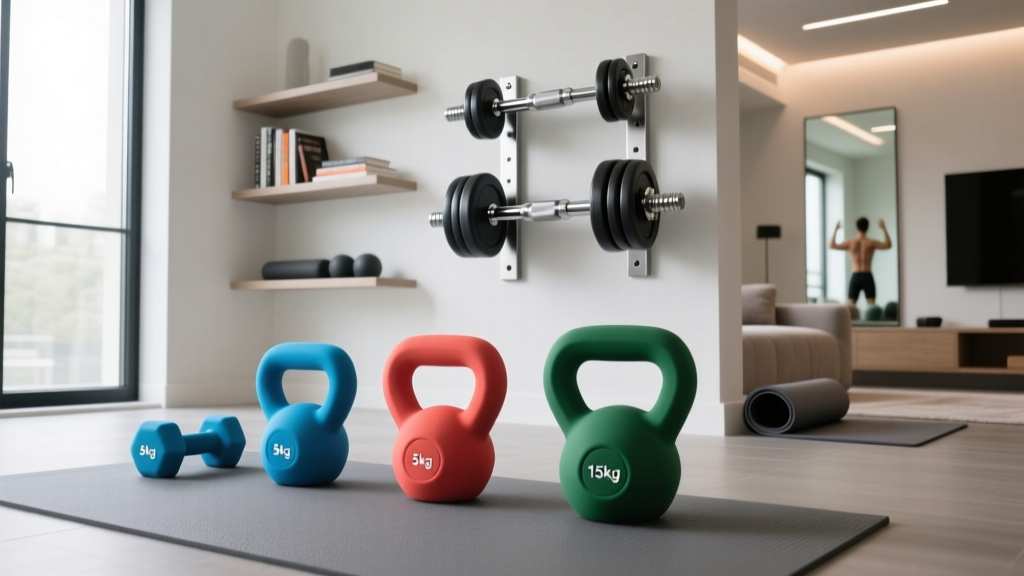
Dumbbell Squats Exercise: Neoprene Home Gym Setup
Master the dumbbell squats exercise at home. Our complete setup guide covers neoprene dumbbell selection, flooring, rack installation, and form.

Phase 1: Environmental Installation and Flooring Prep
Executing the dumbbell squats exercise safely in a home environment requires more than just purchasing a set of weights; it demands a dedicated, shock-absorbing physical space. When using neoprene-coated dumbbells, the primary environmental concern is protecting both your subfloor and the integrity of the neoprene coating during fatigue-induced drops. In 2026, the gold standard for home gym flooring remains 3/4-inch vulcanized rubber horse stall mats (typically 4x6 feet, retailing between $55 and $75 per mat from agricultural suppliers).
Subfloor and Mat Installation Steps
- Assess the Base: If installing over concrete, lay down a 6-mil polyethylene vapor barrier to prevent moisture from degrading the rubber or rusting nearby metal rack components.
- Install a Plywood Subfloor (Optional but Recommended):strong> For heavy squatting, lay 3/4-inch tongue-and-groove plywood over the vapor barrier. This distributes the point-load of a dropped dumbbell, preventing concrete cracking.
- Lay the Rubber Mats: Stagger the seams of your 3/4-inch rubber mats like brickwork. Use a heavy-duty flooring adhesive or double-sided carpet tape at the seams to prevent the mats from separating when you step out laterally during a wide-stance sumo squat.
- Define the Drop Zone: Leave a 2-foot perimeter clear of any rigid objects. Neoprene is softer than urethane and can tear if dragged across sharp edges or metal rack bases.
Phase 2: Material Science — Why Neoprene for Home Squats?
Neoprene (polychloroprene) is a synthetic rubber that offers distinct advantages and specific limitations for home gym owners. With a Shore A durometer rating typically between 70 and 80, neoprene is significantly softer than urethane (Shore A 85-90+). This makes it exceptionally quiet and floor-friendly, which is critical for multi-family housing or garage gyms with living spaces above them.
| Material | Durometer (Shore A) | Acoustic Dampening | Drop Durability | 2026 Avg. Cost per lb |
|---|---|---|---|---|
| Neoprene | 70 - 80 | Excellent (Quiet) | Moderate (Can tear on sharp edges) | $1.50 - $2.20 |
| Urethane | 85 - 95 | Good | High (Virtually indestructible) | $2.80 - $4.50 |
| Cast Iron | N/A (Rigid) | Poor (Loud) | High (But damages floors) | $1.20 - $1.80 |
For the dumbbell squats exercise, the grippy texture of neoprene is highly beneficial. As your core temperature rises and palmar sweating begins during high-rep squat sets, the slight tackiness of neoprene prevents the dumbbell handles from slipping, a common failure point with smooth cast iron or heavily worn rubber.
Phase 3: Rack Assembly and Ergonomic Weight Staging
Proper 'installation' of your weight storage is a critical, often overlooked safety factor. Bending over to pick up heavy dumbbells from the floor before initiating a squat places immense shear force on the lumbar spine. According to American Council on Exercise (ACE) guidelines for home gym construction, ergonomic staging of equipment is paramount for injury prevention.
Rack Positioning Protocol
- Select a 3-Tier Horizontal Rack: Avoid A-frame racks for heavy squatting. A 3-tier horizontal rack (typically 36 inches wide and 24 inches deep) allows you to lift the weights from a neutral spine position.
- Anchor the Rack: If your rack is freestanding, anchor it to the wall studs using 3-inch lag screws or use L-brackets bolted into your plywood subfloor. A loaded 3-tier rack can exceed 400 lbs and will tip if bumped during a squat set.
- Clearance Metrics: Position the rack exactly 24 inches behind your primary squat stance. This allows you to step back safely after racking the weights without tripping over the rack's base feet.
Phase 4: Executing the Dumbbell Squats Exercise
With your environment installed and your neoprene dumbbells staged at waist height, you are ready to execute the movement. The dumbbell squats exercise can be performed in two primary configurations at home: the Goblet Squat (anterior load) and the Suitcase Squat (bilateral load).
Configuration A: The Goblet Squat Setup
The goblet variation is ideal for home users focusing on depth, mobility, and quad development. ExRx.net's biomechanical breakdown of the goblet squat highlights how the anterior load acts as a counterbalance, allowing the lifter to maintain a more upright torso and achieve greater depth without the lumbar rounding often seen in back squats.
- The Pickup: Hinge at the hips, grasp a single neoprene dumbbell vertically by the top bell (or by the handle if using a specialized squat grip), and stand up by driving through your heels.
- The Stance: Position feet shoulder-width apart, toes pointed out 15 to 30 degrees. The neoprene coating provides a secure grip against your chest, preventing slippage.
- The Descent: Brace your core, pull your elbows down inside your knees, and descend until your hip crease drops below the top of your knee.
- The Ascent: Drive through the mid-foot, keeping the dumbbell tight to your sternum.
Configuration B: The Suitcase (Dual) Squat Setup
For maximum lower-body overload, use two matching neoprene dumbbells. Hold one in each hand, arms hanging straight down at your sides (suitcase grip). This variation heavily recruits the glutes, hamstrings, and obliques to stabilize the bilateral load. Keep the dumbbells close to your lateral thighs to maintain a center of gravity directly over your mid-foot.
"The limiting factor in dual dumbbell squats is rarely leg strength; it is grip endurance. The tactile friction of high-quality neoprene can extend your set by 2 to 3 reps compared to slick metal handles, allowing for greater time-under-tension for the quadriceps and glutes."
Phase 5: Troubleshooting and Neoprene Maintenance
To ensure your home gym installation remains pristine and your equipment lasts for years, you must maintain the neoprene coating. Neoprene is highly resistant to water and oils, but it is vulnerable to UV degradation and acidic sweat.
- UV Protection: Do not install your squat station in direct, unfiltered sunlight. Prolonged UV exposure causes neoprene to 'chalk'—a process where the surface dries out, turns white, and loses its tactile grip, becoming slippery during heavy squats.
- Post-Workout Sanitization: Wipe down the dumbbell handles and bells with a pH-neutral cleaner (like a diluted Simple Green solution or dedicated gym wipes). Avoid bleach-based cleaners, which break down the chloroprene polymer chains over time.
- Handling Edge Cases: If the neoprene begins to tear at the seam where the metal core meets the coating, apply a thin layer of flexible polyurethane glue (e.g., Gorilla Clear Grip) to seal the breach before the moisture reaches the internal cast iron core and causes rust jacking.
Summary: Your Complete Squat Station Checklist
Pre-Flight Setup Checklist
- [ ] 3/4-inch rubber flooring installed and seamed securely.
- [ ] 3-tier horizontal rack anchored to wall or subfloor.
- [ ] Neoprene dumbbells staged at waist-height to protect lumbar spine.
- [ ] 2-foot lateral drop-zone cleared of rigid obstacles.
- [ ] Grip surfaces wiped free of dust and debris for maximum friction.
By treating your home gym setup as a comprehensive installation project rather than just a gear purchase, you create a safe, ergonomic, and highly effective environment. Whether you are grinding out high-rep goblet sets or testing your max with heavy suitcase variations, mastering the environmental setup ensures the dumbbell squats exercise remains a staple, injury-free cornerstone of your home training regimen for years to come.
More gear to consider
All reviews
Olympic vs Standard Plates: Upgrading Your Side Bend Dumbbell Setup

Barbell Setup Guide: Weight, Knurling & Gym Ball Dumbbell Exercises

Barbell Knurling Guide: Olympic Shafts vs Thomas Inch Dumbbell Trick

Best T Bar Row Alternative with Dumbbells: Loadable Budget Guide

EZ Curl vs Straight Bar Layouts: Is 30kg Dumbbell Chest Press Good?
