Power Rack vs Squat Rack vs Stand: How to Lift Dumbbells Correctly
Learn how to lift dumbbells correctly and choose the right enclosure. We compare power rack vs squat rack vs squat stand for safe home gym progression.

The Intersection of Form and Steel: A Beginner's Blueprint
Building a home gym is a journey that typically starts with a pair of adjustable dumbbells and a flat bench. As a beginner, your immediate priority is learning how to lift dumbbells correctly to build a baseline of functional strength, joint stability, and muscle memory. However, as your strength progresses and you move from 30-pound dumbbells to 70-pound or 90-pound behemoths, the logistics of getting heavy weights into position—and bailing safely when you fail—become a massive hurdle.
This is where your equipment must evolve. But with so many options on the market in 2026, how do you choose between a squat stand, a half squat rack, and a full power rack? This guide bridges the gap between mastering foundational dumbbell biomechanics and selecting the exact steel enclosure required to support your heavy lifting safely.
Phase 1: Biomechanics First — How to Lift Dumbbells Correctly
Before investing hundreds of dollars in 11-gauge steel, you must ensure your movement patterns are flawless. According to Mayo Clinic's weight training safety guidelines, proper form prevents the vast majority of beginner rotator cuff and lumbar injuries. Here is a step-by-step breakdown of two foundational movements you will perform both inside and outside of a rack.
1. The Dumbbell Goblet Squat
The goblet squat is the ultimate primer for barbell back squats. It forces an upright torso and teaches proper depth.
- The Grip: Hold a single dumbbell vertically against your chest, cupping the top head of the dumbbell with both palms (like holding a goblet).
- The Stance: Place feet shoulder-width apart, toes pointed slightly outward (15 to 30 degrees).
- The Descent: Initiate the movement by breaking at the knees and hips simultaneously. Push your knees out over your toes to track properly.
- The Depth: Lower until your elbows touch the inside of your knees, or your hip crease drops below your knee joint. Keep your core braced as if preparing for a punch.
For a deeper dive into the biomechanics of this movement, review ExRx.net's guide on Goblet Squats, which provides excellent visual breakdowns of joint angles.
2. The Dumbbell Romanian Deadlift (RDL)
The RDL builds the posterior chain (hamstrings, glutes, and lower back) and teaches the vital 'hip hinge' mechanic.
- Stand with feet hip-width apart, holding a dumbbell in each hand with a neutral grip (palms facing your thighs).
- Soften your knees (do not lock them, but do not squat).
- Push your hips backward as if trying to close a car door with your glutes. The dumbbells should slide down your thighs.
- Stop when you feel a deep stretch in your hamstrings (usually just below the knee). Do not round your lower back to go lower.
- Drive your hips forward to return to the starting position, squeezing the glutes at the top.
When learning how to lift dumbbells correctly, beginners often let their wrists bend backward under heavy loads (extension). This leaks power and strains the carpal joints. Always maintain a 'knuckles-to-the-ceiling' or perfectly neutral wrist alignment, stacking the dumbbell directly over the radius and ulna bones of your forearm.
Phase 2: The Heavy Dumbbell Dilemma (Why You Need a Rack)
You might be wondering: "If I am lifting dumbbells, why do I need a squat rack at all?"
The answer is heavy dumbbell bench pressing and safety spotter arms. When you progress to 70lb, 80lb, or 100lb dumbbells, kicking them up from your knees becomes dangerous. More importantly, if you fail a rep, dropping heavy dumbbells to the floor can tear your rotator cuffs, dislocate your shoulders, or destroy your home gym flooring. A rack equipped with safety spotter arms or nylon safety straps allows you to fail safely, dump the weights, and escape without injury.
Phase 3: Squat Stand vs. Squat Rack vs. Power Rack (2026 Matrix)
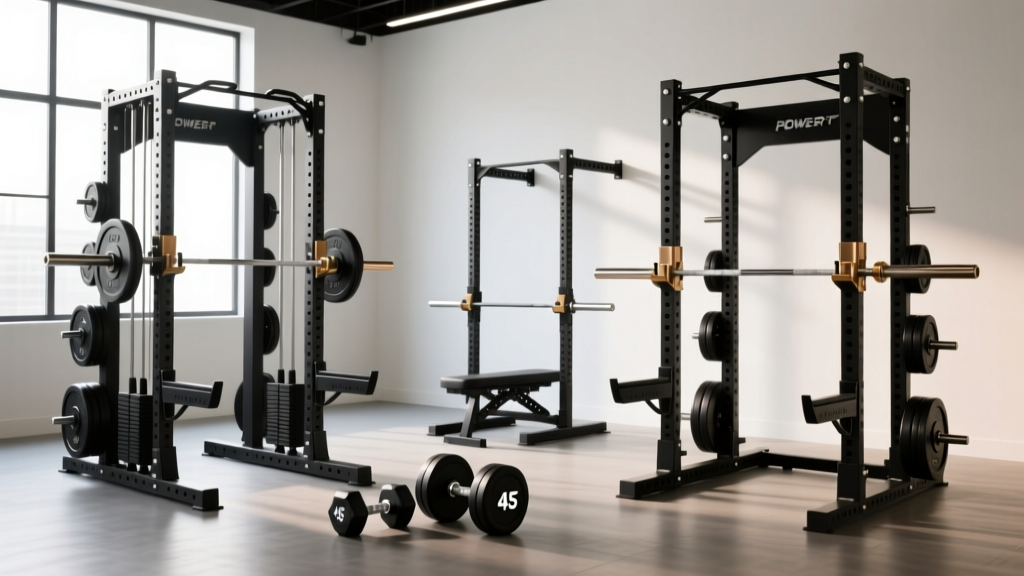
Not all racks are created equal. Your choice depends on your ceiling height, floor space, and whether you plan to lift alone. Below is a comparison of the three main categories based on current 2026 market standards.
| Feature | Squat Stands | Half / Squat Rack | Full Power Rack |
|---|---|---|---|
| Example Model | Rogue SML-1 Monster Lite | Titan T-3 Series Half Rack | REP Fitness PR-4000 |
| Avg. Price (2026) | $350 - $450 | $450 - $600 | $599 - $899 |
| Footprint | ~4 sq. ft. (Minimal) | ~16 sq. ft. (Moderate) | ~25+ sq. ft. (Large) |
| Safety Spotter Arms | Optional (Extends outward) | Included (Extends outward) | Included (Internal/External) |
| Pull-Up Bar | Rare / Add-on | Standard | Standard (Multi-grip options) |
| Best For | Garage gyms, open DB work | Olympic lifts, kipping | Heavy solo DB/BB benching |
Phase 4: The 'Knuckle Clearance' Rule for Dumbbell Benchers
Here is a non-obvious, expert-level insight that most beginner buying guides completely miss: Interior Rack Width.
If you plan to bench press with heavy dumbbells inside a power rack, you must pay attention to the interior dimension between the uprights. Standard, budget-friendly power racks often feature an interior width of 41 to 43 inches. When you lie on a bench inside a 42-inch rack and lower heavy dumbbells, your knuckles and elbows will violently scrape against the steel uprights, ruining your range of motion and potentially causing wrist injuries.
The 48-Inch Mandate: If heavy dumbbell bench pressing is a core part of your routine, you must purchase a power rack with at least 48 inches of interior clearance (such as the REP PR-4000 or Rogue RM-4000). This extra 6 inches provides the necessary clearance for a natural dumbbell arch and elbow tuck without hitting the steel.
Phase 5: Step-by-Step Spotter Setup for Dumbbells
Setting up safety mechanisms for dumbbells is fundamentally different than setting them up for a barbell. A barbell is a single, rigid unit. Dumbbells are two independent objects that can tilt, slip, or be dropped outward.
Step 1: Ditch the Steel Arms for Nylon Straps
Steel spotter arms are excellent for barbells, but they are dangerous for heavy dumbbells. If you fail a dumbbell rep and your wrist collapses onto a steel arm, the dumbbell can bounce unpredictably back into your face or shoulder. Always use heavy-duty nylon safety straps (available from brands like REP and Rogue) when benching with dumbbells. The nylon catches the weight, absorbs the shock, and prevents the 'bounce-back' effect.
Step 2: Positioning the Straps
- Place your bench perfectly in the center of the rack.
- Set the safety straps on the lowest possible hole that still allows you to achieve a full range of motion. The straps should sit roughly 1 to 2 inches below your chest at the bottom of your arch.
- Ensure the straps are pulled taut. Loose straps will stretch under load, potentially allowing the dumbbell to hit your chest before catching.
Step 3: The 'Dump' Technique
Even with straps, you must know how to bail. If you fail the concentric (pushing) portion of the lift, do not try to hold the weight over your face. Simply open your hands and let the dumbbells drop to the floor on either side of the bench. This is why power racks with open sides or squat stands are sometimes preferred by advanced dumbbell lifters—they allow for an easy lateral drop without the dumbbells getting caught on vertical uprights.
Frequently Asked Questions
Can I use a squat stand for heavy dumbbell bench pressing?
Yes, but with caveats. Squat stands offer unlimited lateral space, meaning you will never bang your knuckles on uprights. However, unless you purchase extended spotter arms (which can make the stand tippy and require rear weight storage for counterbalance), you have no overhead safety catch. You must be comfortable dumping the dumbbells to the floor if you fail.
How much weight capacity do I really need in a rack?
In 2026, most reputable 11-gauge steel racks feature a static weight capacity between 800 and 1,000 pounds. As a beginner or intermediate lifter, you will never exceed this. Focus more on the rack's footprint, upright thickness (look for 3x3 inch tubing with 5/8-inch or 1-inch holes), and attachment compatibility rather than raw weight limits.
Should I bolt my power rack to the floor?
If you are doing pull-ups, kipping movements, or using band pegs for heavy dumbbell resistance, bolting is mandatory to prevent tipping. If you are strictly performing controlled dumbbell and barbell lifts, a heavy rack (like a 150lb+ power rack) loaded with weight plates on the rear storage pegs will remain perfectly stable without being bolted to concrete.
Final Thoughts on Your Progression
Mastering how to lift dumbbells correctly is the foundation of your fitness journey. But recognizing when your strength has outgrown your equipment is the hallmark of a smart lifter. Assess your space, measure your interior width requirements, and choose the rack that will keep you safe for the next decade of heavy lifting.
More gear to consider
All reviews
Troubleshooting Grip: Dumbbell Alternate Bicep Curl & Barbell Knurling

Cable Flyes vs Dumbbell Flys: Adjustable Dumbbell Guide
Dumbbell Shoulder to Overhead CrossFit: Power vs Squat Rack vs Stand

EZ Curl Bar vs Straight Bar: Trends & Barbell Row Dumbbell Shifts

Bumper vs Iron Plates: Space & the Dumbbell Chest Fly GIF