Space Planning: Life Fitness Treadmill Incline & Belt Maintenance
Optimize your home gym layout for Life Fitness treadmill incline clearance and belt maintenance. Expert spatial planning and lubrication tips.

The Spatial Paradox: Heavy Cardio in Compact Rooms
Designing a home gym in 2026 often requires balancing premium equipment with limited square footage. High-end cardio machines, particularly rigid-frame models, present a unique spatial challenge. Unlike folding budget treadmills, premium units are engineered for stability and club-quality biomechanics, meaning they demand a permanent, dedicated footprint. However, a critical error many home gym owners make during layout design is ignoring the operational and maintenance clearances required by these machines. Specifically, failing to account for the spatial dynamics of the Life Fitness treadmill incline mechanism and the physical access needed for routine belt maintenance and lubrication.
When you push a 350-pound treadmill into a tight alcove to save floor space, you inadvertently create a maintenance bottleneck. Lubricating the running belt is not a 'set it and forget it' task; it requires side access, rear clearance for tension adjustments, and front clearance to safely test the incline motor under load. In this guide, we break down the exact spatial requirements for optimizing your layout, ensuring your equipment remains serviceable without requiring a complete room teardown every six months.
Calculating Clearance: The Life Fitness Treadmill Incline Factor
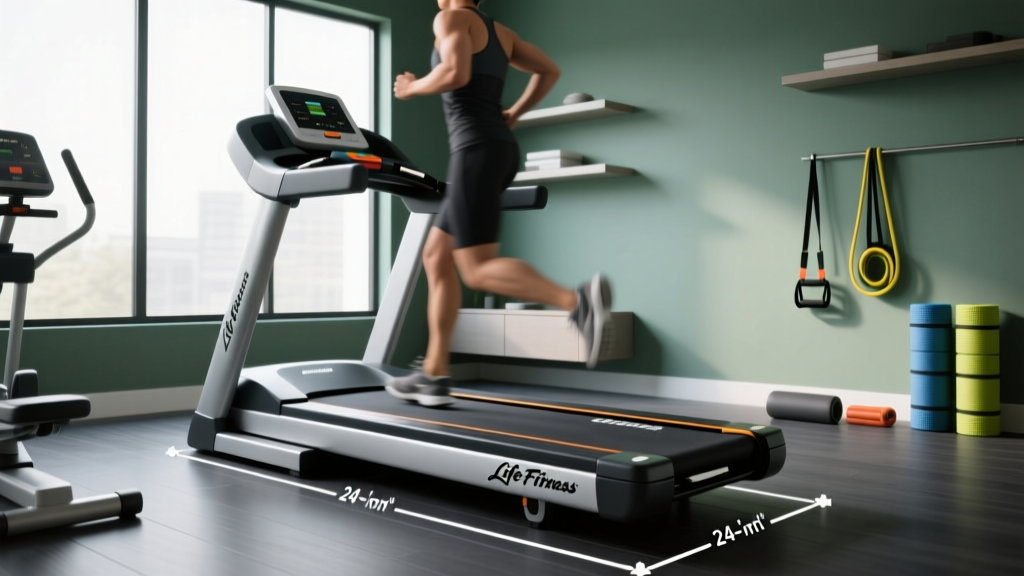
The most common layout mistake involves front-wall proximity. Homeowners often measure the treadmill's resting length (typically 70 to 80 inches for premium models) and place the front shroud just inches from a wall or floating shelf. This ignores the vertical and horizontal displacement that occurs during incline testing.
When you lubricate a treadmill belt, the manufacturer's mandatory post-service protocol requires running the machine at varying speeds and maximum incline to evenly distribute the silicone across the deck. Let us look at the geometry of a popular model, the Life Fitness T5 (with a 60-inch running surface):
- Base Deck Height: ~8.5 inches off the floor.
- Maximum Incline Grade: 15%.
- Incline Rise Calculation: A 15% grade over a 60-inch deck yields approximately 9 inches of vertical lift at the front.
- Total Front Height at Max Incline: ~17.5 inches.
If your treadmill faces a wall with a baseboard heater, a low window sill, or a floating shelf positioned at 15 inches, testing the Life Fitness treadmill incline will result in the front shroud violently colliding with the architecture. Furthermore, the incline motor requires adequate airflow; wedging the front against a wall traps heat, accelerating the degradation of the motor's internal potentiometer and lift actuator.
⚠️ Layout Warning: Never place the front of an inclining treadmill directly against a wall. According to equipment safety guidelines outlined by the American College of Sports Medicine (ACSM), a minimum of 24 inches of frontal clearance is required not just for safety dismounts, but to accommodate the mechanical arc of the incline lift and ensure proper motor ventilation.The Maintenance Bottleneck: Belt Lubrication in Tight Layouts
Belt maintenance is where poor space planning truly punishes the user. Treadmill belts require periodic lubrication with 100% pure liquid silicone (typically every 150 to 300 miles, or roughly every 6 months for avid runners). Over time, the belt also stretches and requires re-tensioning via the rear roller adjustment bolts.
If your treadmill's rear is pushed flush against a wall, you cannot access the rear endcaps. You will be unable to insert the 3/4-inch hex wrench required to adjust the roller tension after the silicone is applied, leading to belt slippage, severe deck friction, and eventual motor burnout.
Step-by-Step: Lubricating in a Space-Constrained Layout
If your layout is already fixed and moving a 350-pound Life Fitness Club Series+ or T5 seems impossible, follow this space-saving maintenance protocol:
- Deploy PTFE Furniture Sliders: Do not attempt to drag the machine. Lift the rear slightly (using your legs, not your back) and place heavy-duty PTFE appliance sliders (e.g., SuperSliders, approx. $14) under the rear leveling feet.
- Slide and Secure: Gently pull the treadmill 24 inches away from the rear wall. Engage the front transport wheels (if applicable) or lock the rear feet once in position.
- Loosen the Belt: Using the provided 3/4-inch hex key, turn both rear tension bolts counter-clockwise exactly 3 full turns. This creates enough slack to slide your hand beneath the belt.
- Apply Silicone: Squeeze approximately 15ml of 100% pure liquid silicone (available in official Life Fitness maintenance kits for ~$20) in a zigzag pattern directly onto the wooden deck, reaching as close to the center as possible. Never use WD-40 or petroleum-based sprays, which will dissolve the belt backing.
- Re-Tension and Test: Tighten the bolts back to their original position. Plug in the machine, stand on the side rails, and run the belt at 3 MPH for 2 minutes. Finally, test the Life Fitness treadmill incline to 15% to ensure the belt tracks centrally and the motor operates without binding.
Spatial & Maintenance Specs: Life Fitness Home Series
To assist in your 2026 home gym floor planning, refer to the clearance matrix below. These dimensions account for maximum incline height, rear maintenance access, and lateral arm swing.
| Model | Footprint (L x W) | Front Clearance (Incline) | Rear Clearance (Tensioning) | Side Clearance |
|---|---|---|---|---|
| Life Fitness T5 (Track+) | 71" x 35" | 24" min. | 18" min. | 12" each side |
| Life Fitness T3 | 71" x 33" | 24" min. | 18" min. | 12" each side |
| Club Series+ (CS+) | 80" x 38" | 30" min. | 24" min. | 15" each side |
Note: Side clearance is not merely for maintenance; it is a critical safety buffer. The American Council on Exercise (ACE) emphasizes that lateral clearance prevents users from striking walls or adjacent equipment during high-intensity interval training or fatigue-induced form breakdown.
Layout Solutions for the Space-Starved Home Gym
If your dedicated fitness room cannot accommodate the 18-to-24-inch rear clearance required for permanent placement, you must integrate dynamic layout solutions into your design.
- Heavy-Duty Appliance Slide Trays: For an investment of roughly $40 to $60, you can mount the treadmill onto a reinforced steel appliance slide tray equipped with locking casters. This allows you to roll the 350lb machine away from the wall for belt lubrication and incline testing, then lock it securely in place for running.
- Hinged Rear Shelving: If you desire storage behind the treadmill, install heavy-duty, gas-strut hinged shelving units. When maintenance day arrives, the shelves fold flat against the wall, instantly granting you the 24 inches of rear access needed to reach the roller tension bolts.
- Diagonal Corner Placement: Instead of pushing the treadmill parallel into a corner, position it diagonally. This naturally creates a triangular void behind the rear roller and the front incline motor, satisfying both the spatial requirements for the Life Fitness treadmill incline arc and the lateral clearance for belt servicing, while softly breaking up the rigid geometry of a rectangular room.
Expert Troubleshooting: Incline Motor Strain vs. Dry Belt Friction
When operating a treadmill in a compromised spatial layout, users often misdiagnose mechanical symptoms. If your treadmill suddenly shuts down when the incline engages, or if you hear a grinding noise from the front shroud, the issue is frequently spatial, not electrical.
Symptom 1: The 'Clunk' at 10% Incline.
If the front shroud hits a baseboard or wall, the incline lift actuator will register a physical blockage. The internal amperage sensor will detect a massive spike in motor strain and immediately trigger a fault code (often Error 01 or 04 on Life Fitness consoles) to prevent the actuator gear from stripping. Solution: Pull the machine forward 12 inches.
Symptom 2: Belt Hesitation on Incline.
If the belt stutters specifically when the incline is raised, but runs smoothly on a flat deck, you are experiencing a combination of a dry belt and increased gravitational load. When the deck is raised, the user's weight shifts backward, increasing the friction coefficient on the lower half of the deck. If the belt lacks silicone lubrication, the drive motor cannot overcome the friction, resulting in hesitation. Solution: Perform the lubrication protocol outlined above, ensuring you apply silicone to the lower-middle section of the deck.
Final Thoughts on Spatial Ergonomics
A premium treadmill is a significant financial investment, often ranging from $3,500 to over $7,000 in 2026. Protecting that investment requires treating the machine not as a static piece of furniture, but as a dynamic mechanical system. By respecting the geometry of the Life Fitness treadmill incline and ensuring unobstructed access for belt maintenance, you extend the lifespan of your deck, belt, and drive motor by years. For further technical specifications and official maintenance schedules, always consult the Life Fitness Support Hub and refer to your specific model's owner manual before altering tension or applying chemical lubricants.
More gear to consider
All reviews
What Does Watts Mean on a Treadmill? Motor Power Guide

Air Bike vs Assault Bike: Do Advantages of Treadmill Walking Win?

Hands-On Review: Best Treadmill Belt Lubrication Kits
Under Desk Treadmill Review: Office & VR Treadmill Quest 3

Do You Need 12 mph on a Treadmill? Beginner Buying Guide