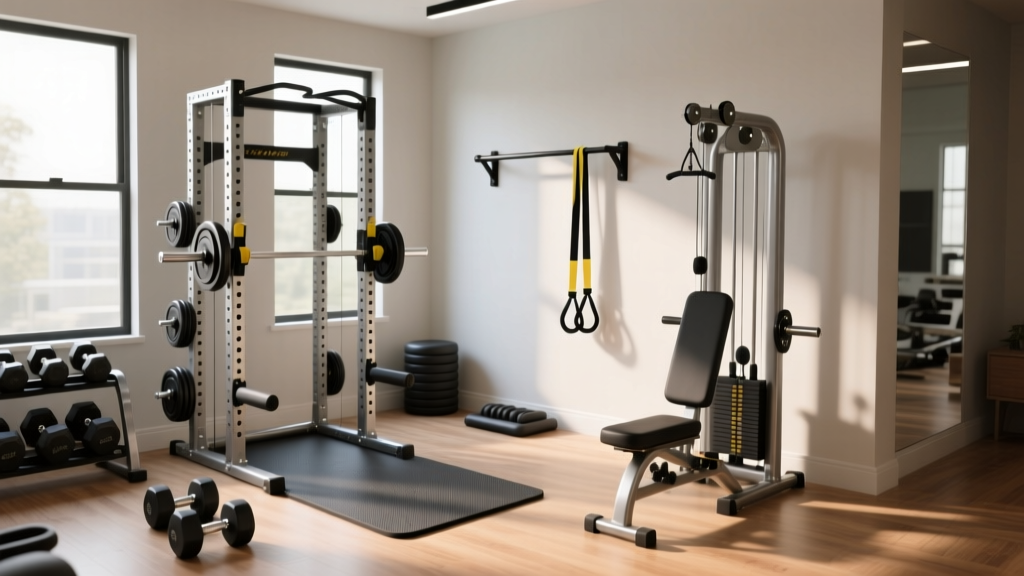
Designing the Perfect Layout for a Home Gym Upper Body Workout
Learn how to optimize your home gym layout specifically for a home gym upper body workout. Discover space-saving rigs, clearances, and zoning tips.

The Blueprint: Why Upper Body Workouts Dictate Your Layout
When building a home gym, most beginners focus entirely on the equipment they want to buy, neglecting the spatial geometry required to actually use it. Designing the perfect layout for a home gym upper body workout requires a fundamentally different approach than a cardio or lower-body-focused space. Upper body training involves wide horizontal arcs (like dumbbell flyes), strict vertical clearances (for overhead presses and pull-ups), and precise barbell paths that demand specific safety margins.
If you place a power rack just six inches too close to a wall, you will scrape the knurling off your barbell and damage your drywall during bench presses. If your ceiling is too low, standing military presses become impossible. According to facility design principles emphasized by the American Council on Exercise (ACE), optimizing spatial flow and safety clearances is the single most critical factor in preventing injury and ensuring long-term adherence to a training program. This step-by-step guide will walk you through engineering a highly efficient, biomechanically sound layout for your upper body training zone.
Pro-Tip: The Ceiling Height TestBefore buying any equipment, stand in the center of your room and raise your arms fully overhead. Measure from the floor to the tip of your middle finger. Add 18 inches to this number. This is your absolute minimum ceiling height requirement for a functional home gym upper body workout space. For a 6-foot-tall lifter, this means you need at least an 8-foot-6-inch ceiling to safely perform standing overhead barbell presses.
Step 1: Zoning Your Space for Push, Pull, and Isolation
A common mistake is treating the home gym as one giant open floor. To optimize for upper body training, you must divide your room into distinct functional zones based on the biomechanical ranges of motion detailed on ExRx.net. This prevents equipment bottlenecks and ensures you have the correct footprint for every movement.
| Zone Type | Primary Movements | Required Footprint (L x W) | Key Layout Constraint |
|---|---|---|---|
| Push Zone | Bench Press, Overhead Press, Dips | 110' x 60' | Requires centered barbell path and spotter arm clearance. |
| Pull Zone | Pull-ups, Lat Pulldowns, Rows | 48' x 48' (Rack dependent) | Requires vertical clearance and cable attachment space. |
| Isolation Zone | Dumbbell Flyes, Lateral Raises, Curls | 72' x 72' open floor | Requires wide lateral clearance for dumbbell arcs. |
By mapping these zones before you unbox a single piece of steel, you guarantee that your dumbbell rack isn't blocking your barbell path, and your pull-up bar isn't colliding with a ceiling joist.
Step 2: Selecting the Right Rig (Footprint vs. Function)
The centerpiece of any home gym upper body workout is the squat rack or power rig. Your layout will dictate which style of rig you can safely accommodate. As highlighted in extensive footprint testing by Garage Gym Reviews, choosing the wrong rack profile can render your space unusable.
Option A: The Wall-Mounted Folding Rack (For Garages and Small Rooms)
If your room depth is less than 10 feet, a folding rack is mandatory. The Titan Fitness T3 Series Folding Wall-Mount Power Rack (approx. $449) extends 41 inches from the wall when in use and folds down to just 4 inches. Failure Mode Warning: You must mount this directly into structural wooden studs or solid concrete using 3/8-inch lag bolts. Mounting into drywall anchors will result in catastrophic failure during heavy pull-ups or kipping movements.
Option B: The Freestanding Power Rack (For Basements and Dedicated Rooms)
If you have a 12x12 foot dedicated room, a freestanding rack offers superior stability and attachment options. The REP Fitness PR-4000 (starting at $699) features a 50x53-inch footprint and 1-inch hole spacing through the bench press zone, which is critical for precise J-cup placement during heavy incline and flat benching. Ensure you leave at least 24 inches of clearance behind the rack for loading plates and adjusting resistance bands.
Step 3: Calculating Safety Clearances and Barbell Paths
Upper body training heavily relies on the standard 7-foot-2-inch (86-inch) Olympic barbell. To calculate your exact spatial needs, use this clearance checklist:
- Lateral Barbell Clearance: You need a minimum of 110 inches (9 feet 2 inches) of unobstructed width. This allows for the 86-inch barbell plus 12 inches on each side to safely load and unload 45-pound bumper plates without hitting a wall or dumbbell rack.
- Pull-Up Bar Ceiling Clearance: You need a minimum of 18 to 24 inches between the top of the pull-up bar and the ceiling. If you are 6 feet tall and your bar is 84 inches high, your head will penetrate the ceiling plane during the concentric phase of a pull-up unless you have a 9-foot ceiling or a lower-mounted bar.
- Dumbbell Arc Clearance: When performing chest flyes on a flat bench, a standard 35-pound dumbbell extends roughly 30 inches from your shoulder joint. You must leave at least 36 inches of open space on both the left and right sides of your adjustable bench to prevent striking walls or mirrors.
Step 4: Flooring and Mirror Placement for Form Correction
Upper body isolation movements require strict visual feedback to prevent shoulder impingement and ensure symmetrical muscle recruitment. Flooring and mirrors are not just aesthetic; they are functional layout components.
Strategic Mirror Placement
Do not mirror the entire room. Instead, place a large frameless mirror (such as the Home Depot 48x72-inch panel, approx. $119) directly in front of your Isolation Zone and adjacent to your Push Zone. This allows you to monitor elbow tuck angles during the bench press and lateral raise trajectories without craning your neck. Never place mirrors directly behind a power rack; the risk of a barbell striking the glass during a failed lift is too high.
High-Density Rubber Flooring
For dropping deadlifts or heavy dumbbells, skip the cheap interlocking foam tiles. They compress and degrade within months. Invest in 3/4-inch thick vulcanized rubber horse stall mats (available at Tractor Supply Co. for roughly $55 per 4x6 foot mat). They provide the necessary shock absorption to protect your concrete subfloor and reduce acoustic vibration transfer to the rest of the house.
Expert Insight: 'The layout of a home gym should force good habits. If your dumbbell rack is placed too far from your bench, you will inevitably compromise your lower back by carrying heavy weights across the room. Keep your rack exactly one step away from your working area.'
Step 5: Budgeting Your Upper-Body Optimization
Building a layout optimized for a home gym upper body workout requires strategic capital allocation. Below is a realistic 2026 budget breakdown for a high-quality, space-efficient setup.
| Item Category | Recommended Model | Estimated Cost | Space Impact |
|---|---|---|---|
| Power Rack | REP Fitness PR-4000 | $699 - $850 | High (Requires 50x53' footprint) |
| Adjustable Bench | Rogue AB-3 Adjustable Bench | $495 | Medium (Stores vertically) |
| Dumbbell Rack | Titan Fitness 3-Tier Saddle Rack | $199 | Medium (36' wide footprint) |
| Flooring | 3/4' Vulcanized Rubber Mats (x4) | $220 | Covers 96 sq ft |
| Mirrors & Lighting | Frameless Wall Panels + LED Strips | $150 | Zero floor footprint |
Total Estimated Layout Cost: $1,763 - $1,914 (excluding barbell and weight plates). This investment ensures your space is biomechanically sound, safe, and primed for progressive overload.
Frequently Asked Questions
Can I do a complete home gym upper body workout without a power rack?
Yes. If your layout cannot accommodate a rack, you can pivot to a dumbbell-centric zone. Invest in a high-quality adjustable dumbbell set (like the Nuobell 80lb set, approx. $429) and a heavy-duty adjustable bench. This reduces your required lateral clearance from 110 inches down to roughly 72 inches, making it ideal for apartments or small spare bedrooms.
How far should my dumbbell rack be from my workout bench?
For optimal safety and layout flow, position your dumbbell rack no more than 18 to 24 inches from the head or foot of your adjustable bench. This allows you to safely kick heavy dumbbells up to your shoulders for incline presses without having to walk across the room while holding 70-pound weights.
What is the best lighting layout for upper body form checking?
Avoid overhead recessed lighting directly above your bench press zone, as it will cast harsh shadows on your face and chest when looking up. Instead, install vertical LED strip lights on the wall behind your mirrors or use forward-facing floor lamps to provide even, shadow-free illumination across your working plane.
More gear to consider
All reviews
How Much Weight You Need & Flooring Ideas for Home Gym Safety

Jeff Nippard Home Gym Setup: 2026 Renter-Friendly Trends

Foldable Home Gym Cost: Compact Setup Pricing Guide

Boots vs. Practical: Choosing the Right Footwear for Your Home Gym Setup

Marcy Pro Home Gym 2026 Review: Best Shared Couples Setup
