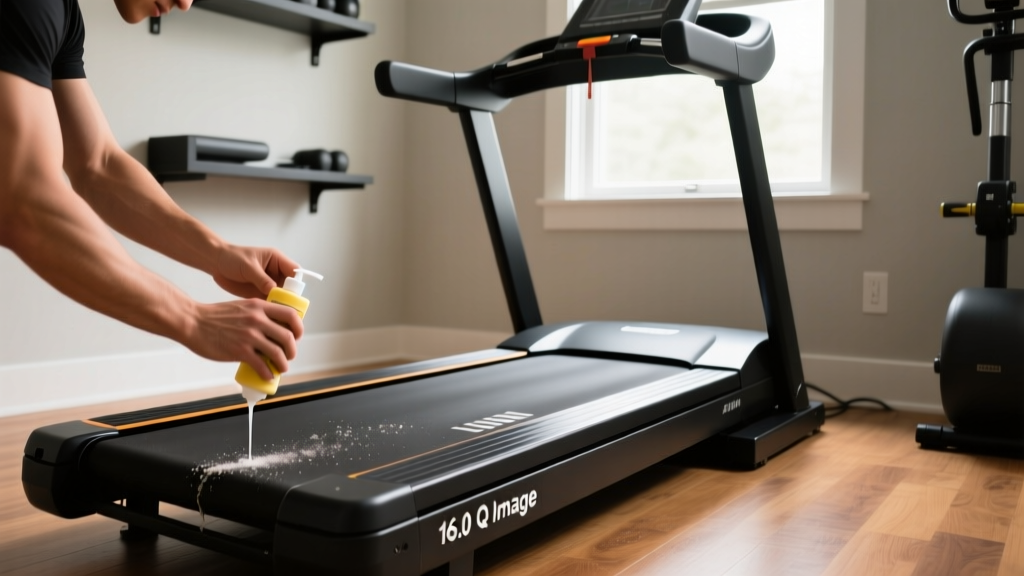
16.0 Q Image Treadmill Belt Maintenance for Compact Home Gyms
Learn how to perform belt maintenance and lubrication on your 16.0 Q Image treadmill, optimized for tight home gym layouts and space-saving setups.

The Spatial Reality of Folding Treadmill Maintenance
Space optimization is the primary reason fitness enthusiasts choose folding models like the 16.0 Q Image treadmill for their home gyms. Featuring a hydraulic folding mechanism, this machine allows you to reclaim up to 28 square feet of floor space when not in use. However, this compact layout design introduces a unique set of challenges when it comes to routine deck maintenance and belt lubrication. When a treadmill is shoved into a tight corner or alcove to maximize square footage, accessing the rear roller bolts, cleaning the deck, and applying silicone lubricant becomes a logistical puzzle.
As of 2026, modern home gym design heavily emphasizes multi-use spaces, meaning your cardio equipment is likely sharing a room with a home office, a guest bed, or a living area. This makes 'maintenance access' a critical component of your initial layout planning. Neglecting belt lubrication due to spatial inconvenience leads to severe friction, premature deck warping, and motor burnout. In this guide, we will break down exactly how to maintain and lubricate the belt of your 16.0 Q Image treadmill without compromising your space-optimized floor plan.
The Geometry of Treadmill Clearance
Before you even uncap a bottle of silicone lubricant, you must evaluate the spatial geometry around your machine. The 16.0 Q Image treadmill requires specific clearances not just for safety during a workout, but for the physical act of maintenance.
Layout Rule of Thumb: To properly access the rear roller adjustment bolts and slide a lubrication wand under the belt, you need a minimum of 24 inches of clearance behind the deck and 18 inches of lateral clearance on the drive side (typically the right side, where the motor hood and primary electronics are housed). If your treadmill is placed flush against a baseboard, you will be forced to move the entire 180-pound machine every time maintenance is required.If your room layout strictly prohibits these clearances, you must design a 'pull-out zone.' Use interlocking EVA foam mats that extend 3 feet behind the treadmill. This creates a visual and physical track, allowing you to easily roll the machine forward on its transport wheels into the maintenance zone, perform the lubrication, and push it back into its space-saving footprint.
The Expert Diagnostic: The Amp-Draw Test
Most generic manuals suggest lubricating your treadmill every three months or every 150 miles. However, true fitness equipment technicians rely on empirical data rather than arbitrary calendars, especially in climate-controlled or uniquely humid home environments that affect belt friction.
Before applying lubricant to your 16.0 Q Image treadmill, perform an Amp-Draw Test to determine if the belt actually needs it. Over-lubrication can cause the belt to slip and attract dust, which is highly detrimental in small, multi-use rooms where airborne particles from fabrics or paper are common.
- Plug the treadmill into a smart plug with energy monitoring capabilities (such as a Kasa or Wyze smart plug) or use a dedicated Kill A Watt meter.
- Establish a baseline: Turn the treadmill on and let it run at 3.0 mph with no one on it. Note the amperage (usually between 2 to 4 amps for a healthy, lubricated 2.5 CHP motor).
- Apply a load: Walk on the treadmill at 3.0 mph. The amp draw will spike. A healthy, well-lubricated belt should pull between 6 to 8 amps under a 150 lb load.
- Evaluate: If the amp draw exceeds 10 to 12 amps under load, the friction between the walking belt and the phenolic deck is too high. It is time to lubricate. If it stays under 8 amps, your belt is fine, and you can skip the maintenance cycle, saving time and preventing over-saturation.
Step-by-Step Belt Lubrication in Confined Layouts
When working within a space-optimized layout, efficiency is key. You do not want to be crawling under a low-clearance desk or navigating around a tight wall corner with messy tools. Here is the optimized procedure for the 16.0 Q Image treadmill.
Step 1: Secure and Position
Unplug the machine from the wall. If you are in a tight alcove, pull the treadmill forward into your designated maintenance zone. Engage the hydraulic lock so the deck does not accidentally fold down on you while you are working near the rear roller.
Step 2: Loosen the Belt Tension
Locate the rear roller adjustment bolts at the very back left and right corners of the deck. Using a 3/16-inch or 1/4-inch Allen wrench (check your specific model's hardware kit), turn both bolts counter-clockwise by exactly three full turns. This provides enough slack to lift the belt without stripping the threads or losing your tension baseline.
Step 3: Clean the Deck
In small home gyms, dust accumulation under the belt is a major issue. Slide a microfiber cloth attached to a thin ruler or a specialized deck-cleaning wand under the loosened belt. Wipe away any black debris (which is a mix of degraded rubber and old silicone). According to expert technicians at Treadmill Doctor, applying new silicone over old, caked-on debris creates a gritty paste that accelerates deck wear.
Step 4: Apply 100% Silicone Lubricant
Use only 100% pure silicone treadmill lubricant. Never use WD-40, petroleum-based oils, or household sprays, as these will chemically degrade the cotton-polyester backing of the walking belt. Lift the right side of the belt and apply a single 15ml line of silicone in a zig-zag pattern down the center third of the deck. Repeat on the left side. Total application should not exceed 30ml.
Step 5: Re-tension and Center
Tighten both rear bolts clockwise by the exact three turns you removed. Plug the machine in, stand on the side rails, and start it at 2.0 mph. Walk on the belt to distribute the silicone. If the belt drifts to the left, tighten the left rear bolt by a quarter-turn and loosen the right by a quarter-turn.
Space-Optimized Storage for Maintenance Supplies
A core tenet of layout design is that every item must have a dedicated, space-efficient home. Storing bulky treadmill maintenance kits on a nearby shelf creates visual clutter in a compact home gym.
- Magnetic Tool Strips: Mount a 12-inch magnetic knife strip on the side of the treadmill's upright frame or a nearby wall. This perfectly holds your Allen wrenches, a small flathead screwdriver, and your microfiber cloths.
- Under-Deck Storage: If your 16.0 Q Image treadmill is elevated slightly on rubber isolation pads, use the void beneath the motor hood (when folded) or the base frame to store a small, flat silicone applicator bottle.
- Velcro Strap Mounts: Attach a heavy-duty Velcro loop to the side of the treadmill's console upright to hold the bottle of silicone lubricant, keeping it out of the way but immediately accessible during your quarterly maintenance checks.
Troubleshooting Matrix: Symptoms and Spatial Causes
Sometimes, belt issues on folding treadmills are directly related to how the machine interacts with its environment. Use this matrix to diagnose issues specific to compact layouts.
| Symptom | Root Cause | Space/Layout Factor | Solution |
|---|---|---|---|
| Belt slips during heavy footstrike | Under-tensioned belt or over-lubrication | Inadequate rear clearance prevented proper torque on rear bolts | Pull machine out, re-tension rear bolts by 1/2 turn each |
| Belt consistently drifts to one side | Uneven floor or misaligned roller | Machine placed on a thick, uneven rug to save space on hard floors | Move to a hard, level surface or use high-density equipment mats |
| Motor shuts off abruptly mid-run | Thermal overload due to high friction | Flush against a wall, blocking the motor hood's cooling intake fan | Ensure 12 inches of clearance directly behind the motor hood for airflow |
Long-Term Layout Best Practices
Maintaining the 16.0 Q Image treadmill is significantly easier when your home gym layout anticipates the machine's mechanical needs. According to equipment maintenance guidelines highlighted by Consumer Reports, proper ventilation and debris management are just as critical as lubrication. In a compact room, ensure your treadmill is not placed directly beneath an HVAC return vent or a ceiling fan, which will continuously drop dust and lint directly onto the running surface, forcing you to clean the deck twice as often.
By respecting the spatial geometry required for maintenance, utilizing smart diagnostic tools like energy monitors, and keeping your silicone and tools integrated seamlessly into the room's design, you ensure your cardio equipment remains a reliable, space-saving asset for years to come.
More gear to consider
All reviews
ProForm 390PI Treadmill vs Stationary Bikes: Budget Value Analysis

Rowing Machine Buying Guide and Lifespan Treadmill Maintenance
Care for Stationary Bikes & Light Weight Treadmill for Home
Beyond Commercial 1750 Treadmill Reviews: Feature Comparison Guide

What Does a Treadmill Do? Curved vs Motorized Guide
