How Much Weight Should I Have for a Home Gym? Layout Guide
Discover how much weight you need for a home gym and how to optimize your layout, flooring, and storage for safe, efficient training.

The Spatial Geometry of Iron: Why Weight Dictates Design
Building a home gym is an exercise in spatial geometry as much as it is in physical fitness. When beginners ask, how much weight should I have for a home gym, they are typically thinking about their current lifting capacity or budget. However, as a home gym design specialist, I look at that question through a different lens: spatial volume, structural load, and traffic flow. The amount of iron or rubber you bring into your space directly dictates your floor plan, ceiling clearance requirements, and storage infrastructure.
A standard 45-pound cast iron plate is roughly 1.75 inches thick, while a 45-pound crumb rubber bumper plate can be up to 4.5 inches thick. That difference in material density completely changes how you design your weight storage zones and load your barbell. In this step-by-step guide, we will bridge the gap between selecting the right weight inventory and engineering a highly optimized, safe, and efficient home gym layout.
Step 1: Zoning Your Layout for Weight Storage and Movement
Before purchasing a single dumbbell or barbell plate, you must divide your available square footage into three distinct operational zones. According to facility guidelines emphasized by the National Strength and Conditioning Association (NSCA), proper zoning prevents equipment bottlenecks and reduces the risk of tripping hazards in high-fatigue states.
The Three-Zone Floor Plan
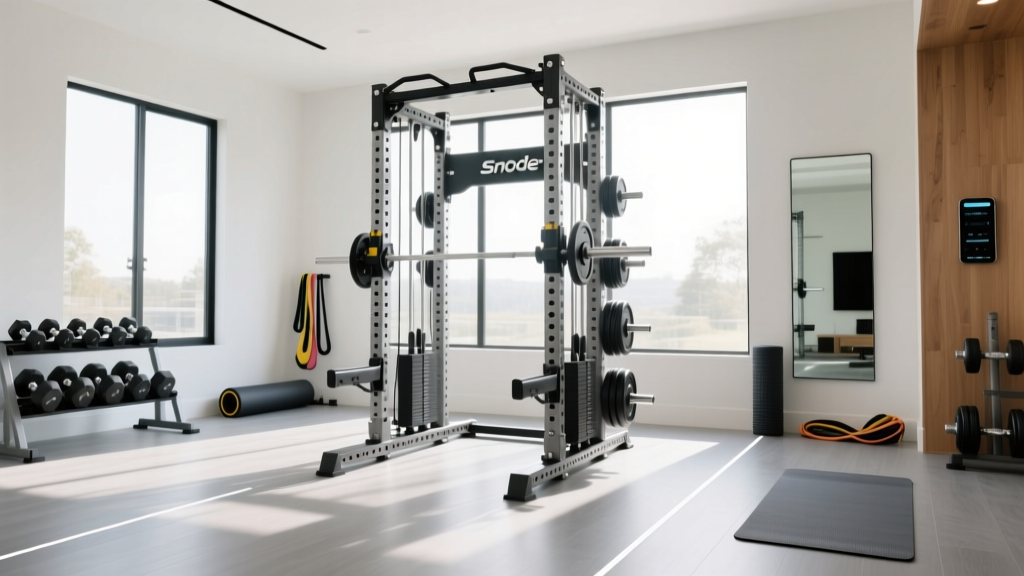
- The Hot Zone (Primary Lifting): This is where your power rack, platform, and barbell live. It requires the most structural reinforcement and spatial clearance.
- The Warm Zone (Accessory & Dumbbell Work): Dedicated to adjustable dumbbells, kettlebells, and plyometric movements. This area requires high-impact flooring but less overhead clearance.
- The Cold Zone (Storage & Loading): Weight trees, plate racks, and cardio equipment. This zone must be positioned to minimize the distance you carry heavy plates to the barbell.
Step 2: How Much Weight Should I Have for a Home Gym?
To answer the core question of how much weight should I have for a home gym, we must align your training age with your spatial footprint. Buying 600 pounds of bumper plates is useless if your weight tree cannot hold the physical width of the rubber, or if your sleeves max out before you reach your target load.
| Experience Level | Recommended Weight | Plate Type & Layout Impact | Estimated Cost (2026) |
|---|---|---|---|
| Beginner | 150 - 250 lbs | Cast Iron (Slim profile). Fits easily on standard wall-mounted racks. | $250 - $400 |
| Intermediate | 300 - 450 lbs | Virgin Rubber Bumpers. Requires a dedicated A-frame tree due to thickness. | $600 - $950 |
| Advanced | 500 - 800+ lbs | Competition Calibrated Plates. Slim profile allows high sleeve capacity. | $1,200 - $2,500+ |
The Dumbbell Dilemma: Fixed vs. Adjustable
If your layout is constrained (e.g., a 10x10 foot spare bedroom or apartment), the answer to how much weight you should have shifts heavily toward adjustable options. A full rack of fixed hex dumbbells from 10 to 50 pounds (in 5lb increments) requires a 4-foot wide, 3-tier rack and occupies roughly 12 square feet of floor space while weighing over 500 pounds. Conversely, a set of Nuobell 80 lb Adjustable Dumbbells replaces 17 pairs of fixed weights, occupying less than 2 square feet and costing around $750. For tight layouts, adjustable weight is the ultimate spatial hack.
Step 3: Calculating Clearances and Traffic Flow
Once you know your weight inventory, you must design the layout around the physical act of loading and moving that weight. The American Council on Exercise (ACE) consistently highlights that inadequate clearance is a primary cause of home gym injuries and equipment damage.
The Barbell Loading Equation
A standard Olympic barbell is 7 feet (84 inches) long. The sleeves are roughly 16 inches each. To comfortably load and unload plates without scraping your knuckles against a wall or a mirror, you need a minimum of 36 inches of lateral clearance on both sides of the barbell.
Therefore, your Hot Zone must be at least 13 feet wide (84" barbell + 36" left clearance + 36" right clearance) to allow for safe, unimpeded plate loading. If your room is only 10 feet wide, you must orient the rack perpendicular to the longest wall or utilize a specialized shorty barbell (like the Rogue C-70 Bar at 79 inches total).
Overhead Clearance and Plate Thickness
Ceiling height is a critical, often overlooked layout metric. If you are 6 feet tall and performing an overhead press, your hands will reach roughly 84 to 90 inches in the air. Add the diameter of a 45-pound bumper plate (17.7 inches), and you need a minimum ceiling height of 8 feet 6 inches to avoid punching holes in your drywall during a heavy press. If your basement ceiling is lower, your layout must restrict overhead barbell work to seated positions or rely on dumbbells and landmine attachments.
Step 4: Flooring, Joists, and Structural Integrity
The more weight you bring into your home gym, the more your layout must account for structural load distribution. Residential floor joists are typically engineered for a live load of 40 pounds per square foot (PSF). Dropping a 400-pound barbell from shoulder height creates a massive spike in kinetic force that can crack floor tiles, splinter subfloors, or damage ceiling drywall in the room below.
Designing the Impact Zone
To protect your home's structure, your layout must include a dedicated drop zone. Do not use cheap, interlocking EVA foam puzzle mats (usually 1/2 inch thick) for heavy free weights; they compress entirely under load and offer zero shock absorption.
- The Gold Standard: 3/4-inch (19mm) vulcanized rubber horse stall mats. Brands like those sold at Tractor Supply Co. cost roughly $55 to $65 per 4x6 foot mat. They weigh 100 lbs each and provide the necessary density to disperse kinetic energy.
- The Premium Option: Crumb rubber drop pads or specialized 8mm+ high-density rubber tiles (e.g., Rogue Fitness RM Mats) if you are building over a concrete slab garage where moisture resistance is a priority.
Real-World Layout Failure Modes to Avoid
Even with the best intentions, beginners frequently make layout errors when scaling up their weight inventory. Avoid these common failure modes:
- The Mirror Collision: Mounting mirrors directly behind the barbell path. When you fail a squat and dump the bar backward, the bouncing plates will shatter the glass. Always leave a 24-inch buffer zone between the rear of the rack and any wall-mounted mirrors.
- The Humidity Rust Trap: Storing cast iron plates directly against an uninsulated exterior garage wall. The temperature differential causes condensation, leading to rapid oxidation. Keep weight trees at least 6 inches away from exterior walls.
- The Choke-Point Walkway: Placing a cardio machine (like a Concept2 RowErg) at the end of the room, forcing you to walk around it while carrying heavy plates to your rack. Keep primary walkways 36 inches wide and completely unobstructed.
Frequently Asked Questions
Can I put a 500 lb home gym setup in my apartment?
Yes, but you must prioritize adjustable weight (like power blocks or adjustable kettlebells) and high-density rubber flooring to mitigate noise and point-loads. Always check your lease agreement regarding structural weight limits and vibration transfer to neighbors below.
Do I need a weight tree if I have a power rack?
If you own more than 300 pounds of plates, absolutely. While many racks (like the REP Fitness PR-4000) feature rear storage pegs, loading 400+ pounds onto the rack itself shifts the center of gravity and can cause the rack to tip forward during heavy pull-ups if it is not bolted to the floor. A standalone A-frame tree keeps the rack balanced and the floor plan organized.
How do I layout a gym in a room with angled basement ceilings?
Map the highest point of the ceiling and place your power rack and overhead pressing zones directly beneath it. Use the lower, angled sections of the room for your Cold Zone (weight storage, cardio machines, and stretching areas) where vertical clearance is not required.
More gear to consider
All reviews
Weatherproofing Your Outdoor Gym Set for Home: Longevity Guide
Small Space DIY Home Gym Ideas: Maintenance & Longevity Guide

Best Compact & Foldable Home Workout Gym Equipment 2026

Bowflex Revolution Home Gym Review: Complete Setup & Floor Plan Guide

Budget-Friendly Home Gym Ideas: Renovation & Remodeling Costs