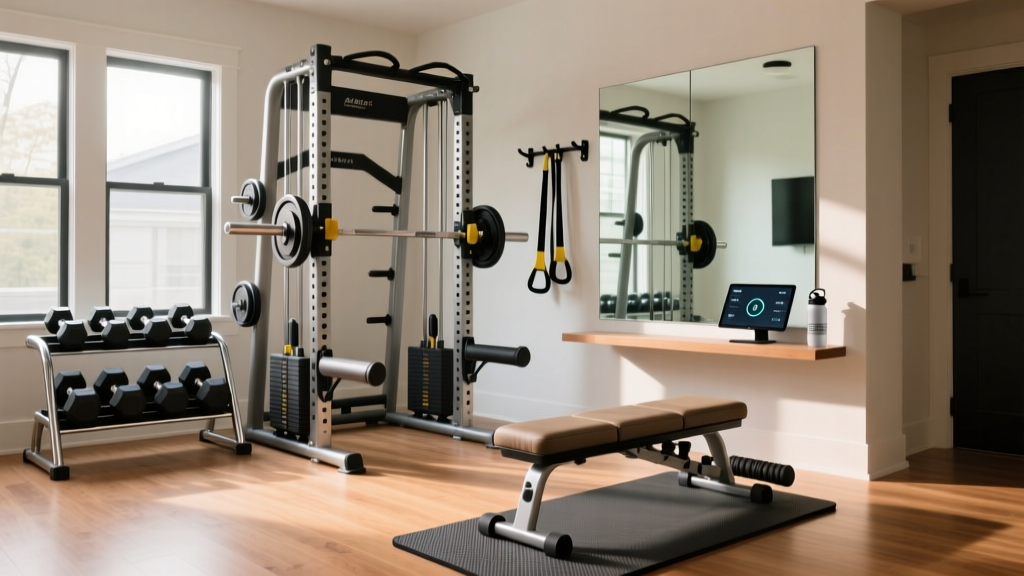
Home Gym Equipment for Abs and Strength Training: Full Setup Walkthrough
Complete walkthrough for setting up a home gym with the best equipment for abs and strength training. Covers space planning, installation, and budgeting.

Building a dedicated strength training space that effectively targets your core requires more than buying a few pieces of gear and clearing out the garage. This walkthrough covers every phase of configuring a home gym for compound strength work and targeted abdominal development — from measuring your space to bolting down your power rack and choosing the right home gym equipment for abs that integrates seamlessly into a full-body strength program.
Phase 1: Space Assessment and Layout Planning
Before ordering any equipment, measure your available space with a tape measure and document ceiling height, floor dimensions, door widths, and electrical outlet locations. Most strength training setups require a minimum footprint of 120 square feet (10×12 ft), though a comfortable configuration with dedicated ab work stations typically needs 150–200 square feet.
Quick Space Requirements:• Power rack with pull-up bar: 48" W × 48" D × 90" H minimum
• Olympic barbell clearance: 7 feet on each side of rack
• Ab wheel rollout lane: 8 feet of clear floor space
• Cable/functional trainer: 60" W × 36" D × 84" H
Ceiling height is critical. If you plan to install a power rack for squats and overhead presses, you need at least 84 inches (7 feet) of clearance. For muscle-ups or high pull-ups, aim for 96 inches or more. Basements with low ceilings often require a shorter rack — the Rogue RML-390C (90" height, $1,350) or Titan T-2 Series Short (82" height, $650) are practical alternatives that preserve full functionality without sacrificing headroom.
Phase 2: Equipment Selection for Strength and Core Development
A well-rounded home gym for strength training and abdominal work combines compound lifting equipment with targeted core machines. The key insight most beginners miss: your home gym equipment for abs should not exist in isolation. Cable machines, GHD benches, and decline boards serve double duty for both heavy compound work and progressive core overload. Here is the tiered equipment breakdown based on budget levels:
| Equipment Category | Budget Pick | Mid-Range Pick | Premium Pick |
|---|---|---|---|
| Power Rack | Titan T-2 ($650) | Rogue R-3 ($1,250) | Eleiko Prestige ($3,500+) |
| Barbell + Plates | Yes4All Olympic Set ($200) | Rogue Ohio Bar + Bumpers ($600) | Eleiko Sport Bar + Calibrated Plates ($1,200) |
| Adjustable Bench | Fitness Reality 1000 ($170) | Rep AB-3100 2.0 ($400) | Rogue Adjustable Bench 3.0 ($795) |
| Ab-Specific Equipment | Ab Wheel + Mat ($35) | GHD Machine ($500) | Cable Functional Trainer ($1,500) |
| Flooring | Interlocking EVA Tiles ($80) | Horse Stall Mats 4×6 ($50/ea) | Rogue U-Lift Mats ($200+) |
Targeted Ab Equipment Breakdown
While compound movements like squats, deadlifts, and overhead presses engage the core significantly, dedicated abdominal equipment accelerates development and allows for progressive overload of the rectus abdominis, obliques, and transverse abdominis. According to EMG research compiled by the American Council on Exercise, exercises that involve spinal flexion against resistance produce the highest levels of abdominal muscle activation.
Essential home gym equipment for abs in a strength-focused setup:
- Perfect Fitness Ab Carver Pro ($40): The gold standard ab wheel with a wide wheel base for stability and padded ergonomic handles. Supports up to 300 lbs and allows full-extension rollouts that challenge the entire anterior chain. The wider wheel prevents lateral tipping during advanced single-arm progressions.
- Rep Fitness GHD (Glute-Ham Developer, $550): Enables hip-extension ab work like GHD sit-ups and back extensions. This piece targets the deep core stabilizers that standard crunches miss entirely. The hip pad adjusts across 7 positions to accommodate users from 5'2" to 6'4".
- Adjustable Decline Bench ($200–$400): Weighted decline sit-ups and Russian twists on a 30–45° decline angle increase resistance on the rectus abdominis by approximately 40–60% compared to flat-ground variations. The Rep AB-3100 2.0 offers 7 angle positions from -20° decline to 85° incline.
- Cable Machine with Rope Attachment: Cable crunches and woodchops provide constant tension throughout the range of motion — something bodyweight ab exercises cannot replicate. The Titan Fitness Functional Trainer FT-50 ($1,200) offers 50 lbs per side with 20 height adjustment positions, making it ideal for both cable crunches and lat pulldowns.
Phase 3: Flooring and Infrastructure Installation
Flooring is not optional in a strength training gym. Dropped weights on concrete or wood subfloors cause cracking, noise transmission, and equipment damage. Here is the installation protocol that protects both your floor and your investment:
Step 1: Clean the subfloor thoroughly. Remove all debris, sweep, and mop if necessary. Allow concrete to dry completely (minimum 24 hours after mopping). Check for moisture using a plastic sheet test — tape a 2×2 foot plastic sheet to the floor and check for condensation after 24 hours.
Step 2: Lay a vapor barrier if installing over concrete in a basement or garage. Use 6-mil polyethylene sheeting, overlapping seams by 6 inches and sealing with construction tape. This prevents moisture from degrading your rubber mats over time.
Step 3: Install 3/4-inch thick horse stall mats (typically 4×6 feet, available at Tractor Supply for approximately $50 each). These provide superior shock absorption compared to cheaper interlocking foam tiles, which compress and degrade under loads exceeding 200 lbs. For a 10×12 foot gym, you need 5 mats at a total cost of $250.
Step 4: Cut mats to fit using a utility knife with a fresh blade and a straight edge. Score multiple times rather than attempting a single deep cut. Leave a 1/4-inch gap from walls for thermal expansion. Use double-sided carpet tape at seams to prevent shifting during heavy lifts.
⚠️ Ventilation Warning: Rubber mats off-gas volatile organic compounds (VOCs) for 1–3 weeks after installation. Open windows, run fans, and consider an air purifier with activated carbon filter during this period. The smell dissipates significantly after 10 days. Never install rubber flooring in a completely sealed room without mechanical ventilation.Phase 4: Mirror and Lighting Configuration
Mirrors serve a functional purpose in strength training: they allow you to monitor form during squats, deadlifts, and ab exercises where visual feedback prevents injury. Install shatterproof gym mirrors (not standard household glass mirrors, which shatter dangerously when struck by equipment) at eye level on the wall facing your primary lifting area.
Recommended specifications:
- Minimum size: 48" W × 60" H per panel
- Mounting height: Bottom edge 16–20 inches from floor (captures knee and hip positions during squats)
- Type: Acrylic shatterproof gym mirrors (MMA Mirror brand, $120–$180 per panel)
- Placement: Cover the wall opposite your rack for frontal form checks, plus one side wall for lateral hip and knee tracking
For lighting, install LED panel lights (4000K–5000K color temperature) overhead to eliminate shadows that obscure form breakdowns. Avoid single-point spotlights that create glare on mirrors. A 4-panel LED setup (approximately $200 total) provides even illumination across a 10×12 foot space.
Phase 5: Equipment Assembly and Anchoring Protocol
This is where most DIY gym builders make critical errors that compromise safety. Follow this exact sequence:
1. Assemble the power rack first. The Rogue R-3 ships in 4 boxes weighing 60–90 lbs each and takes 2–3 hours to assemble with two people. Use the included hardware exclusively — do not substitute bolts from hardware stores as they may not meet the same tensile strength specifications. Torque all bolts to manufacturer specifications (typically 60–80 ft-lbs for main frame connections using a calibrated torque wrench). If bolting to concrete, use 3/8" wedge anchors drilled 3 inches deep with a hammer drill at the lowest RPM setting to prevent cracking.
2. Position the rack with minimum 36 inches of clearance on all sides for loading plates and performing walkouts. Face the open side toward your mirror wall for form monitoring. Ensure the pull-up bar has at least 12 inches of clearance above to the ceiling.
3. Install the adjustable bench inside or adjacent to the rack. Ensure the bench feet sit flat on your rubber flooring without rocking — wobbling during incline presses is a serious safety hazard. Test all angle locking pins under load before use.
4. Mount the GHD machine in a separate zone with 4 feet of clearance on each end. GHD sit-ups require full range of motion behind the pad, and you need space to add weight plates or bands for resistance.
5. Set up the cable/functional trainer against a load-bearing wall, anchored with 3/8" lag bolts into wall studs (minimum 2 studs engaged) or bolted directly to the floor with wedge anchors. The Titan FT-50 weighs 380 lbs unloaded — ensure your floor structure can support this plus an additional 200+ lbs of loaded weight plates and user force during exercises.
"Progressive overload is the single most important variable in strength development. Whether you are loading a barbell for squats or adding weight to cable crunches, the ability to incrementally increase resistance over weeks and months determines your results far more than exercise selection alone." — National Strength and Conditioning Association training principles
Phase 6: Complete Budget Summary
Here is a realistic budget for a complete strength training and ab-focused home gym at three investment levels, based on current retail pricing:
| Item | Essential Build | Standard Build | Complete Build |
|---|---|---|---|
| Power Rack | — | Rogue R-3 ($1,250) | Rogue RML-490C ($1,650) |
| Barbell + Plates | Yes4All Set ($200) | Rogue Ohio + Bumpers ($600) | Rogue Ohio + Calibrated ($900) |
| Bench | Fitness Reality ($170) | Rep AB-3100 ($400) | Rogue Adj 3.0 ($795) |
| Ab Equipment | Ab Wheel + Mat ($35) | GHD + Ab Wheel ($590) | GHD + Cable Trainer ($1,700) |
| Flooring | EVA Tiles ($80) | Stall Mats ($250) | Rogue Mats + Platform ($500) |
| Mirrors + Lights | — | 2 Panels + LEDs ($380) | 3 Panels + LEDs ($560) |
| Accessories | Bands + Roller ($60) | Bands, Roller, Straps ($150) | Full accessory kit ($350) |
| TOTAL | ~$545 | ~$3,620 | ~$6,455 |
Final Pre-Session Safety Checklist
✅ Inspection Protocol Before First Workout:- All rack bolts torqued and secure — verify with calibrated torque wrench
- Barbell sleeves spin freely without grinding or lateral play
- Bench locking pins fully engaged at desired angle — test with bodyweight
- Cable pulleys move smoothly without fraying or catching
- Flooring is flat with no tripping hazards at seams or edges
- Mirrors are securely mounted with no hairline cracks
- Ventilation is adequate — sealed spaces cause CO2 buildup and premature fatigue
- Emergency phone and first aid kit accessible within arm's reach
With your equipment installed, anchored, and inspected, you have a functional strength training environment that supports everything from heavy squats to progressive ab wheel rollouts and cable crunches. The key to long-term results is consistent programming — start with proven templates like Starting Strength or 5/3/1 for compound lifts, and add 2–3 dedicated ab sessions per week using your cable machine and GHD for progressive core overload. Research documented through the Exercise Prescription on the Internet (ExRx) database confirms that combining heavy compound movements with targeted isolation work produces superior core strength and hypertrophy outcomes compared to either approach alone. Your home gym equipment for abs becomes exponentially more effective when integrated into a structured progressive overload program rather than used as standalone tools.
More gear to consider
All reviews
Compression Common Mistakes: Why Your Home Gym Setup Is Sabotaging Recovery (And How to Fix It)

Building an Outdoor Home Gym on Carpet: Weather & Care

Where to Donate Fitness Equipment: A Research-Backed Channel Guide

Beginner Home Gym Starter Kit: Bowflex PR3000 Space Layout Guide

Do It Yourself Home Gym Maintenance for Small Apartments
