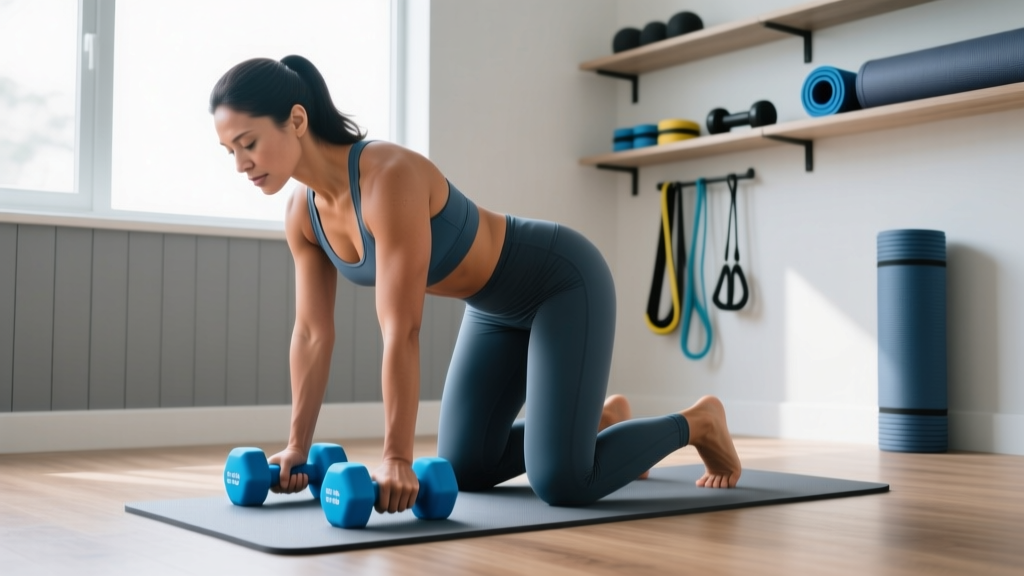
Hamstring Curls with Dumbbells: Beginner Neoprene Guide
Master hamstring curls with dumbbells at home. This beginner guide covers neoprene weight selection, step-by-step form, and real-world troubleshooting.

The Case for Isolation: Why Hamstring Curls Matter at Home
When building a home gym, most beginners prioritize compound movements like squats and deadlifts. However, the hamstrings—comprising the biceps femoris, semitendinosus, and semimembranosus—often require targeted isolation to correct muscle imbalances and prevent knee injuries. According to the American Academy of Orthopaedic Surgeons, hamstring strains are among the most common lower-body injuries, frequently caused by weakness relative to the quadriceps. Performing hamstring curls with dumbbells is one of the most effective, space-saving ways to build posterior chain strength without investing in a $2,000 cable machine.
For home use, the type of dumbbell you choose drastically impacts the safety and comfort of this exercise. This guide focuses specifically on why neoprene coated dumbbells are the superior choice for home hamstring curls, how to select the right weight, and a step-by-step breakdown of flawless execution.
💡 Quick Biomechanics Insight: The hamstrings cross both the hip and the knee joint. While hip hinges (like Romanian deadlifts) target the hamstrings in their lengthened state, lying hamstring curls target them in their shortened, fully contracted state. You need both for complete development.Why Neoprene Dumbbells for Home Hamstring Curls?
Not all dumbbells are created equal. When you are balancing a weight between your feet while lying prone on the floor, the material of the dumbbell dictates your safety and grip security. Neoprene (polychloroprene) is a synthetic rubber that offers distinct advantages over bare cast iron, PVC, or standard hard rubber.
Material Comparison for Floor-Based Curls
| Material | Grip Security (Between Feet) | Floor Protection | Odor & Maintenance |
|---|---|---|---|
| Neoprene Coated | Excellent (Tactile, sweat-absorbent) | Superior (Soft, non-marring) | Odorless, easy to wipe clean |
| Standard Hard Rubber | Poor (Slick when sweaty) | Good | Strong initial chemical odor |
| Bare Cast Iron | Dangerous (Slippery, hard edges) | Poor (Dents hardwood) | Prone to rust if not dried |
| PVC / Vinyl Filled | Moderate (Smooth plastic shell) | Good | Odorless, but bulky sizing |
Furthermore, most high-quality neoprene dumbbells (such as the CAP Barbell Neoprene series) feature hexagonal heads. This is a critical safety feature for home gyms. When you place the dumbbell on the floor next to your mat before picking it up with your feet, a hex shape prevents it from rolling away and damaging your baseboards or tripping you.
Choosing the Right Neoprene Weight for Beginners (2026 Pricing)
Because the lever arm in a lying hamstring curl is relatively long (from the knee joint to the ankle), the weight feels significantly heavier than it would in a bicep curl. Beginners must start light to avoid tendon strain at the back of the knee.
- Absolute Beginner (0-3 months): 5 lbs to 10 lbs. Recommended: Yes4All Neoprene Dumbbell Pair (Approx. $22 - $28 in 2026).
- Novice (3-6 months): 10 lbs to 15 lbs. Recommended: CAP Barbell Hex Neoprene (Approx. $30 - $38 per pair).
- Intermediate (6+ months): 15 lbs to 25 lbs. Recommended: Tone Fitness Neoprene Set (Approx. $45 - $55 per pair).
Expert Tip: Buy two lighter pairs rather than one heavy pair. As you fatigue, you will need to perform drop-sets to fully exhaust the hamstring muscle fibers without compromising your lower back form.
Step-by-Step: Lying Hamstring Curls with Dumbbells
Proper form is non-negotiable. The ExRx.net kinesiology database notes that poor pelvic alignment during this movement shifts the load away from the hamstrings and onto the lumbar spine. Follow these steps precisely.
- The Setup: Lie face down (prone) on a thick yoga mat or carpeted floor. Place your neoprene dumbbell on its side directly behind your feet. Keep your legs fully extended and your toes pointed slightly outward.
- The Foot Grip: Flex your ankles (dorsiflexion) so your toes point toward your shins. Squeeze the dumbbell handle securely between the arches of your feet. Failure Mode Alert: Do not grip the dumbbell with your toes. This will cause severe calf cramping and increase the risk of the weight slipping and hitting your floor.
- Pelvic Anchoring: Press your hip bones firmly into the mat. Engage your core as if bracing for a punch. Your pelvis must remain glued to the floor throughout the entire set.
- The Concentric Phase (Lifting): Exhale and curl the dumbbell up toward your glutes. Focus on driving your heels toward your ceiling. Stop when your knees reach a 90-degree angle or when you feel your hips begin to lift off the mat.
- The Peak Contraction: Hold the top position for a full 1-second pause. Squeeze the hamstrings hard.
- The Eccentric Phase (Lowering): Inhale and lower the weight slowly over a 3-second count. The eccentric (lowering) phase causes the most muscle micro-tears, which is essential for hypertrophy. Do not let gravity pull the weight down.
Real-World Troubleshooting & Edge Cases
Even with perfect instructions, beginners encounter physical roadblocks. Here is how to solve the most common issues when using neoprene dumbbells for this exercise.
Issue: The Dumbbell Keeps Slipping from My Feet
The Fix: Neoprene is highly tactile, but it becomes slick when exposed to heavy sweat. Before your set, wipe the handle of the dumbbell with a dry microfiber towel. Additionally, wear 100% cotton crew socks. Synthetic athletic socks (like polyester blends) create a frictionless surface against the neoprene coating, guaranteeing a slip.
Issue: I Feel It in My Lower Back, Not My Hamstrings
The Fix: You are lifting your hips off the floor to cheat the weight up. This happens when the dumbbell is too heavy. Drop the weight by 5 lbs. If the issue persists, place a small, rolled-up towel directly under your hip bones to physically block your pelvis from rising.
Issue: Knee Joint Pain at the Bottom of the Movement
The Fix: You are hyperextending your knees at the bottom of the eccentric phase. Do not lock your knees out completely when the dumbbell is resting near the floor. Keep a micro-bend in the knee joint to maintain constant tension on the muscle belly rather than the connective tissue.
Programming Your Hamstring Routine
To integrate hamstring curls with dumbbells into your weekly split, follow this evidence-based volume guide for beginners:
Recommended Beginner Protocol
- Frequency: 2 times per week (e.g., Leg Day A and Leg Day B).
- Volume: 3 sets of 12-15 repetitions.
- Rest Periods: 60 to 90 seconds between sets.
- Tempo: 1-1-3 (1 second up, 1 second pause, 3 seconds down).
- Progressive Overload: Once you can comfortably complete 3 sets of 15 reps with strict form and a 3-second negative, upgrade to the next neoprene dumbbell weight increment (usually a 5 lb jump).
Final Thoughts on Home Equipment
Mastering hamstring curls with dumbbells is a milestone in any home-gym journey. By specifically choosing neoprene-coated, hex-headed dumbbells, you eliminate the safety hazards of rolling iron and slippery rubber, allowing you to focus entirely on the mind-muscle connection. Start light, respect the eccentric phase, and your posterior chain will reward you with bulletproof knees and balanced leg development.
More gear to consider
All reviews
Power Rack vs Squat Rack vs Squat Stand for Kettlebells or Dumbbells

EZ Curl Bar vs Straight Bar: Good Upper Body Workouts with Dumbbells
Olympic Barbell Knurling & Dumbbell Exercises for Bigger Biceps

Neutral Grip Dumbbell Bench Press: Power Rack vs Squat Stand Setup
Philosophy Gym Neoprene Dumbbell Hand Weights With Stand vs Plates
