Hammer Grip Dumbbell Curl: Home Gym Setup & Neoprene Guide
Master the hammer grip dumbbell curl at home. Our setup guide covers space prep, neoprene dumbbell selection, and biomechanical execution.

The Complete Home Gym Installation for the Hammer Grip Dumbbell Curl
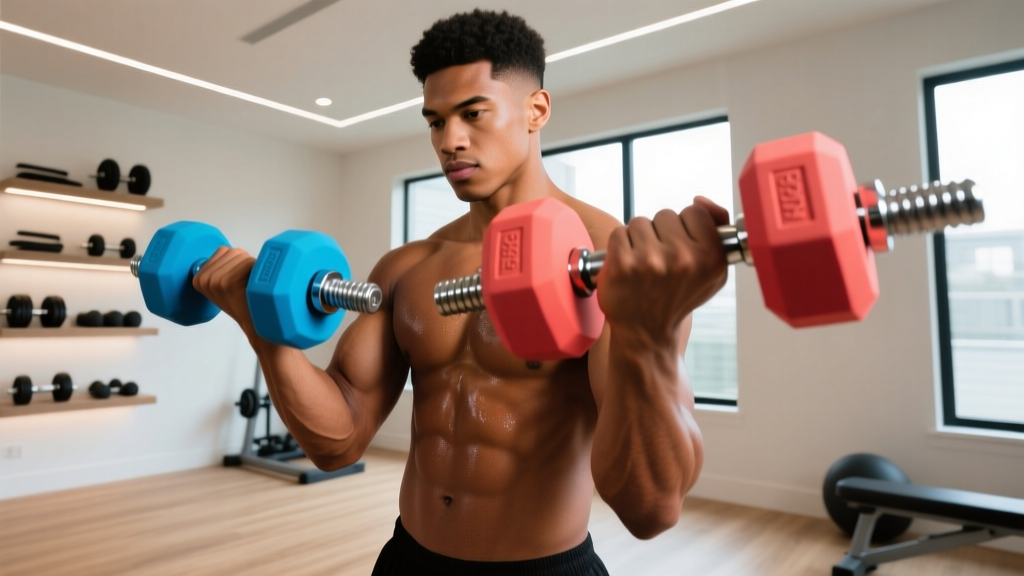
When building a home gym, the focus often drifts toward massive power racks and Olympic barbell sets. However, targeted isolation movements remain the cornerstone of arm hypertrophy and joint health. The hammer grip dumbbell curl is a premier exercise for developing the brachialis and brachioradialis, muscles that add crucial thickness to the upper arm and stabilize the elbow joint. To execute this movement safely and effectively in a residential environment, selecting the right equipment—specifically a neoprene coated dumbbell for home use—and properly installing your workout space is non-negotiable.
This comprehensive setup and installation walkthrough will guide you through preparing your physical environment, choosing the optimal neoprene dumbbells based on 2026 market specifications, and biomechanically 'installing' your body into the perfect starting position for maximum muscle recruitment.
Phase 1: Environmental Setup and Spatial Installation
Before unboxing your weights, you must prepare the physical footprint of your home gym. The hammer curl requires strict vertical tracking, meaning your spatial clearance and flooring must accommodate strict form and accidental drops.
Flooring and Drop Protection
Neoprene coated dumbbells are favored for home use because the synthetic rubber (chloroprene) absorbs shock and protects hardwood or laminate flooring. However, the subfloor still requires preparation. Install interlocking vulcanized rubber mats with a minimum thickness of 8mm (approx. 5/16 inch). While neoprene dumbbells are forgiving, repeated micro-drops from fatigue failures can still crack tiles or dent engineered wood over time.
Clearance Metrics and Mirror Placement
Proper tracking of the elbow joint is essential to prevent anterior shoulder impingement during the curl.
Installation Spec: Spatial Clearance• Lateral Clearance: Minimum 36 inches of empty space on both sides of your centerline to prevent wall-knuckle strikes during the eccentric lowering phase.
• Vertical Clearance: Standard 8-foot ceilings are sufficient, but ensure no overhead light fixtures hang within 24 inches of your standing position.
• Mirror Alignment: Install a shatterproof acrylic gym mirror at eye level, exactly 24 inches in front of your standing mark, to monitor shoulder rotation and wrist neutrality.
Phase 2: Equipment Selection - Neoprene Dumbbell Specifications
Not all neoprene coated dumbbells are manufactured equally. The primary advantage of neoprene for the hammer grip dumbbell curl lies in its tactile friction and handle geometry. Bare steel knurling can cause micro-tears on the palms during high-rep sets, while cheap PVC-filled dumbbells lack the density required for a compact center of gravity. Neoprene provides a secure, sweat-resistant grip without the aggressive bite of bare iron.
Handle Diameter and Grip Demand
The standard Olympic barbell handle is 28mm-29mm. Most cast-iron dumbbells sit around 1.25 inches (31mm). However, the neoprene coating process often adds 1mm to 3mm of material over the handle, subtly increasing the grip diameter. According to kinesiological data from ExRx, a thicker grip forces the brachioradialis to work harder to maintain wrist stability, inadvertently amplifying the forearm benefits of the hammer curl.
2026 Neoprene Dumbbell Market Comparison
When outfitting your home gym rack, you need incremental weight jumps. Hammer curls typically allow for 10% to 15% more load than standard supinated biceps curls. Below is a breakdown of the top neoprene options available for home use this year.
| Brand / Model | Coating Material | Handle Diameter | 2026 Price (per lb) | Best Application |
|---|---|---|---|---|
| Yes4All Neoprene Hex | Chloroprene Rubber | 1.35 inches | $1.60 - $1.85 | High-rep endurance sets |
| CAP Barbell Cast | Neoprene Blend | 1.25 inches | $1.40 - $1.60 | Budget home setups |
| Bionic Steel Pro | Urethane/Neoprene | 1.50 inches | $2.20 - $2.50 | Grip-heavy hammer curls |
Phase 3: Biomechanical Setup and Execution Protocol
With your space prepared and your neoprene coated dumbbells selected, the final 'installation' phase involves setting up your body. The American Council on Exercise (ACE) emphasizes that joint alignment is the primary driver of isolation exercise efficacy. Poor setup shifts the load from the target muscles to the connective tissues of the shoulder and wrist.
Step-by-Step Stance and Grip Installation
- The Foundation: Stand with feet shoulder-width apart. Plant your heels firmly into the rubber matting. Engage your core by bracing as if preparing for a mild abdominal strike. This prevents lumbar hyperextension during the concentric phase.
- Scapular Retraction: Pull your shoulder blades down and back (depression and retraction). This locks the humerus into the glenoid cavity, stabilizing the shoulder joint and ensuring the biceps and brachialis do the lifting, not the anterior deltoid.
- The Hammer Grip: Grasp the neoprene dumbbells. Your palms must face your torso (neutral pronation). Wrap your thumbs fully around the handle; a thumbless 'suicide' grip compromises wrist stability and is dangerous for home use without a spotter.
- Elbow Pinning: Press your triceps lightly against your lats. Imagine a steel rod running through your elbow joint, pinning it to your ribcage. The elbow must act as a fixed hinge.
The Execution Phase
Exhale and curl the dumbbells upward in a strict vertical arc. The thumbs should point toward the ceiling throughout the entire range of motion. Pause for one full second at the top of the movement when the dumbbells are level with your anterior deltoids. Inhale and lower the weight slowly over a 3-second eccentric count, stopping just short of full elbow lockout to maintain continuous tension on the brachialis.
Phase 4: Common Failure Modes and Troubleshooting
Even with the perfect home gym setup and premium neoprene equipment, lifters frequently encounter mechanical breakdowns. Identifying these failure modes early will save your joints and maximize hypertrophy.
Warning: The 'Rowing' CompensationAs fatigue sets in around rep 8 or 9, lifters often pull their elbows backward, turning the hammer grip dumbbell curl into a makeshift upright row. This immediately disengages the brachialis and shifts the load to the rear deltoids and biceps tendon. Fix: Reduce the weight by 15% and perform the set facing a mirror, ensuring the elbow stays strictly in line with the torso.
Wrist Flexion and Extension
Another frequent error is 'breaking' the wrist at the top of the curl, curling the dumbbell toward the shoulder. The Mayo Clinic notes that improper wrist alignment during resistance training is a leading cause of repetitive strain injuries. Your wrist must remain entirely neutral, acting as a rigid extension of the forearm. The thick grip of a neoprene coated dumbbell actually aids in preventing this by forcing a more secure, locked-in wrist position compared to thin, bare steel handles.
Summary: Optimizing Your Home Arm Training
Mastering the hammer grip dumbbell curl requires more than just picking up a weight and bending the elbow. By properly installing your home gym environment with adequate clearance and protective matting, selecting high-quality neoprene coated dumbbells that offer optimal grip thickness, and rigorously applying biomechanical setup principles, you transform a basic movement into a highly effective muscle-building tool. Stick to the 3-second eccentric protocol, maintain strict elbow tracking, and watch your brachialis and forearm development reach new levels in 2026 and beyond.
More gear to consider
All reviews
Barbell Collar vs Clamp: Securing One Dumbbell Exercises for Biceps

Bumper vs Iron Plates: Elevating Your Dumbbells Routine Home Setup
How Dumbbell Rack Storage Impacts Dumbbell Chest Fly Form & Value
Cast Iron vs Competition Kettlebells & Dumbbell Front Rack Lunge Space

Barbell Collar and Clamp Types Comparison: Securing Free Weights for Squats and Chest-Supported Dumbbell Rows
