
The Ultimate Force Home Gym Floor Plan & Setup Guide
Learn how to design the perfect Force home gym floor plan. This beginner step-by-step guide covers space planning, equipment placement, and safety clearances.

Why Build Around a Force USA All-in-One System?
Designing a complete home gym from scratch can feel overwhelming, especially when you are trying to maximize a limited footprint in a garage, basement, or spare bedroom. For beginners and seasoned lifters alike, centering your layout around a Force home gym system—specifically the Force USA G-Series all-in-one functional trainers—is one of the smartest spatial decisions you can make. By combining a power rack, Smith machine, cable crossover, and pull-up station into a single frame, you eliminate the need for five separate pieces of bulky equipment.
However, simply buying the equipment is only half the battle. To ensure safety, optimize your workout flow, and protect your property, you need a meticulously planned floor plan. This step-by-step guide will walk you through assessing your space, drafting your layout, selecting the right foundation, and properly anchoring your rig.
Quick Specs: Popular Force USA Models
- Force USA G6: 50' W x 50' D x 85' H | Ideal for 8-foot ceilings | Approx. $2,499
- Force USA G12: 53' W x 53' D x 86' H | 1:1 and 2:1 Cable Ratios | Approx. $3,699
- Force USA G20: 53' W x 53' D x 91' H | Requires 9+ foot ceilings | Approx. $4,999
Data sourced from the official Force USA G-Series Comparison page.
Step 1: Assessing Your Space and Safety Clearances
The most common mistake beginners make is measuring the exact dimensions of the power rack and assuming that is the only space they need. According to facility design guidelines highlighted by the American Council on Exercise (ACE), you must account for dynamic movement, plate loading, and emergency bail-outs.
The 36-Inch Perimeter Rule
For any Force home gym setup, you must maintain a minimum 36-inch clearance on all sides of the main rack. This space is non-negotiable for several reasons:
- Plate Loading: Standard Olympic plates are 17.5 inches in diameter. You need room to maneuver 45-pound bumpers on and off the storage horns without scratching your walls or drywall.
- Barbell Overhang: A standard 7-foot Olympic barbell extends roughly 16 inches past the J-cups on either side. The 36-inch clearance ensures you can safely unrack the bar without hitting adjacent equipment.
- Cable Crossover Functionality: If you are using the functional trainer attachments, you need space to perform walking lunges or cable woodchoppers without the weight stacks maxing out their travel distance prematurely.
Minimum Room Dimensions: To comfortably house a Force USA G12 (53' x 53') with proper safety clearances, your dedicated gym space should be at least 10 feet by 10 feet (120' x 120'). If you plan to add a dedicated dumbbell rack or a rowing machine, aim for a 12x12 or 10x20 footprint.
Step 2: Drafting Your Force Home Gym Floor Plan
Once you have confirmed your room meets the minimum dimensional requirements, it is time to zone your floor plan. A well-designed gym flows logically from heavy compound movements to accessory work and conditioning.
| Floor Plan Zone | Purpose & Equipment | Placement Strategy |
|---|---|---|
| Zone 1: The Anchor | Force USA G-Series Rack, Smith Machine, Cables | Place against the primary load-bearing wall. Ensure the back is 36' from the wall to allow for plate storage access and lat pulldown seating. |
| Zone 2: Free Weights | Dumbbell Rack, Kettlebells, Olympic Plate Tree | Position adjacent to the rack (left or right side). Keep heavy dumbbells low to the ground to prevent tipping hazards. |
| Zone 3: Conditioning | Assault Bike, Rower, or SkiErg | Place near a window or ventilation source. Leave at least 24' behind the machine for mounting and dismounting. |
| Zone 4: Floor Work | Stretching, Yoga, Ab Rollouts, Dumbbell Floor Presses | Keep the center of the room completely open. Avoid placing low-profile benches or plyo boxes in the middle of the traffic flow. |
Pro Tip: Tape out your floor plan on the concrete or subfloor using painter's tape before unboxing your equipment. Walk through the motions of a mock workout to ensure the flow feels natural and unobstructed.
Step 3: Flooring and Foundation Selection
Do not skip this step, and under no circumstances should you use interlocking EVA foam puzzle mats under a Force home gym. EVA foam compresses under heavy static loads, which will cause your power rack to become unlevel over time, leading to cable pulley misalignment and barbell roll-off hazards.
The 3/4-Inch Vulcanized Rubber Standard
For a permanent, safe, and shock-absorbent foundation, you need 3/4-inch (19mm) vulcanized rubber mats. As noted by flooring experts at Rogue Fitness, high-density rubber protects your concrete slab from dropped barbells, dampens acoustic vibrations (crucial if your gym is on a second floor or shares a wall with a living space), and provides a non-slip surface for heavy deadlifts.
- Budget Option: Horse stall mats from Tractor Supply Co. (Typically 4x6 feet, ~$50-$60 per mat). Note: These can have a strong rubber odor initially and require thorough washing.
- Premium Option: Precision-cut, beveled-edge rubber tiles from commercial gym suppliers. These offer a seamless look and eliminate the tripping hazards of uneven mat seams.
Install the flooring wall-to-wall if possible, or at least create a continuous 10x10 platform that extends beyond the rack's footprint to ensure uniform height across your lifting zones.
Step 4: Structural Anchoring and Assembly
A Force USA all-in-one gym is incredibly heavy (the G12 weighs over 800 lbs in its shipping boxes). While the sheer weight and wide base provide significant stability, anchoring the unit to the floor is a critical safety requirement, especially if you have children, pets, or plan to perform dynamic kipping pull-ups.
How to Anchor Based on Your Subfloor
- Concrete Slab (Garages/Basements): Use 3/8-inch or 1/2-inch Red Head wedge anchors. Drill through the base plates of the rack directly into the concrete. Ensure you are not drilling into post-tension cables or radiant heating lines by using a stud/cable detector or consulting your home's blueprints.
- Wood Subfloor (Spare Bedrooms/Upper Levels): You must locate the floor joists. Use structural lag screws (e.g., Simpson Strong-Tie 3/8' x 3') to secure the rack directly into the joists. If the rack's mounting holes do not align with your joists, lay down a 3/4-inch plywood sub-platform, lag the plywood to the joists, and then bolt the rack to the plywood.
During assembly, use a high-quality cordless impact wrench and a reliable bubble level. If the rack is even slightly off-level, the Smith machine barbell will drift to one side during use, and the cable stacks may rub against the housing.
Step 5: Electrical, Lighting, and Ventilation
The final phase of your floor plan setup involves optimizing the environment. A cramped, poorly lit garage can kill your motivation and create safety hazards when loading heavy plates.
- Lighting: Install 4000K to 5000K LED shop lights. Avoid placing a single light source directly above the bench press area, as looking up during a lift will blind you. Position lights at a 45-degree angle or use diffused panel lighting.
- Ventilation: Garage gyms can easily exceed 100°F in the summer. Install a high-CFM wall exhaust fan and utilize oscillating floor fans. If you are in a basement, ensure your dehumidifier is rated for the square footage to prevent rust on your Force USA cable pulleys and weight stacks.
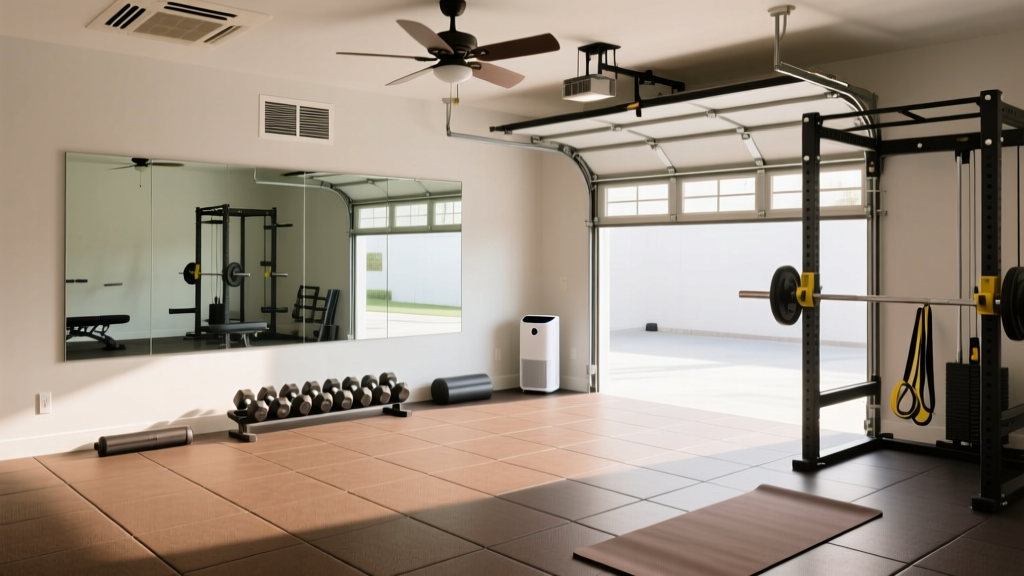
- Mirrors: Mount shatterproof gym mirrors on the wall opposite the rack. This not only helps you check your lifting form but also reflects light and makes a 10x10 space feel significantly larger and less claustrophobic.
Frequently Asked Questions
Can I put a Force home gym on the second floor of my house?
Yes, but it requires careful structural planning. Modern homes built to code generally support 40 pounds per square foot for live loads in bedrooms. A Force USA rack plus weight plates can easily exceed 1,000 lbs concentrated in a 25-square-foot area. You must place the rack directly over load-bearing walls or primary floor joists, and use a thick rubber mat combined with a 3/4-inch plywood sheet to distribute the point-load weight across multiple joists.
Do I need to buy the weight plate storage attachments?
Absolutely. While you can buy a standalone Olympic plate tree, integrating the storage horns onto the back and sides of your Force rack is highly recommended for space efficiency. It acts as a counterbalance, adding rear stability to the rig during heavy lat pulldowns or cable rows, and keeps your floor plan free of tripping hazards.
What is the best ceiling height for a Force USA G12?
The G12 stands at 86 inches (7 feet 2 inches) tall. You need a minimum ceiling height of 8 feet to accommodate the frame. However, if you plan to do pull-ups or overhead presses inside the rack, a 9-foot or 10-foot ceiling is vastly superior to prevent your head or the barbell from striking the ceiling drywall at the top of the movement.
More gear to consider
All reviews
Mirrors & Lighting for Your Marcy Machine Home Gym: Budget Guide

Budget-Friendly Home Gym Ideas: Renovation & Remodeling Costs

Space-Saving Beginner Starter Kit: Parabody CM3 Home Gym Layout
Best Paint Color for Home Gym Outdoor Structures & Weather Tips
Garage Gym Setup: Flooring, Ventilation & Mirror Installation Service
