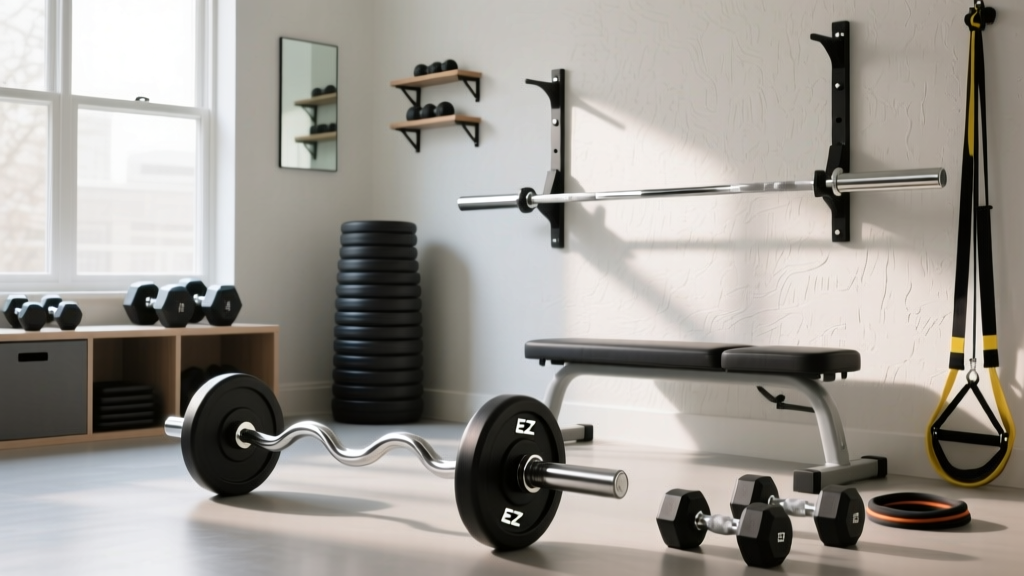
EZ Curl Bar vs Straight Bar: Space & SA Dumbbell Row
Compare EZ curl bar vs straight bar for small gym layouts. Discover space-saving storage tips and how to optimize your SA dumbbell row setup.

Home gym real estate is at an absolute premium in 2026. With urban living spaces shrinking and multi-use rooms becoming the standard, lifters are forced to make ruthless, calculated decisions about every square foot of their training environment. Two of the most common spatial dilemmas involve upper-body equipment selection: choosing between an EZ curl bar and a straight bar for arm and pressing work, and figuring out how to properly stage the SA dumbbell row (single-arm dumbbell row) without turning your workout zone into an unnavigable obstacle course.
This guide bridges the gap between biomechanics and interior layout design. We will break down the exact spatial footprints, storage failure modes, and ergonomic trade-offs of the EZ curl bar vs straight bar debate, while providing a concrete floor-plan strategy for integrating the sa dumbbell row into a compact, high-functioning home gym.
The Core Dilemma: EZ Curl Bar vs Straight Bar in Tight Spaces
When outfitting a small garage gym or spare bedroom, the physical dimensions of your barbells dictate your storage solutions and movement clearance. A standard 7-foot Olympic straight barbell is the undisputed king of compound lifts, but its 84-inch length is a nightmare for spatial optimization. Conversely, an Olympic EZ curl bar typically measures between 47 and 52 inches, offering a drastically reduced storage footprint.
Storage Failure Modes & Wall Clearance
The most common failure mode in small gym layouts is vertical barbell storage. If your ceiling height is 8 feet (96 inches), storing a 7-foot straight bar vertically on a wall-mounted holder leaves only 12 inches of clearance. This makes lifting the bar off the peg nearly impossible without scraping the drywall. An EZ curl bar, measuring roughly 4 feet, completely eliminates this ceiling-height conflict, allowing for effortless vertical or horizontal wall storage.
| Equipment Type | Standard Length | Weight | Wall Storage Footprint | 2026 Avg Price |
|---|---|---|---|---|
| 7ft Olympic Straight Bar | 84 inches | 44 lbs | 84" W x 4" D (Horizontal) | $220 - $350 |
| Olympic EZ Curl Bar | 47 - 52 inches | 18 - 35 lbs | 52" W x 4" D (Horizontal) | $140 - $280 |
| 5ft Standard Straight Bar | 60 inches | 25 - 35 lbs | 60" W x 4" D (Horizontal) | $90 - $150 |
Biomechanics vs. Square Footage: Which Bar Wins?
Beyond storage, the spatial constraints of a small room often force lifters into suboptimal stances. When you cannot widen your feet to accommodate a heavy straight-bar curl or skull crusher, your wrist and elbow joints take the brunt of the kinetic load. According to biomechanical data cataloged by ExRx.net, the angled grips of an EZ curl bar significantly reduce wrist extension and ulnar deviation compared to a straight bar.
Expert Insight: In a confined space where you are backed up against a wall or rack, the EZ curl bar's multi-angle shaft allows you to maintain a neutral or semi-supinated grip. This preserves joint health during high-volume arm work when your lower body positioning is restricted by the room's layout.However, the straight bar remains non-negotiable for heavy rack pulls, barbell rows, and floor presses. If your budget and wall space only allow for one bar, a 6-foot Olympic barbell (72 inches) offers a functional middle ground, providing enough sleeve length for plates while shaving a full foot off your horizontal storage requirement.
Integrating the SA Dumbbell Row Into Your Layout
While barbell variations handle bilateral loading, unilateral back development is critical for addressing muscle imbalances and improving core anti-rotation. This is where the sa dumbbell row becomes a staple. However, executing the SA dumbbell row requires specific spatial allowances that many compact gym owners overlook.
Calculating the Clearance Footprint
A standard flat utility bench measures approximately 45 inches long by 18 inches wide. To perform the SA dumbbell row safely, you must account for the lateral arc of the dumbbell and the backward travel of your elbow at the top of the concentric phase. You need a minimum of 24 inches of lateral clearance on the working side. Therefore, your dedicated rowing footprint is roughly 45 inches by 42 inches.
- The Parallel Mistake: Placing the bench parallel and flush against a wall limits your elbow travel, forcing you to truncate the range of motion or risk driving the dumbbell into the drywall during the eccentric lowering phase.
- The 45-Degree Offset Solution: Angle the bench at a 30 to 45-degree diagonal away from the wall or power rack. This creates a 'pocket' of space that allows you to step in, hinge at the hips, and pick up heavy hex dumbbells (80+ lbs) without spatial interference.
Space-Optimized Equipment Synergy (2026 Edition)
To seamlessly blend your barbell arm work with heavy unilateral back training, your equipment must serve multiple purposes. Here is a highly optimized, space-saving equipment matrix for a 50-to-80-square-foot home gym:
- The Anchor: Rogue Curl Bar
As detailed in the Rogue Curl Bar specifications, a high-quality Olympic EZ bar with a 30mm shaft diameter and needle bearings allows for heavy curling and triceps extensions while storing easily on standard J-cups inside your power rack, eliminating the need for secondary wall hooks. - The Rowing Engine: Adjustable Dumbbells
Traditional cast-iron dumbbell racks consume up to 6 square feet of floor space. Upgrading to a pair of Nuobell or PowerBlock adjustable dumbbells (ranging from 5 to 80 lbs) condenses an entire rack into a 2-square-foot footprint, providing the exact load increments needed to progressively overload the SA dumbbell row. - The Stowaway Bench: Foldable Utility Bench
Look for benches with a folding rear leg mechanism. When the SA dumbbell row is complete, the bench folds flat to a 5-inch profile and slides vertically into the 12-inch gap between your power rack and the wall.
Step-by-Step: Executing the SA Dumbbell Row in Tight Spaces
If your layout simply cannot accommodate a bench in the center of the room, you must adapt the exercise to the environment. The National Strength and Conditioning Association (NSCA) emphasizes that unilateral movements can be modified to maintain hypertrophic stimulus while respecting spatial boundaries.
1. The Rack-Supported Staggered Row
Remove the bench entirely. Stand inside your power rack or squat stand. Hinge forward and grasp the vertical upright of the rack with your non-working hand for support. Stagger your feet (working-side leg back) and execute the SA dumbbell row. This confines your movement strictly within the rack's footprint, requiring zero extra floor space.
2. The Wall-Hinge Isometric Row
Place a yoga mat against a reinforced wall. Walk your feet out and hinge forward until your torso is parallel to the floor, resting your non-working hand on the wall for balance. Perform the SA dumbbell row in this suspended position. This not only saves space but heavily engages the hamstrings and glutes as stabilizers.
Final Verdict: Building Your Compact Arsenal
Optimizing a small gym is an exercise in geometric problem-solving. When debating the EZ curl bar vs straight bar for a tight layout, the EZ curl bar wins on pure spatial efficiency and joint preservation in restricted stances, though a 6-foot straight bar may be required if you prioritize heavy compound pulling. Meanwhile, mastering the sa dumbbell row in a confined space requires abandoning the 'bench flush against the wall' mentality in favor of angled offsets or rack-supported variations. By selecting multi-functional, stowable gear and calculating your clearance zones down to the inch, you can build a world-class back and arm arsenal in less than 80 square feet.
More gear to consider
All reviews
Best Adjustable Dumbbells for a Rear Deltoid Workout With Dumbbells
Barbell Clamp Types Comparison: Beyond the Women's Dumbbell Workout Routine PDF
Beyond a Full Body Dumbbell Workout Beginner Routine: Barbell Setup
Flying With Dumbbells? The Loadable Plate Budget Breakdown

Power Rack vs Squat Stand: How Dumbbell Dimensions Guide Your Choice
