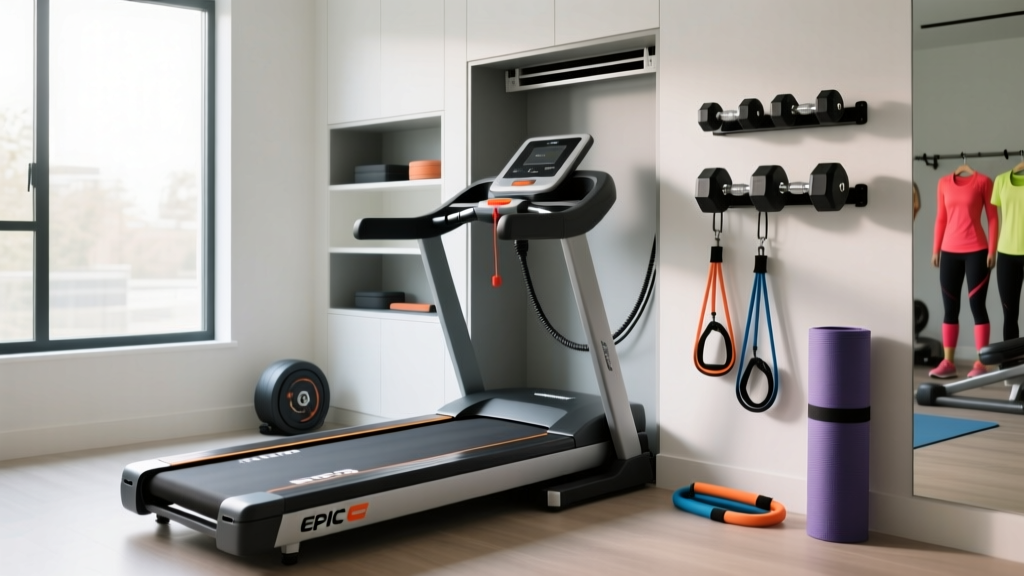
Space-Saving Layouts for Your Epic Treadmill: Belt Maintenance Guide
Learn how to design a space-optimized home gym layout that allows easy access for epic treadmill belt maintenance, lubrication, and tensioning.

The Spatial Paradox of Premium Cardio Equipment
In the modern home gym of 2026, space is the ultimate luxury. Fitness enthusiasts frequently invest in an epic treadmill—high-performance, commercial-grade machines like the Sole F85, Matrix T7xe, or NordicTrack Commercial 2450—only to shove them into tight corners or flush against walls to maximize floor space. While this layout strategy optimizes your square footage for yoga or free weights, it creates a logistical nightmare for the most critical aspect of machine longevity: belt maintenance and lubrication.
An epic treadmill setup is not just about the machine's 22-inch HD touchscreen or 4.0 CHP motor; it is about designing a spatial environment that accommodates the physical reality of maintaining a 300-pound piece of moving machinery. When a treadmill deck dries out, friction spikes, motor amp draw increases, and the control board eventually fries. This guide bridges the gap between interior space optimization and the mechanical clearance required to keep your premium cardio investment running flawlessly.
The Cost of Neglect in Tight Spaces
Ignoring belt lubrication because the machine is too close to the wall is a costly mistake. A replacement 4-ply belt and phenolic deck kit for a premium treadmill costs between $180 and $320 in 2026, not including the labor to flip a heavy machine in a cramped room. By contrast, a bottle of 100% silicone lubricant costs roughly $14.
Minimum Clearance Matrix for Belt Maintenance
When mapping out your home gym floor plan, you must account for the 'maintenance envelope'—the physical space a human body requires to access the belt edges, rear roller bolts, and motor hood. Below is the spatial matrix required for standard maintenance tasks on high-end treadmills.
| Maintenance Task | Minimum Side Clearance | Minimum Rear Clearance | Space-Saving Layout Strategy |
|---|---|---|---|
| Belt Lubrication | 12 inches | 24 inches | Offset corner placement; use L-nozzle applicator |
| Rear Roller Alignment | 6 inches | 18 inches | Leave rear access hatch unblocked by furniture |
| Motor Hood / Board Access | N/A | 36 inches | Front-facing wall gap or rolling slide-out rails |
| Deck Replacement / Flip | 36 inches | 48 inches | Install heavy-duty appliance slider mat with pull-cords |
Step-by-Step Belt Lubrication in a Space-Constrained Layout
If your epic treadmill is positioned with only 12 inches of clearance on the non-motor side, traditional lubrication methods (which involve lifting the belt edge with both hands) become physically awkward. Here is the optimized protocol for tight-space lubrication.
1. Procure the Correct Applicator and Lubricant
Never use WD-40 or petroleum-based solvents; they will melt the PVC and cotton layers of the belt. You need 100% liquid silicone. According to the repair experts at Treadmill Doctor, liquid silicone disperses evenly under the belt via the natural friction and heat generated during the first five minutes of walking. For tight spaces, purchase a bottle equipped with a flexible, elongated tubing nozzle (often sold as an 'L-shaped applicator').
2. The 'Slide-and-Prop' Technique
- Power Down: Unplug the treadmill from the wall. This is non-negotiable to prevent accidental motor engagement while your hands are near the rollers.
- Release Tension (Optional but Recommended): Using a 6mm hex key, turn both rear roller adjustment bolts counter-clockwise by exactly two full turns. This loosens the belt, making it easier to slide the applicator tube underneath without needing to lift the heavy rubber edge.
- Apply Silicone: Insert the elongated tube under the center of the belt. Squeeze exactly 0.5 ounces (about half the bottle) in a zig-zag pattern as you slowly pull the tube out toward the edge.
- Re-Tension: Turn the rear roller bolts clockwise two full turns to restore the original tension.
- Distribute: Plug the machine in and walk at 2.0 MPH for 5 minutes, intentionally stepping on the left and right edges to spread the silicone across the phenolic deck.
Diagnosing Friction: Motor Amp Draw and Heat Signatures
In a highly optimized, dimly lit home gym, you might not visually notice a dry belt until it starts fraying. Instead, rely on data. The most accurate way to determine if your epic treadmill needs lubrication is by measuring the motor's amp draw.
The Clamp Meter Test: Purchase a basic digital clamp meter ($25-$40). Clamp it around the red wire connected to the drive motor's lower control board. Have a 175-pound user walk at 3.0 MPH on a 0% incline. A healthy, well-lubricated belt should draw between 4 to 7 amps. If the draw spikes above 12 amps, the deck is dry, and the motor is working overtime to overcome friction. If it exceeds 15 amps, you are in the danger zone for blowing the motor control board.
Layout Hacks: Managing Folding Hinges and Deck Props
Many space-conscious buyers opt for folding treadmills. However, the hydraulic folding mechanisms on premium models (like the Bowflex Treadmill 22) add 40 pounds of hardware to the front of the deck, altering the center of gravity. When performing belt maintenance on a folding model in a tight room:
- Never rely on the hydraulic strut to hold the deck while reaching underneath. Struts can fail or slip if bumped in a cramped space.
- Use the manual safety pin. Always engage the secondary steel locking pin located near the hinge joint before placing your hands near the belt edge.
- Wall-Mounted Prop Systems: If your treadmill folds flat against the wall, install a heavy-duty wall-mounted D-ring and use a ratchet strap to secure the folded deck to the wall studs. This prevents the machine from accidentally deploying onto you while you are cleaning the rear roller area from behind.
Troubleshooting Edge Fraying and Slippage in Tight Corners
When an epic treadmill is jammed into a corner, users tend to enter and exit the machine from the same side repeatedly. Over months, this uneven weight distribution causes the belt to track slightly to the left or right, leading to edge fraying against the side rails.
The 1/4-Turn Alignment Rule
According to equipment repair guides from The Family Handyman, belt alignment requires microscopic adjustments. If the belt is drifting to the right:
- Locate the right rear adjustment bolt.
- Turn it clockwise by exactly 1/4 of a turn.
- Turn the left rear adjustment bolt counter-clockwise by 1/4 of a turn.
- Run the belt at 4.0 MPH and observe for 60 seconds.
Warning: Overtightening one side to force the belt over will stretch the cotton backing, permanently ruining a $150 belt. Always adjust both sides in equal, opposite increments.
Summary: Designing for the Long Haul
Space optimization should never compromise mechanical accessibility. By planning your home gym layout with the maintenance envelope in mind—leaving strategic gaps, utilizing appliance sliders, and employing specialized long-reach tools—you ensure that your epic treadmill remains a cornerstone of your fitness routine for a decade or more, rather than becoming a massive, broken paperweight in the corner of your room.
More gear to consider
All reviews
Compact Bikes vs Treadmill Workouts to Increase Speed and Endurance
Treadmill Motor Guide: Benefits of Walking Backwards on a Treadmill
Folding Treadmill Review: Testing the NordicTrack Treadmill Motor

Elliptical vs Treadmill: Preserving Advantages of Treadmill Exercise
Folding Treadmill Review: Avoid a Crease in Treadmill Belt