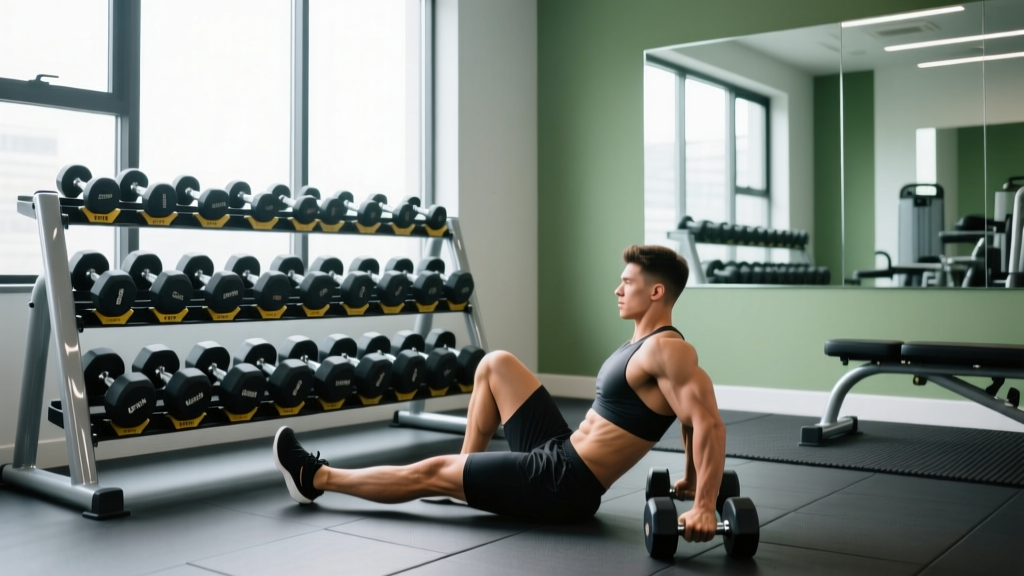
Dumbbell Rack Care: Organizing for Dumbbell Hamstring Curls
Master dumbbell rack maintenance and tier organization to optimize safety and workflow for floor-based lifts like dumbbell hamstring curls and heavy RDLs.

The Intersection of Rack Maintenance and Exercise Biomechanics
Most lifters and home gym owners treat their dumbbell rack as a static piece of furniture—a place to dump weights after a set. However, as of 2026, with commercial-grade 3-tier racks from brands like Rep Fitness and Titan Fitness ranging from $249 to $595, these storage solutions are significant investments that require active maintenance. More importantly, how you organize and maintain your rack directly impacts your safety during complex, awkward movements.
Consider the mechanics of dumbbell hamstring curls. Whether you are performing them lying prone on a flat bench with a dumbbell secured between your feet, or executing a seated floor variation, you are often operating in close proximity to the lower tiers of your rack. Retrieving a 70 lb or 90 lb hex dumbbell from a cluttered, poorly maintained bottom tier while your body is already in a compromised, flexed position is a primary catalyst for lumbar strain and rotator cuff impingement. Proper rack care, hardware torque management, and strategic tier organization are not just about aesthetics; they are critical components of injury prevention and workout efficiency.
Strategic Tier Placement for Floor and Bench Access
The golden rule of dumbbell storage is 'heavy on the bottom, light on the top.' However, we must refine this rule based on exercise selection and retrieval biomechanics. When setting up for isolated, lower-body movements like dumbbell hamstring curls, Romanian deadlifts (RDLs), or floor presses, your spinal alignment during the 'pick-up' phase is paramount.
The 'Blind Reach' Safety Test
Stand in front of your rack and close your eyes. Simulate the setup for dumbbell hamstring curls by hinging at the hips or squatting down. Can your hand naturally find the handle of your target weight on the bottom tier without your knuckles scraping against exposed bolts, rusted edges, or the tier above? If not, your rack spacing and hardware clearance need immediate adjustment.
| Tier Level | Weight Range | Primary Exercise Retrieval | Clearance Requirement |
|---|---|---|---|
| Top Tier | 5 lb – 25 lb | Lateral raises, tricep extensions | Standard (6-8 inches) |
| Middle Tier | 30 lb – 50 lb | DB presses, goblet squats | Standard (6-8 inches) |
| Bottom Tier | 55 lb – 120+ lb | Dumbbell hamstring curls, RDLs, heavy rows | Extended (10+ inches for safe hinging) |
Hardware Integrity: Torque Specs and Frame Maintenance
Dumbbell racks endure immense static loads and dynamic shock. Every time a heavy dumbbell is dropped onto the floor near the rack, or slammed onto a tier, vibrational energy travels through the frame. Over time, this causes hardware to back out. According to facility maintenance guidelines emphasized by the National Strength and Conditioning Association (NSCA), regular inspection of structural hardware is mandatory to prevent catastrophic rack collapse.
Torque Specifications for Common Rack Hardware
Most premium racks, such as the Rogue RM-6 or Rep Fitness SR-4000, utilize 5/8-inch or 3/4-inch Grade 8 bolts. Hand-tightening is insufficient. You must use a calibrated torque wrench.
- 5/8" Grade 8 Bolts: Torque to 65–85 ft-lbs.
- 3/4" Grade 8 Bolts: Torque to 110–130 ft-lbs.
- M12 Metric Bolts (Common in imported racks): Torque to 55–70 ft-lbs.
Maintenance Cadence: Perform a full torque check every 90 days. If your rack sits on an uneven garage floor, check the hardware monthly, as torsional stress will accelerate bolt loosening.
Saddle Protection and UHMW Plastic Care
Metal-on-metal contact between cast iron or urethane dumbbells and the steel rack frame will destroy both the equipment and the rack. To combat this, modern racks utilize saddle liners made from UHMW (Ultra-High-Molecular-Weight) polyethylene. As detailed in materials science literature regarding UHMWPE, this polymer offers exceptional impact resistance and a low coefficient of friction, making it ideal for gym equipment.
Warning: Chemical DegradationNever use harsh degreasers, bleach, or petroleum-based solvents to clean your UHMW rack saddles. These chemicals can break down the polymer chains, causing the plastic to become brittle and crack under the load of heavy dumbbells. Use only mild dish soap and warm water, or a dedicated gym equipment wipe.
When the UHMW pads inevitably wear down—usually after 2 to 3 years of heavy commercial use or 5+ years in a home gym—replace them immediately. Aftermarket UHMW adhesive pads cost between $15 and $30 per tier and will save you from having to replace $800 worth of ruined urethane dumbbells.
Base Anchoring, Floor Protection, and Rack Walk
When performing dumbbell hamstring curls, you are often seated on the floor directly in front of or adjacent to the rack. If the rack experiences 'walk' (micro-movements caused by uneven loading or nearby dropped weights), it poses a severe crushing hazard to your feet and hands.
Step-by-Step Base Stabilization
- Assess the Floor: Use a 48-inch machinist level across the rack's footprint. Garage floors are notoriously uneven, often sloping 1/4 inch per 10 feet for drainage.
- Shim, Don't Force: If the rack rocks, do not overtighten the bolts to force the frame into the concrete. This introduces massive pre-load stress on the welds. Instead, use high-density UHMW or steel shims under the base plates.
- Anchor for Earthquakes and Impacts: If you live in a seismic zone, or if you frequently drop heavy dumbbells within 3 feet of the rack, anchor the base plates to the concrete using 3/8-inch wedge anchors. Note: Never anchor into wood subfloors or floor joists; the pull-out strength is insufficient for dynamic gym loads.
- Matting Integration: Place 3/4-inch vulcanized rubber horse stall mats under the rack. Ensure the mat is trimmed so it doesn't create a trip hazard during the setup phase of your hamstring curls.
Troubleshooting Common Rack Failures
Even with meticulous care, racks develop issues. Here is how to diagnose and fix the most common storage anomalies:
- Peeling Powder Coat: Caused by humidity and sweat. Sand the affected area with 220-grit sandpaper, apply a rust-inhibiting primer, and finish with a matte black appliance epoxy. Do not use standard spray paint; it will chip upon dumbbell impact.
- Stripped Bolt Holes: If a bolt spins freely in the threaded insert, the insert has failed. Drill out the insert and use a Helicoil repair kit to restore the threads to factory specifications.
- Tier Sagging: If the middle or bottom tier bows under the weight of 100 lb dumbbells, the cross-support brackets are undersized. Retrofit the underside of the tier with 1/4-inch steel flat bar stock, bolted through the existing UHMW saddle holes.
Final Thoughts on Longevity and Workflow
Your dumbbell rack is the anchor of your free weight training. By respecting the biomechanics of exercises like dumbbell hamstring curls, you can organize your tiers to protect your spine and shoulders during the setup phase. Combine this strategic organization with rigorous hardware torque checks and UHMW saddle maintenance, and your rack will easily survive decades of heavy use. For more detailed specifications on commercial and home gym equipment standards, always refer to manufacturer guidelines from trusted brands like Rep Fitness and Rogue, and adhere to established facility safety protocols.
More gear to consider
All reviews
Kettlebells vs Upper Body Dumbbell Workout for Beginners: 2026 Guide

Beyond Dumbbell Lat Rows: Cast Iron vs Competition Kettlebell Guide
Best Adjustable Dumbbells for Overhead Dumbbell Exercises (2026)
How Dumbbell Rack Storage Impacts Dumbbell Chest Fly Form & Value

Quad Exercises With Dumbbells: Rubber Hex vs Urethane 2026
