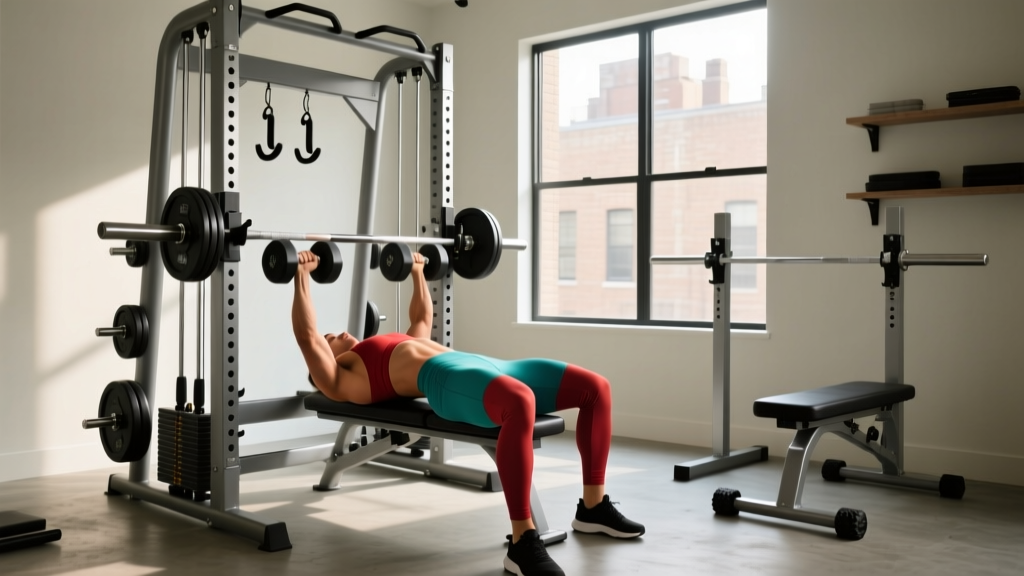
Dumbbell Press to Bench Press Conversion: Power Rack vs Squat Stand
Transitioning from dumbbells to barbells? Compare power racks, squat racks, and stands to find the safest setup for your bench press conversion.

Hitting a plateau with adjustable dumbbells is a rite of passage for home gym owners. Once you max out your 80 lb or 120 lb dumbbells, the logical next step is transitioning to a barbell. However, the dumbbell press to bench press conversion requires more than just buying a barbell and weight plates; it demands a fundamental upgrade to your racking ecosystem. Choosing between a power rack, a half squat rack, and independent squat stands will dictate your safety, floor space utilization, and long-term progression.
The Biomechanics of the Dumbbell Press to Bench Press Conversion
When you initiate the dumbbell press to bench press conversion, you are altering the mechanical and neurological demands placed on your upper body. According to ExRx.net's biomechanical breakdown, dumbbell pressing requires significant stabilization from the rotator cuff and serratus anterior to prevent the weights from drifting laterally. The barbell bench press removes this lateral stabilization requirement, allowing your central nervous system to direct more force horizontally into the pectoralis major and anterior deltoids.
The Conversion Math: A common misconception is that pressing two 80 lb dumbbells (160 lbs total) equates to a 160 lb barbell bench press. In reality, due to the increased bilateral stability of a barbell, most lifters can immediately bench press 110% to 120% of their combined dumbbell working weight. If your 5-rep max with dumbbells is 160 lbs total, expect your barbell 5-rep max to land between 185 lbs and 205 lbs within the first month of the transition.Anchoring Your Setup: Power Rack vs. Squat Rack vs. Squat Stand
As of 2026, the home gym industry standard has firmly settled on 3x3-inch 11-gauge steel for serious lifters. However, the footprint and configuration of your rack will depend on your spatial constraints and safety requirements. As highlighted in BarBend's extensive home gym rack testing, selecting the wrong rack type for solo benching is a leading cause of home gym injuries.
1. The Power Rack (Full Cage)
A full power rack features four to six vertical uprights, creating an enclosed cage. For the bench press, this is the gold standard for solo lifters. You can set the horizontal safety straps or pin-pipe safeties just an inch above your chest. If you fail a rep, you simply lower the bar onto the safeties. Models like the REP Fitness PR-4000 or Rogue R-3 offer immense versatility, allowing for lat pulldown attachments and belt squat setups, but they require a minimum footprint of 48x48 inches (or 48x24 inches for shallow models).
2. The Squat Rack (Half Rack)
Half racks typically feature two main tall uprights and two shorter front uprights, often doubling as weight plate storage to counterbalance the rack. They provide an open-front feel, which some lifters prefer for bench press bar paths, as there is no front crossmember to bump the bar against when unracking. The Titan T-3 Half Rack is a prime example, offering a robust spotter arm system while keeping the center of gravity low.
3. The Squat Stand (Independent Uprights)
Squat stands consist of two independent vertical posts. They are the most space-efficient and budget-friendly option, with premium models like those found in the Rogue Fitness squat stand lineup offering 1,000+ lb capacities. However, for the bench press, squat stands must be paired with extended spotter arms. Without them, a failed rep can result in the bar crushing your sternum.
Comparison Matrix: Racking Systems for the Bench Press
| Feature | Power Rack (Full Cage) | Half Rack | Squat Stand |
|---|---|---|---|
| Uprights | 4 to 6 | 4 (2 tall, 2 short) | 2 |
| Solo Bench Safety | Excellent (Enclosed safeties) | Very Good (Pin/Strap safeties) | Moderate (Requires long spotter arms) |
| Avg. Footprint | 48" x 48" (or 48" x 24") | 48" x 48" | 48" x 48" (with arms deployed) |
| 2026 Price Range | $599 - $1,200+ | $499 - $899 | $299 - $550 |
Critical Hardware: J-Cups, Spotter Arms, and Bench Height
The rack itself is only half the equation. The hardware connecting your barbell to the rack dictates the safety and longevity of your equipment.
- Sandwich J-Cups: Avoid cheap J-cups lined with thin plastic that cracks over time. Upgrade to UHMW sandwich J-cups (layers of ultra-high-molecular-weight polyethylene bolted between steel). These protect your barbell's knurling from being scraped off during heavy unracks.
- Spotter Arm Length: If using squat stands, your spotter arms must be at least 20 to 24 inches long. When bench pressing, lifters often bounce the bar off their chest. A short 12-inch spotter arm will fail to catch a bar that bounces forward toward your face.
- Bench Height Specifications: The International Powerlifting Federation (IPF) mandates a bench height between 16.5 and 17.7 inches. Many cheap commercial benches sit at 19 inches, which forces shorter lifters to lift their heels off the floor, destroying leg drive and lower back stability. Ensure your bench sits at exactly 17.5 inches for optimal force transfer.
Barbell Whip and Shaft Diameter: The Hidden Variable
When converting from dumbbells, the barbell you purchase matters just as much as the rack. Barbells come in different shaft diameters, which drastically affect grip comfort and bar 'whip' (the bouncing oscillation of the bar under load).
- 28mm Shaft (Olympic Weightlifting): Too much whip. If you bench press heavy loads with a 28mm bar, the bar will bounce violently off your chest, throwing off your bar path.
- 28.5mm Shaft (Multi-Purpose): The sweet spot for most home gym owners. Provides enough rigidity for benching while remaining comfortable for deadlifts and cleans.
- 29mm Shaft (Powerlifting): Extremely stiff. Ideal if your primary focus is the bench press, as it offers maximum grip surface area and zero oscillation, but can feel thick for lifters with smaller hands during pulling movements.
Programming Your First Month
Do not attempt to max out your barbell bench press on day one. Your tendons and stabilizers need time to adapt to the new bilateral load. Follow this 4-week progression framework:
- Week 1: Focus purely on bar path and unracking mechanics. Use 60% of your estimated 1-rep max for 4 sets of 8 reps. Practice tucking your elbows at a 45-degree angle.
- Week 2: Increase load to 70%. Introduce paused bench pressing (1-second pause on the chest) to eliminate the stretch reflex and build starting strength.
- Week 3: Increase load to 80% for 5 sets of 5 reps. Begin utilizing leg drive, ensuring your glutes remain in contact with the bench pad.
- Week 4: Test your 5-rep max. You should now have a highly accurate baseline to plug into percentage-based programs like 5/3/1 or the Texas Method.
The Final Verdict
The dumbbell press to bench press conversion is a massive milestone in your strength journey. If you have the space and budget, a full power rack is the undisputed king of safety and versatility. If you are dealing with low ceilings or a cramped garage, a heavy-duty squat stand paired with 24-inch safety spotter arms and a 17.5-inch flat bench will serve you exceptionally well, provided you respect the equipment's limitations and never lift without safeties deployed.
More gear to consider
All reviews
Maintaining Dumbbell Racks Against Heavy Standing Dumbbell Shrugs
Beyond Dumbbells for Flabby Arms: Olympic Barbell Weight & Knurling Guide

Cast Iron vs Competition Kettlebells: 2026 Trends & Dumbbell Diagonal Raises

Best Neoprene Options for Curling 40 Lb Dumbbells (2026)
Rubber Hex vs Urethane: Dumbbell Press to Bench Press Calculator Data
