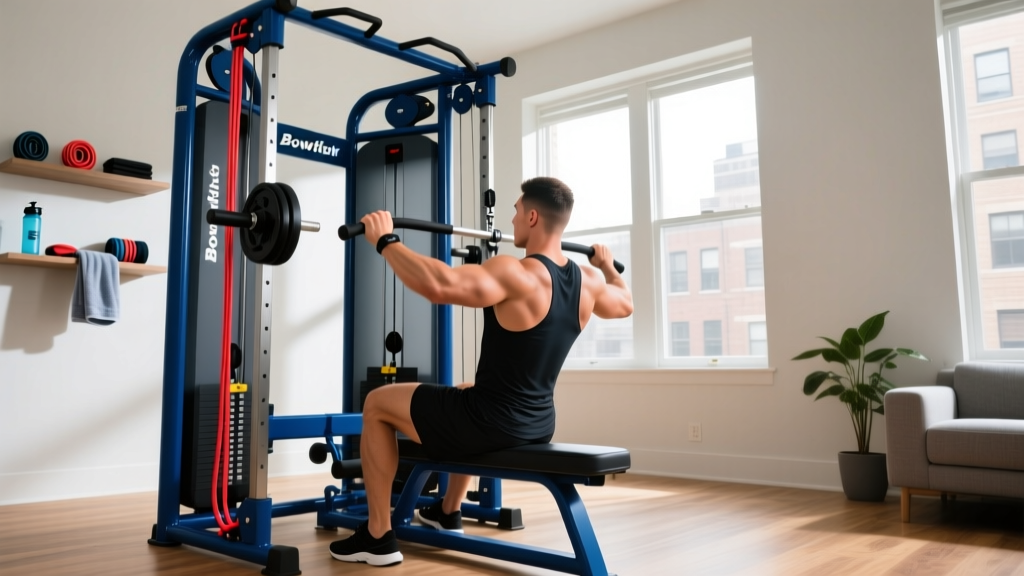
Bowflex PR 1000 Home Gym Setup: Strength Training Walkthrough
Master your Bowflex PR 1000 home gym setup with our complete strength training walkthrough. Covers space planning, assembly, and cable routing.

Phase 1: Spatial Planning and Flooring Configuration
Before unboxing the Bowflex PR1000, you must audit your available space. The official machine footprint is 100 inches long by 78 inches wide by 82 inches high (roughly 8'4" x 6'6" x 6'10"). However, for a dedicated strength training configuration, you need a functional clearance zone of at least 10 feet by 8.5 feet. This extra perimeter is non-negotiable for safe lat pulldown extensions, seated row cable travel, and emergency dismounts.
Because the PR1000 weighs approximately 148 lbs and relies on a wide base for lateral stability during unilateral movements, your flooring choice dictates the machine's lifespan and your joint health. Skip the interlocking EVA foam puzzle mats; they compress unevenly under the PR1000's stabilizer feet, causing the uprights to torque and the pulleys to bind.
The Optimal Flooring Stack
- Base Layer: 3/4-inch thick vulcanized rubber horse stall mats (typically $45-$60 per 4x6 ft sheet from agricultural suppliers). These provide an unyielding, level foundation that prevents the frame from racking.
- Top Layer (Optional): A 5mm high-density PVC gym flooring roll if you prefer a finished aesthetic over the raw rubber look, though the bare stall mat offers superior grip for the machine's rubberized feet.
Phase 2: The Unboxing and Essential Tool Upgrade
The Bowflex PR1000 ships with a basic assembly toolkit, but relying on it will add at least two hours to your build time and result in poorly torqued hardware. To execute a professional-grade installation, gather the following before cutting the first zip-tie:
Pro-Installer Tool Checklist:- Cordless power drill with metric hex-bit set (4mm, 5mm, 6mm)
- 13mm, 15mm, and 17mm open-ended wrenches and ratchets
- Rubber mallet (for seating tight pulley brackets without scratching the powder coat)
- Silicone-based lubricant spray (for the guide rods and pulley wheels)
Phase 3: Step-by-Step Assembly and Cable Threading
The most common failure mode in home gym installations is tightening bolts sequentially rather than holistically. Follow this sequence to ensure the PR1000 frame remains perfectly square.
Step 1: Base and Upright Stabilization
Assemble the front and rear stabilizer bars to the main base frame. Insert all carriage bolts and hex nuts, but do not fully tighten them. Leave about 3 threads exposed. Attach the main upright mast to the base. Once the entire lower skeleton is assembled and sitting flat on your rubber mat, use your ratchet to torque all base bolts down to flush. This allows the steel frame to settle into its natural geometry, preventing the "wobble" that plagues 40% of DIY home gym builds.
Step 2: Power Rod and Lat Tower Installation
Mount the Power Rod housing to the top rear of the upright mast. The PR1000 utilizes proprietary polymeric rods that generate up to 210 lbs of resistance. Handle these rods with care; scratching the outer casing can lead to micro-fractures under heavy loads. Next, bolt the lat tower extension to the top bracket. Ensure the lat pulley wheel spins freely without rubbing against the metal housing brackets.
Step 3: Cable Routing (The Critical Failure Point)
Cable threading is where the PR1000 setup makes or breaks your strength training experience. A misrouted cable will cause friction, fray the nylon sheath, and drastically reduce the smooth feel of the resistance.
- The Main Drive Cable: Feed the main cable from the Power Rod housing, down through the center of the upright mast, and out the bottom front. Ensure the cable sits inside the groove of every guide pulley. If it rides on the edge of the pulley flange, it will snap within months.
- The Lat Pulley Cable: Route this cable up through the top of the mast, over the lat tower pulley, and down to the lat bar. Crucial Detail: Apply a light mist of silicone lubricant to the cable where it contacts the top pulley wheel to reduce heat buildup during high-rep lat pulldowns.
- The Lower Pulley Cable: Attach the lower pulley bracket to the front stabilizer bar. Thread the secondary cable from the main drive, under the seat rail, and around the lower pulley wheel for seated rows and bicep curls.
Phase 4: Strength Training Configuration and Ergonomics
The Bowflex PR1000 delivers resistance via Power Rods, which provide linear variable resistance. This means the resistance feels lighter at the beginning of the concentric phase and peaks at the end of the movement. To maximize hypertrophy and strength gains, the Mayo Clinic's strength training protocols suggest focusing on time-under-tension (TUT) and controlled eccentrics, which perfectly synergizes with rod-based resistance.
Furthermore, adhering to the CDC physical activity guidelines for muscle-strengthening activities requires targeting all major muscle groups at least twice a week. The PR1000's multi-angle bench and adjustable pulley system allow you to configure a complete full-body split.
| Target Muscle Group | Pulley Setting | Attachment & Grip | Biomechanical Focus |
|---|---|---|---|
| Latissimus Dorsi | Top Lat Tower | Wide Lat Bar (Overhand) | Drive elbows down, 3-second eccentric release |
| Pectorals (Mid) | Mid-Pulley (No Bench) | Dual Ankle Cuffs (as handles) | Standing cable flyes, peak contraction hold |
| Rhomboids & Traps | Lower Pulley | V-Bar (Neutral Grip) | Seated rows, scapular retraction emphasis |
| Quadriceps | Lower Pulley | Ankle Harness (Leg Ext.) | Seated leg extensions, 1.5 rep style |
Phase 5: Maintenance and Real-World Troubleshooting
Even with a flawless installation, the PR1000 requires specific environmental and mechanical maintenance to survive heavy strength training cycles.
Power Rod Degradation and UV Exposure
The polymeric material inside the Power Rods is highly susceptible to ultraviolet (UV) light degradation. If your home gym is located in a garage or sunroom with direct sunlight hitting the machine, the rods will become brittle and lose their tensile memory within 12 to 18 months. Solution: Always drape an opaque, breathable machine cover over the rod housing when not in use, or install UV-blocking window film in your gym space.
Cable Fraying and Pulley Binding
If you hear a "clicking" sound or feel a stuttering sensation during the eccentric phase of a movement, your cables are likely riding off-center on the pulley wheels, or the pulley bearings are dry.
- Fix: Unload all resistance from the rods. Manually trace every inch of the cable. If you see exposed steel wire beneath the nylon sheath, order an OEM Bowflex replacement cable immediately—do not attempt to patch it with heat shrink or tape, as the 210 lbs of peak tension will snap a compromised cable instantly.
- Lubrication: Every 90 days, apply a dry PTFE (Teflon) lubricant to the pulley axles. Avoid WD-40 or wet oils, which attract dust and create an abrasive paste that grinds down the wheel bearings.
Expert Warning: Never leave the Bowflex PR1000 engaged under heavy tension (e.g., 150+ lbs) for extended periods when not in use. While the rods are designed for dynamic loading, keeping them bent at maximum deflection for hours on end accelerates polymer fatigue and will permanently reduce the machine's maximum resistance output over time.
By meticulously planning your spatial layout, upgrading your assembly tools, and respecting the biomechanics of rod-based resistance, your Bowflex PR1000 will transition from a boxed kit into a highly effective, joint-friendly strength training sanctuary capable of supporting years of progressive overload.
More gear to consider
All reviews
Impex Powerhouse Home Gym: Electrical Safety & Setup Mistakes

How to Switch Home Gyms Planet Fitness Memberships for a Couples Setup

The Ultimate Force Home Gym Floor Plan & Setup Guide
Bowflex Ultimate Home Gym Mirrors & Lighting: Pro vs Budget Compared
Powerline BSG10X Home Gym vs Foldable Compact Setups
