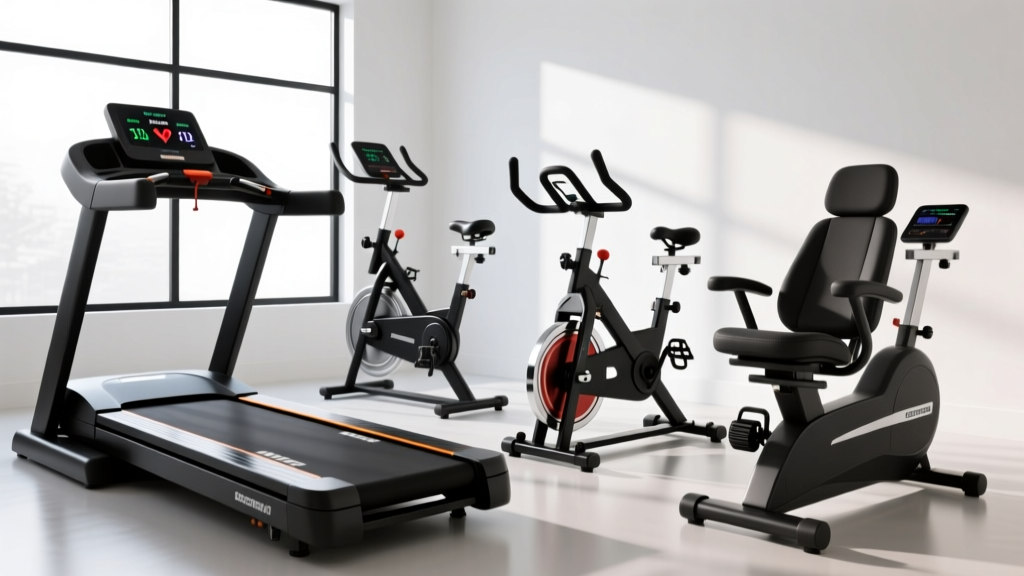
30 Minute Interval Training on Treadmill vs Bikes: Maintenance Guide
Transitioning from 30 minute interval training on treadmill to upright, recumbent, or spin bikes? Learn expert maintenance tips to prevent HIIT wear.

The Biomechanical Shift: From Belt to Pedal
Many athletes and home-gym enthusiasts begin their cardiovascular journey with a standard 30 minute interval training on treadmill protocol. While highly effective for improving VO2 max and burning calories, the repetitive eccentric loading on the knees, hips, and Achilles tendons often leads to overuse injuries. According to the Mayo Clinic's comprehensive guide on interval training, alternating between intense bursts of activity and recovery periods is phenomenal for cardiovascular health, but joint preservation is equally critical for long-term consistency.
This realization drives a massive migration from treadmills to stationary bikes. However, transitioning your high-intensity interval training (HIIT) to an upright, recumbent, or spin bike introduces an entirely new set of mechanical stresses. Rapid resistance jumps, out-of-the-saddle sprints, and heavy sweat accumulation can quickly degrade bike components if not properly maintained. As of 2026, modern magnetic resistance systems have largely eliminated the need for friction pad replacements, but drivetrains, servo motors, and carriages still demand rigorous, specific care to survive the torque of daily HIIT sessions.
Spin Bikes (Indoor Cycles): Managing High-Torque Drivetrains
Spin bikes are the closest biomechanical match to the treadmill when it comes to mimicking high-cadence sprints and standing climbs. Models like the Schwinn IC4 and Bowflex C7 utilize a Poly-V belt drive connected to a magnetic flywheel. During a 30-minute HIIT session, the torque applied to the pedals during standing sprints can exceed 800 watts of instantaneous power output, placing immense lateral stress on the bottom bracket and drive belt.
The Belt Deflection Test
Unlike treadmill belts that require silicone lubrication, spin bike Poly-V belts are dry. However, they do stretch over time. A slipping belt during a max-effort sprint is a severe safety hazard that can cause a sudden loss of cadence control.
- The Test: Press the belt midway between the crank and the flywheel with your thumb, applying roughly 10 lbs of pressure.
- The Spec: The belt should deflect exactly 1/4 to 1/2 inch.
- The Fix: If it deflects more than 1/2 inch, loosen the rear flywheel axle nuts and slide the flywheel back to increase tension. Replacement belts for these models typically cost between $45 and $60 and should be swapped every 2 to 3 years under heavy HIIT usage.
Eddy Current Magnetic Brakes
The Keiser M3i uses an eddy current magnetic brake system. Because there is no physical contact between the magnet and the aluminum flywheel, there is zero friction wear. However, the exposed rear flywheel acts as a magnet for dust and aerosolized sweat. Wipe the flywheel fins weekly with a damp microfiber cloth; accumulated grime can cause micro-slippage and degrade the smoothness of your resistance transitions.
Upright Bikes: Servo Motors and Console Protection
Upright bikes, such as the Sole B94 or NordicTrack Commercial S15i, rely on motorized magnetic resistance. When you tap the screen to jump from Level 4 to Level 18 for a sprint interval, a small internal servo motor physically moves a magnet closer to the steel flywheel.
⚠️ CRITICAL WARNING: Servo Motor StrippingNever force the pedals backward to 'cool down' immediately after a max-effort sprint while the resistance is still engaged. Back-pedaling against high magnetic tension can strip the internal plastic gears of the servo motor, resulting in a $150+ repair bill and a complete loss of automated resistance control. Always drop the resistance to Level 1 before reversing pedal direction.
Console Splash Zones
Upright bikes place the digital console directly in the 'splash zone' of your sweat. Human sweat has a pH between 4.5 and 7.0, making it highly corrosive to exposed electronics and conductive membrane buttons. Apply a clear, static-cling screen protector to your display. For membrane buttons, wipe them down with a damp cloth and mild dish soap—never use harsh glass cleaners like Windex, which will degrade the conductive layers and cause button unresponsiveness.
Recumbent Bikes: Track Lubrication and Carriage Care
Recumbent bikes like the Spirit XBR95 or Sole R92 are the ultimate joint-savers, offering lumbar support while allowing for rigorous lower-body intervals. The unique maintenance challenge here lies in the seat carriage system.
The Saline Crystal Threat
When performing intense intervals on a recumbent bike, sweat drips directly off your lower back and glutes onto the aluminum seat adjustment rail. As the sweat evaporates, it leaves behind hardened saline crystals. These crystals act like sandpaper against the nylon carriage wheels, eventually causing the seat to 'stick' or grind when you try to adjust it.
- Wipe the seat rail with a damp cloth after every single workout.
- Once a month, apply a light coat of 100% silicone spray (such as 3M Silicone Lubricant) to the rail.
- Never use WD-40 or petroleum-based oils. Petroleum products will chemically degrade the nylon carriage wheels and attract dust, creating a thick, abrasive sludge.
HIIT Maintenance Matrix: Frequency and Action Items
To keep your equipment running smoothly through years of interval training, adhere to this structured maintenance matrix. The American Heart Association recommends at least 75 minutes of vigorous-intensity aerobic activity per week, which translates to roughly three to four intense HIIT sessions on your bike.
| Component | Bike Type | Frequency | Action Required |
|---|---|---|---|
| Poly-V Drive Belt | Spin / Upright | Monthly | Check deflection (1/4' - 1/2'); adjust tension. |
| Seat Carriage Rail | Recumbent | Weekly | Wipe saline; apply 100% silicone spray monthly. |
| Bottom Bracket | All Types | Bi-Annually | Check for lateral play; tighten crank arms to 35 Nm. |
| Console / Display | Upright / Recumbent | Every Use | Wipe sweat; ensure static-cling protector is intact. |
| Pedal Threads | Spin Bike | Quarterly | Remove, clean, and apply marine-grade grease to prevent seizing. |
Troubleshooting Edge Cases in Interval Training
Squeaking During High-Cadence Sprints
If your spin bike develops a rhythmic squeak only when your cadence exceeds 100 RPM, the issue is rarely the flywheel bearing. In 90% of cases, it is the pedal cage or the cleat interface. Remove the pedals, clean the threads with a wire brush, and reapply a high-quality marine grease. For clip-in pedals (like SPD or Delta), inspect the tension springs and apply a single drop of dry PTFE chain lube.
Console Flickering During Resistance Jumps
If your upright or recumbent bike's console dims or flickers exactly when the motor shifts resistance for a new interval, your power brick is failing to deliver adequate amperage. The servo motor requires a surge of current to move the magnet quickly. If the power adapter is degrading, it cannot handle the voltage drop. Replacing the OEM power supply (usually a 9V or 12V DC adapter, costing around $25) will instantly resolve the flickering and protect the console's internal logic board from voltage spikes.
Pro-Tip for Equipment Longevity: 'The environment matters as much as the machine. Keep your home gym's humidity between 40% and 50%. High humidity accelerates galvanic corrosion where dissimilar metals meet (like steel bolts in aluminum flywheel housings), while extremely low humidity increases static electricity, which can fry the PCB boards inside motorized bikes.' - FitGearPulse Engineering Desk, 2026
Ultimately, while the 30 minute interval training on treadmill remains a gold standard for weight-bearing cardio, transitioning to a stationary bike offers a sustainable, joint-friendly alternative. By understanding the unique mechanical architecture of spin, upright, and recumbent bikes—and respecting the corrosive power of sweat and the torque of HIIT—you can ensure your equipment survives the long haul, delivering flawless performance for every sprint and recovery interval.
More gear to consider
All reviews
Better Me 28 Day Treadmill Challenge vs 2026 Air Bike Trends
Air Bike vs Assault Bike: Better Than 30 min on the treadmill?

Space Planning: Used Treadmill vs Air Bike & Assault Bike

Rowing Buying Guide & Technique: Lubrication for Treadmill Belt Care

Treadmill Origin & Space: Elliptical vs Treadmill Home Layout Guide
