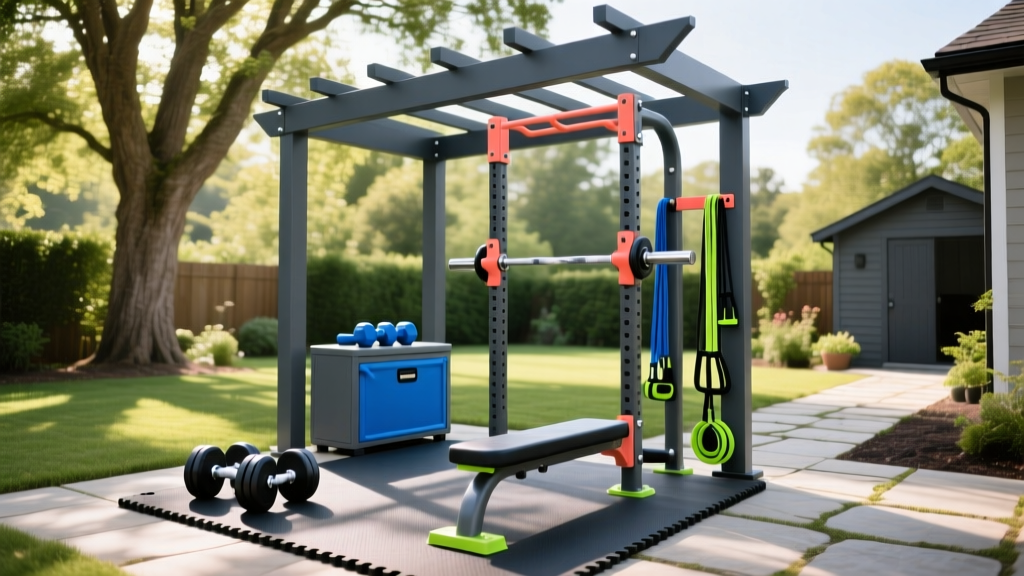
Outdoor Home Gym Inspiration: Weatherproof Setup Walkthrough
Transform your backyard with our outdoor home gym inspiration guide. A complete weatherproof setup walkthrough covering flooring, roofing, and rust.

When scrolling through social media for home gym inspiration, it is incredibly easy to fall in love with the aesthetic of an open-air backyard training space. The idea of lifting heavy iron under the sun or doing pull-ups with a breeze is deeply appealing. However, transitioning from a curated photo to a functional, year-round outdoor gym requires a rigorous understanding of environmental stressors. UV radiation, moisture, thermal expansion, and wind uplift will destroy poorly planned equipment within months.
This complete setup and installation walkthrough moves past the superficial aesthetics and dives into the structural, material, and environmental engineering required to build an outdoor home gym that actually survives the elements.
Step 1: Site Selection and Microclimate Mapping
Before pouring concrete or ordering rubber mats, you must map your yard's microclimate. An outdoor gym cannot simply be dropped onto a flat patch of grass.
Drainage and Grading
Water pooling beneath heavy gym flooring will create a breeding ground for mold and accelerate the corrosion of your rig's base plates. Your site must have a minimum slope of 1/4 inch per foot away from your home's foundation to ensure proper runoff. If your yard is perfectly flat, you will need to excavate and build up a sub-base using crushed angular gravel (not round pea gravel, which shifts under load).
Warning: The Frost Line FactorIf you live in a climate with freezing winters and plan to anchor a power rack, your concrete footings must extend below the local frost line (typically 32 to 48 inches deep in northern US states). If you anchor to a shallow slab, frost heave will shift the concrete over winter, warping your rack and misaligning your barbell sleeves.
Step 2: Weatherproof Flooring and Foundation Installation
Standard indoor gym flooring will fail outdoors. Interlocking crumb-rubber tiles use a polyurethane binder that breaks down under UV exposure, causing the tiles to flake and crumble within 12 to 18 months.
The Ultimate Outdoor Flooring Stack
- Base Layer: 4 inches of compacted 3/4-inch crushed stone (Class II road base).
- Moisture Barrier: Heavy-duty woven landscape fabric (minimum 3 oz per square yard) to prevent weed growth while allowing water permeability.
- Surface Layer: 4x6 ft, 3/4-inch thick vulcanized rubber horse stall mats (e.g., Sundown Horse Mats, approximately $55 to $65 each). Vulcanized rubber is non-porous, highly UV-resistant, and dense enough (roughly 100 lbs per mat) to resist wind uplift.
Pro Tip: Leave a 1/2-inch expansion gap between the stall mats and any rigid retaining walls or concrete borders. Rubber expands in the summer heat, and without a gap, the mats will buckle in the center of your lifting platform.
Step 3: Choosing Climate-Resistant Equipment
The single biggest mistake in outdoor gym builds is buying standard indoor powder-coated equipment. The finish on steel is your only defense against oxidation. Below is a breakdown of steel finishes and their viability for outdoor environments.
| Steel Finish | Cost Premium | Outdoor Lifespan | Best Use Case |
|---|---|---|---|
| Standard Powder Coat | Base Price | 1 - 3 Years | Fully covered, arid climates only |
| E-Coat + Powder Coat | +15% | 4 - 7 Years | Humid climates, covered patios |
| Hot-Dip Galvanized | +30% to 40% | 20 - 50+ Years | Fully exposed, coastal, or snowy regions |
| Marine-Grade Stainless | +150%+ | Lifetime | Luxury builds, direct salt-air exposure |
For a permanent outdoor rig, hot-dip galvanizing is the gold standard. According to the American Galvanizers Association, the metallurgical bond created by hot-dip galvanizing provides a zinc carbonate patina that actively protects the underlying steel from atmospheric corrosion. Brands like Rogue Fitness offer hot-dip galvanized upgrades on their Monster and RM-3 racks (typically adding $400 to $700 to the base price), which is a mandatory investment for exposed setups.
Step 4: Overhead Protection and Wind Uplift Mitigation
Even if your rack is galvanized, your barbells, dumbbells, and plates are likely not. You need overhead protection. However, building a roof introduces a major structural hazard: wind uplift.
Shade Sails vs. Polycarbonate Roofs
- HDPE Shade Sails: A 280 GSM (grams per square meter) High-Density Polyethylene shade sail costs around $80 to $150. They block 90% of UV rays and allow wind to pass through the porous fabric. Installation rule: You must use turnbuckles and tension them to a minimum of 150 lbs of force per corner to prevent violent flapping and tearing during storms.
- Polycarbonate Pergola Kits: Kits like the Palram Arcadia 5000 (approx. $2,200 to $2,800) offer superior rain and snow protection. However, solid roofs act as sails. If you use a solid roof, the supporting posts must be anchored using Simpson Strong-Tie galvanized post bases embedded in 12-inch diameter, 36-inch deep concrete footings. Do not rely on surface-level deck blocks for a roofed structure.
"When planning an outdoor structure, always account for the 'snow load' if you live in northern latitudes. Standard polycarbonate panels will shatter or collapse under wet, heavy snow if the roof pitch is less than 3/12. Ensure your design includes a steep enough angle for natural shedding."
Step 5: Temperature and Humidity Mitigation
Training in an outdoor gym during the peak of summer requires active climate management. The human body's ability to cool itself via sweat evaporation plummets when relative humidity exceeds 60%. The National Weather Service emphasizes that the Heat Index—what the temperature actually feels like—can be up to 15 degrees higher in direct sunlight compared to shaded areas.
Cooling Infrastructure
Do not rely on standard indoor fans. You need equipment rated for damp locations to prevent electrical shorts.
- Airflow: Install a 20-inch outdoor-rated box fan (e.g., Lasko Outdoor Fan, ~$70) mounted to a structural post using heavy-duty zip ties or custom U-brackets, positioned to blow across your primary lifting zone.
- Evaporative Cooling: For arid climates (humidity below 40%), a misting system attached to your overhead shade structure can drop the ambient temperature by up to 20°F. Avoid misting in already humid climates, as it will only make the air feel heavier and accelerate rust on your bare steel knurling.
Step 6: The Monthly Rust Prevention Protocol
Even with galvanized racks, your implements (barbells, kettlebells, weight plates) will require aggressive maintenance. Bare steel knurling will flash-rust within 48 hours of exposure to heavy morning dew.
The 3-Step Monthly Maintenance Routine
- The Nylon Scrub: Once a month, use a stiff nylon brush (never brass or steel wire on outdoor bars, as it can embed foreign metals and cause galvanic corrosion) to scrub chalk and dead skin out of the knurling.
- The Solvent Wipe: Wipe the shaft and sleeves down with a microfiber cloth lightly dampened with mineral spirits to remove built-up oils and environmental pollutants.
- The Lanolin Coat: Apply a light coat of a lanolin-based rust inhibitor like Fluid Film NAS or Woolwax to the sleeves and the shaft. Unlike synthetic oils (like 3-in-One), lanolin creeps into the microscopic pores of the steel and does not wash away easily in the rain. Wipe off the excess with a dry rag so the bar doesn't feel slippery during your next deadlift session.
Building an outdoor gym is one of the most rewarding projects you can undertake, blending raw functional fitness with the natural environment. By prioritizing structural drainage, investing in hot-dip galvanized steel, and adhering to a strict lanolin-based maintenance protocol, your backyard setup will remain a premier training sanctuary for decades, far outlasting any indoor garage gym.
More gear to consider
All reviews
Bowflex Ultimate 2 Home Gym vs 2026 Zero-Damage Apartment Trends

Weight Selection Guide for a Nice Home Gym Layout

Compact Home Gym Room Design: Maintenance and Longevity Tips

Home Gym Dedication Act: 2026 Garage Air & Floor Trends

Marcy MWM 990 150 Stack Home Gym: Couples Setup Review
