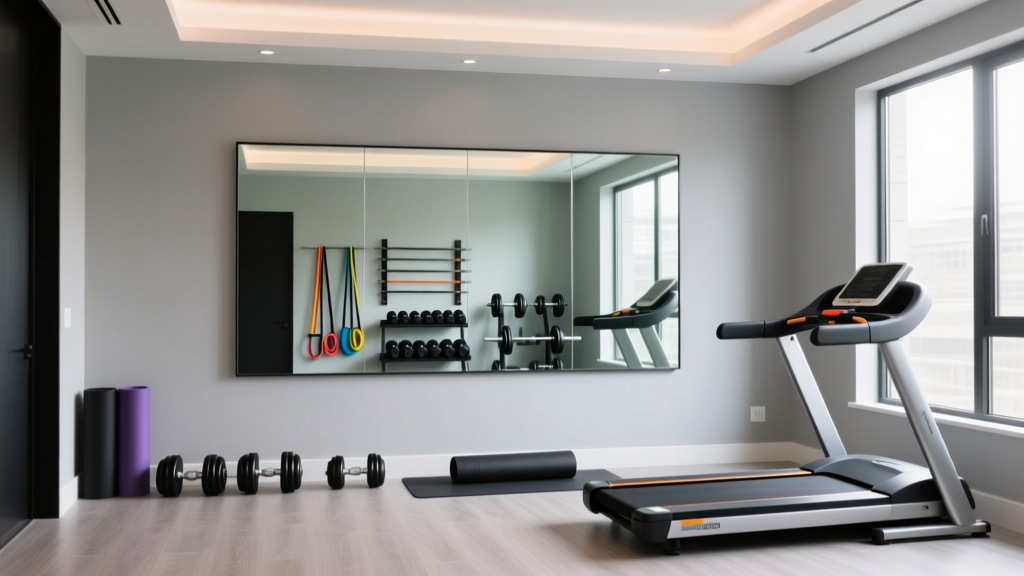
Best Home Gym Wall Mirror Ideas for Layout Optimization
Transform your workout space with these beginner-friendly home gym wall mirror ideas. Learn step-by-step layout optimization, placement, and installation.

Why Mirrors Are a Layout Optimization Tool
When designing a home gym, most beginners view mirrors purely as aesthetic additions. However, from a spatial design and biomechanical perspective, strategic mirror placement is one of the most effective layout optimization tools available. Properly positioned mirrors double the perceived square footage of a cramped garage or basement, bounce natural light into dark corners, and provide real-time visual feedback for lifting mechanics. According to the American Council on Exercise (ACE), visual feedback is critical for motor learning and maintaining proper spinal alignment during complex movements like squats and deadlifts.
If you are searching for practical home gym wall mirror ideas that go beyond simply sticking glass to drywall, this step-by-step guide will walk you through space assessment, material selection, strategic placement, and professional-grade installation.
Step 1: Assessing Light and Spatial Flow
Before purchasing any glass, you must map your gym's lighting and traffic flow. Mirrors act as light multipliers. If your gym has a single window or a primary overhead LED fixture, placing a large mirror on the directly opposite wall will bounce that light back into the room, effectively increasing the ambient lux levels without adding electrical fixtures.
The Glare Test
Lie down on your back in the exact spot where your bench press or floor-work zone will be. Look up at the wall where you plan to install the mirror. If the reflection catches direct glare from a window or exposed bulb, it will blind you during mid-rep exertion. Layout Fix: Angle the mirror slightly downward (using a beveled edge or specialized mounting brackets) or shift the mirror 12 to 18 inches off the direct center axis of the light source.
Step 2: Selecting the Right Mirror Material
Not all mirrors are built to withstand the vibrations of dropped dumbbells or the accidental impact of a swinging kettlebell. Standard 1/8-inch bathroom mirrors are a severe safety hazard in a fitness environment. According to industry standards referenced by Guardian Glass, gym mirrors should utilize thicker glass with a safety backing film to prevent shattering upon impact.
| Material Type | Thickness | Pros | Cons | Est. Cost (per 3x5 ft) |
|---|---|---|---|---|
| Tempered Glass (with Safety Film) | 1/4 inch | Shatters into dull pebbles; highly impact-resistant; zero optical distortion. | Heavy (requires robust mounting); cannot be cut after tempering. | $140 - $220 |
| Annealed Glass (with CAT II Film) | 1/4 inch | Excellent optical clarity; can be custom-cut to fit around outlets. | Breaks into sharp shards if the safety film fails or is improperly applied. | $90 - $150 |
| Acrylic (Plexiglass) | 1/4 inch | Shatterproof; lightweight; easy to mount with adhesive. | Scratches easily; prone to 'funhouse' warping if the wall isn't perfectly flat. | $160 - $250 |
| Polycarbonate | 1/8 inch | Virtually indestructible; ideal for heavy CrossFit drop zones. | Expensive; lower optical clarity than glass. | $250 - $350 |
Expert Recommendation: For 90% of home gyms, 1/4-inch annealed glass with a professionally applied CAT II safety backing film offers the best balance of optical clarity, safety, and cost. A popular, budget-friendly option is the Glacier Bay 36 in. x 60 in. Frameless Beveled Edge Mirror (approx. $110), though you must apply aftermarket safety film if it isn't pre-treated.
Step 3: Strategic Placement for Biomechanical Feedback
Where you put the mirror dictates how useful it is. Here is how to optimize placement based on your equipment layout.
The Squat Rack Zone
When squatting, you need to monitor knee tracking, hip depth, and bar path. The Rule: The mirror should be placed directly in front of the rack, but the bottom edge must be exactly 16 to 20 inches off the floor. This specific height allows you to see your foot placement and ankle mobility without the bottom 16 inches of the mirror being wasted on empty floor space or hidden behind the rack's uprights.
The Dumbbell & Kettlebell Zone
For unilateral work (like lunges or single-arm rows), you need lateral visibility. Place a secondary, narrower mirror (e.g., 24 inches wide) on the side wall adjacent to your dumbbell rack. This allows you to check for shoulder elevation and spinal rotation without twisting your neck mid-rep.
Step 4: Professional-Grade Installation Guide
Improper installation is the leading cause of mirror failure in home gyms. Follow this exact sequence for a secure, rattle-free mount.
- Locate and Mark Studs: Use a magnetic stud finder to mark the center of your wall studs. Drywall anchors alone will not support the 60+ lb weight of a 1/4-inch glass mirror during wall vibrations.
- Install the Z-Bar (French Cleat): Screw the wall-side of an aluminum Z-clip (such as the Hangman French Cleat) directly into the studs. Ensure it is perfectly level using a 48-inch torpedo level.
- Apply the Correct Adhesive: If using a hybrid mount (cleat + adhesive), you MUST use a mirror-specific mastic like Loctite PL 520 Mirror Adhesive. Warning: Standard construction adhesives (like original Liquid Nails) contain solvents that will eat through the mirror's silver backing, causing permanent black spots and desilvering within months.
- Secure the Bottom Channel: Install a rubber-lined J-channel at the baseboard to support the mirror's bottom weight and prevent the glass from slipping off the Z-clip during heavy deadlift drops.
Edge Cases: Baseboards, Outlets, and Acoustics
Real-world home gym layouts are rarely perfect, empty boxes. Here is how to handle common structural obstacles.
Dealing with Baseboards
If your wall has thick baseboards, a mirror mounted flat against the drywall will tilt forward, creating a distorted reflection and a gap at the bottom. Solution: Either cut the baseboard out using an oscillating multi-tool so the mirror sits flush, or mount a 1/2-inch plywood backing board to the studs first, bringing the mounting surface flush with the baseboard's protrusion.
Working Around Electrical Outlets
If an outlet is in your desired mirror zone, do not simply cut a hole in the glass (which requires expensive professional water-jet cutting and compromises structural integrity). Instead, use a mirror extension ring (outlet extender) and mount a smaller, custom-cut acrylic mirror tile around the outlet, leaving a 2-inch gap for safety.
Acoustic and Vibration Dampening
Dropping bumper plates creates low-frequency shockwaves that travel through the floor and up the walls, causing mirrors to rattle against their mounts. To prevent this, apply a continuous bead of 100% silicone caulk behind the mirror's perimeter before pressing it into the Z-clip. The silicone acts as a dampener, absorbing high-frequency vibrations and eliminating the annoying 'buzzing' sound that occurs when you drop heavy weights. For deeper insights into managing gym acoustics and structural vibrations, resources from Family Handyman provide excellent foundational DIY techniques for securing heavy wall fixtures in high-vibration environments.
Final Layout Checklist
- Verify mirror thickness is at least 1/4-inch.
- Confirm safety backing film (CAT I or CAT II) is applied.
- Ensure bottom edge is 16-20 inches from the floor for squat/deadlift visibility.
- Check that Loctite PL 520 (or equivalent mirror-safe mastic) is used if adhesives are required.
- Test for overhead glare while lying in the bench press position.
By treating your mirrors as functional layout components rather than mere decorations, you will create a home gym that feels twice as large, operates safely under heavy loads, and actively improves your training mechanics.
More gear to consider
All reviews
Compact Home Gym Room Design: Maintenance and Longevity Tips

IKEA Home Gym vs Budget Gear: The Ultimate $500 Setup

Space-Saving Body Craft Home Gym Setup for Apartments

Marcy Home Gym Workout Routine PDF Free Download & Mirror Placement
Space-Saving DIY Home Gym: Compact Foldable Solutions
