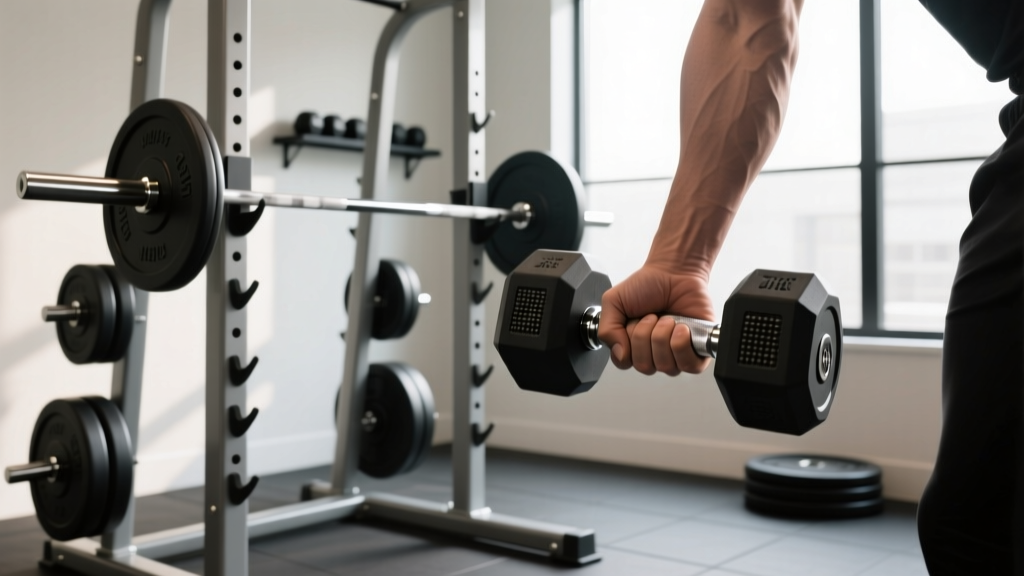
Single Arm Dumbbell to Barbell: Weight & Knurling Setup
Upgrade from single arm dumbbell work to heavy barbell lifts. Our complete setup walkthrough covers rack installation, Olympic barbell weight, and knurling.

The Complete Free-Weight Station: From Unilateral to Bilateral Loading
Transitioning from isolated unilateral movements—like the heavy single arm dumbbell row or split squat—to comprehensive bilateral barbell training requires more than just buying a bar. It demands a meticulously planned equipment setup. In 2026, home and commercial gym standards have evolved, and understanding the precise engineering of your Olympic barbell is non-negotiable for safety and performance.
This complete setup and installation walkthrough will guide you through integrating your rack for both dumbbell and barbell work, followed by a deep-dive buying guide into Olympic barbell weight classes, tensile strength, and knurling geometries. Whether you are outfitting a garage gym or upgrading a commercial facility, these exact specifications will ensure your equipment matches your biomechanical needs.
Phase 1: Rack Preparation and Single Arm Dumbbell Clearance
Before unboxing your Olympic barbell, your power rack must be properly anchored and configured to handle dynamic loads. If you frequently perform single arm dumbbell exercises inside the rack (such as unilateral RDLs or heavy dumbbell floor presses off the pins), spatial clearance is critical.
Installation Pro-Tip: When bolting down a flat-foot rack like the Rogue RML-390F, use a digital torque wrench. Torque all 3/4-inch Grade 8 hardware to exactly 85 ft-lbs. For single arm dumbbell storage, install a single-post storage peg on the rear upright at a height of 42 inches to prevent interference with the barbell's sleeve rotation during heavy squats.Clearance Metrics for Unilateral Work
- Standard Rack Depth (24 inches): Adequate for barbell squats, but restrictive for heavy single arm dumbbell lunges. Consider adding a 24-inch extension or utilizing a 30-inch deep rack.
- Spotter Arm Placement: Set flip-down safeties at the lowest point of your single arm dumbbell split squat, typically 6 to 8 inches from the floor, utilizing UHMW plastic liners to protect your dumbbell handles if dropped.
Phase 2: Olympic Barbell Buying Guide – Weight and Tensile Strength
The core of your setup is the barbell. The term 'Olympic' refers to the 50mm rotating sleeves that accommodate standard bumper plates, but the shaft weight and material science vary drastically. According to BarBend's comprehensive barbell engineering guide, selecting the wrong tensile strength can lead to permanent bar deformation (yielding) under heavy eccentric loads.
Weight Classes and Shaft Specifications
While the 20kg (44 lb) men's bar and 15kg (33 lb) women's bar are the international standards, specialty bars have carved out a massive niche in modern training facilities.
| Barbell Type | Weight | Shaft Diameter | Primary Use Case |
|---|---|---|---|
| Men's Olympic (IWF) | 20 kg (44 lbs) | 28 mm | Weightlifting, dynamic effort |
| Women's Olympic (IWF) | 15 kg (33 lbs) | 25 mm | Smaller grip, Olympic lifts |
| Powerlifting (IPF) | 20 kg (44 lbs) | 29 mm | Squat, Bench, Deadlift |
| Multi-Purpose | 20 kg (44 lbs) | 28.5 mm | General fitness, hybrid |
The Tensile Strength Threshold
Tensile strength, measured in Pounds per Square Inch (PSI), dictates how much weight the bar can hold before bending. Yield strength dictates how much weight it can hold before permanently bending. For any serious home or commercial setup in 2026, never purchase a bar with a tensile strength below 165,000 PSI.
- 165k - 190k PSI: Entry-level. Acceptable for beginners, but susceptible to permanent bending if dropped on safety pins with heavy loads.
- 190k - 205k PSI: The gold standard for multi-purpose and power bars (e.g., the standard Rogue Ohio Power Bar sits at 205k PSI).
- 215k+ PSI: Elite competition grade (e.g., Eleiko OP Power Bar). Extremely stiff, virtually unbendable under human-generated loads.
Phase 3: The Knurling Matrix – Matching Grip to Your Lift
Knurling is the cross-hatched pattern machined into the steel shaft. It is the only point of contact between you and the load. When transitioning from the smooth, contoured handle of a single arm dumbbell to a raw steel barbell, knurl geometry becomes the most critical factor in your buying decision.
"The depth and shape of the knurl determine whether a barbell feels like sandpaper tearing your calluses or a secure lock that bites into the skin without breaking it." — Garage Gym Reviews Equipment Analysis
Knurl Geometries Explained
- Hill Knurl: The peaks of the knurl are rounded off. It feels smooth and is ideal for high-rep CrossFit workouts or bare hands, but lacks the aggressive bite needed for heavy 1RM deadlifts.
- Mountain Knurl: Sharp, pointed peaks. Extremely aggressive. It will tear calluses if used for high-volume hypertrophy work but provides an unbreakable grip for maximal singles.
- Volcano Knurl: The peaks are cratered at the top, creating four distinct biting edges per 'diamond' instead of one sharp point. This is the superior choice for 90% of lifters in 2026. It provides the mechanical grip of a mountain knurl with the skin-preservation of a hill knurl.
Markings and Center Knurl
Pay attention to the ring markings on the shaft. IWF (weightlifting) marks are 910mm apart, while IPF (powerlifting) marks are 810mm apart. Dual-marked bars feature both. Furthermore, if your training involves heavy front squats or back squats, ensure the bar features a center knurl to grip the knurling of your shirt or back. If you primarily do bench pressing and deadlifting, a smooth center ring prevents unnecessary abrasion on your shins and chest.
Phase 4: Barbell Unboxing, Installation, and Maintenance
Once you have selected the correct weight, tensile strength, and knurl type, proper installation and initial maintenance are required to ensure the sleeves spin freely and the steel does not oxidize.
Step-by-Step Prep Walkthrough
- Unboxing: Carefully slice the cardboard tube. Do not use a box cutter deep into the box, as you risk scoring the steel shaft or damaging the knurl.
- Cosmoline Removal: Factory bars are coated in Cosmoline (a rust-preventative petroleum jelly). Use a microfiber cloth and a light degreaser or mineral spirits to wipe down the shaft and sleeves.
- Bushing Lubrication: Most modern power bars use bronze bushings. Apply 3-5 drops of 3-IN-ONE oil or synthetic barbell oil to the seam where the sleeve meets the shaft. Spin the sleeve 20 times to distribute the lubricant.
- Rack Loading: Install UHMW-lined J-cups on your rack at the appropriate height. Always load the barbell symmetrically to prevent uneven wear on the rack's crossmembers.
Troubleshooting Common Setup Failures
Even with premium equipment, installation errors can lead to equipment failure. Watch out for these edge cases:
- Sleeve Spin-Out: If the sleeve wobbles laterally, the snap ring or end-bolt has loosened during shipping. Use a specialized snap-ring plier to reseat the ring. Do not attempt to tighten the end-bolt with a standard flathead, as this can strip the hex socket.
- Knurl Oxidation: Bare steel volcano knurling will rust within weeks in high-humidity environments. Brush the knurl weekly with a brass wire brush and apply a microscopic layer of mineral oil. Never use steel brushes, which will strip the zinc or chrome coating.
- Rack Hardware Loosening: The vibration from dropping heavy single arm dumbbells or barbell deadlifts onto the rack safeties will slowly back out rack bolts. Re-torque all structural hardware every 90 days.
Final Thoughts on Your Free-Weight Ecosystem
Building a comprehensive strength station requires respecting the engineering behind every piece of steel. By properly configuring your rack to accommodate both heavy single arm dumbbell accessories and a meticulously chosen Olympic barbell, you create a seamless training environment. Prioritize a 205k+ PSI tensile strength and a volcano knurl pattern for the ultimate balance of durability and grip, and maintain your equipment rigorously to ensure it lasts a lifetime.
More gear to consider
All reviews
Barbell Guide: Knurling & Bent Over Dumbbell Rows Muscles Worked

Adjustable Dumbbell Setup for the Lying Dumbbell Chest Press

ZIVA Dumbbell Rack Solutions: 2026 Storage Market Trends

Rack Longevity: Storing Weights After a Tricep Press with Dumbbells

Squats With Two Dumbbells: 2026 Urethane vs Rubber Hex Market Trends
