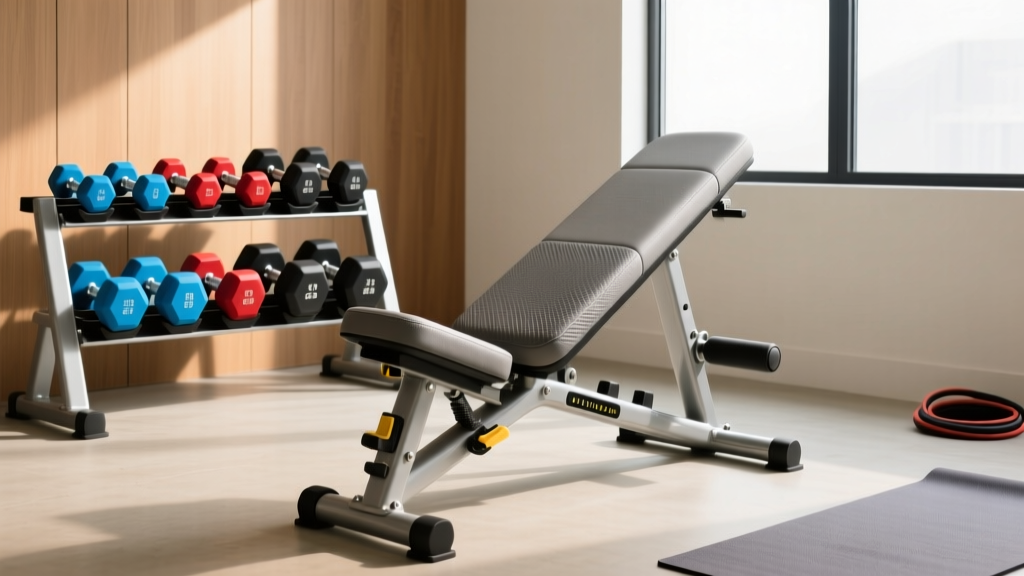
Setting Up Your Home Gym for the 30 Degree Incline Dumbbell Press
Master the complete home gym setup for neoprene dumbbells, from rack installation to bench calibration, to perfect your 30 degree incline dumbbell press.

The Neoprene Advantage for Home Gyms in 2026
When outfitting a home gym, selecting the right free weights is only half the battle; creating an optimized environment for specific movements is where true progress happens. Neoprene-coated dumbbells remain the gold standard for residential setups. Unlike bare cast iron or urethane, the 3mm to 5mm neoprene coating dampens acoustic impact, protects flooring from micro-abrasions, and provides a tactile, sweat-resistant grip. As of 2026, high-quality neoprene hex dumbbells (such as the CAP Barbell Neoprene Hex series) typically range from $1.40 to $2.10 per pound, making them a cost-effective and floor-friendly investment.
However, neoprene dumbbells possess unique physical characteristics—most notably a thicker handle diameter (often 35mm to 38mm compared to the standard 28mm chrome handle) and a bulky hex head. These traits directly influence how you store, handle, and execute precise movements like the 30 degree incline dumbbell press. This comprehensive walkthrough will guide you through the physical installation of your storage rack, the calibration of your adjustable bench, and the biomechanical setup required to isolate the upper chest without joint strain.
Phase 1: Floor Preparation and Mat Installation
Before installing racks or unboxing weights, you must prepare the foundation. Neoprene is highly durable against compressive forces but is vulnerable to shear tearing if dragged across porous concrete or rough wood grain.
- Material Selection: Procure 3/4-inch thick vulcanized rubber horse stall mats (typically 4x6 feet). Avoid cheap, interlocking EVA foam tiles, which compress unevenly under heavy loads and degrade within 12 months.
- Layout Strategy: Position the mats to cover the entire bench footprint plus a 3-foot perimeter on all sides. This accounts for the natural arc of dumbbell drops during fatigue-induced failure sets.
- Seam Sealing: Use a heavy-duty double-sided carpet tape or a polyurethane construction adhesive along the seams to prevent the mats from shifting when you step back to rack your weights.
Phase 2: Wall-Mounted Rack Installation Walkthrough
Neoprene hex dumbbells require tiered storage to prevent the rubberized edges from warping under sustained, uneven pressure. A wall-mounted 3-tier rack is the most spatially efficient solution for home gyms.
Step-by-Step Mounting Procedure
- Locate the Studs: Use a magnetic or electronic stud finder to locate wooden wall studs, which are standardly spaced 16 inches on-center. Mark the center of each stud with a pencil.
- Pre-Drill Pilot Holes: Hold the rack bracket against the wall, ensuring it is perfectly level. Mark the bolt holes. Use a 7/32-inch drill bit to pre-drill pilot holes 2.5 inches deep into the studs. This prevents the wood from splitting.
- Secure the Brackets: Drive 3/8-inch x 3-inch hex lag screws through the bracket holes into the studs using a socket wrench. Do not use drywall anchors; a loaded 3-tier rack can easily exceed 300 pounds, which will rip standard anchors out of the gypsum.
- Load Distribution: Place your heaviest neoprene dumbbells (e.g., 50+ lbs) on the bottom tier to lower the center of gravity, and lighter pairs (10-25 lbs) on the top tier for easy access during warm-ups.
Because neoprene coatings add bulk, the handle diameter on a 30lb neoprene dumbbell can reach 38mm. This thicker grip demands significantly more forearm flexor engagement. When transitioning to the 30 degree incline dumbbell press, lifters often experience premature grip failure before the pectoral muscles reach true muscular failure. Consider keeping liquid chalk nearby or utilizing lifting straps for your heaviest working sets.
Phase 3: Calibrating the True 30-Degree Bench Angle
The most common failure mode in home gyms is the 'false incline.' Many budget adjustable benches (priced under $150) utilize a basic pin-and-ladder system where the first incline notch is marketed as 30 degrees, but actually rests at 42 to 45 degrees. According to biomechanical analyses cited by the National Strength and Conditioning Association (NSCA), an angle exceeding 30 degrees begins to shift the primary load from the clavicular head of the pectoralis major (upper chest) to the anterior deltoid (front shoulder).
The Calibration Fix
To guarantee a true 30-degree setup, you must verify your equipment:
- Purchase a digital angle finder or inclinometer (such as the Wixey WR300, typically around $25).
- Place the base of the digital protractor flat against the seat pad, and the magnetic edge against the backrest pad.
- If your bench's first notch reads 40+ degrees, you have two options: purchase a dedicated 30-degree wedge pad, or upgrade to a premium bench like the Rogue AB-2 or Fitness Reality 1000 Super Max, which feature micro-adjustable ladder rungs that allow for exact 15, 30, and 45-degree lock-ins.
Phase 4: Biomechanical Setup for the 30 Degree Incline Dumbbell Press
With your floor protected, rack installed, and bench calibrated, you are ready to execute the movement. The 30 degree incline dumbbell press requires a specific physical setup to maximize upper chest hypertrophy while protecting the rotator cuff.
Step 1: The Retrieval and Kick-Up
Because neoprene dumbbells are bulky, resting them on your knees while seated is awkward and unstable. Sit on the 30-degree bench with the dumbbells resting vertically on your lower thighs, just above the knees. As you recline, aggressively 'kick' one knee up to launch the dumbbell into position, followed immediately by the other. Do not attempt to press the weights from a dead stop at the bottom of the movement.
Step 2: Scapular Retraction and Arch
Pinch your shoulder blades together and drive them down into the bench pad. This creates a stable shelf and ensures the pectorals, rather than the anterior deltoids, bear the brunt of the load. Maintain a slight, natural arch in your lower back, keeping your feet planted firmly on the rubber mat to generate leg drive.
Step 3: The Pressing Trajectory
Unlike a barbell incline press where the bar moves in a single linear plane, dumbbells allow for convergence. As you press the neoprene dumbbells upward, angle them slightly inward so they meet over your upper chest/clavicle line, rather than pressing them straight up toward the ceiling. As noted in the exercise kinematics database at ExRx.net, this convergent path aligns perfectly with the diagonal muscle fibers of the upper pec.
Angle vs. Muscle Activation Matrix
Understanding why the 30-degree mark is non-negotiable requires looking at the data. The following table illustrates how bench angle shifts the mechanical tension across different muscle groups during the incline press.
| Bench Angle | Clavicular Pec (Upper Chest) | Sternal Pec (Mid/Lower Chest) | Anterior Deltoid (Front Shoulder) |
|---|---|---|---|
| Flat (0 Degrees) | Low | Maximum | Moderate |
| 30 Degrees (Optimal) | Maximum | High | Moderate |
| 45 Degrees | Moderate | Low | Maximum |
| 60+ Degrees | Minimal | Minimal | Maximum (Overhead Press) |
Troubleshooting & Maintenance for Neoprene Gear
'Neoprene is exceptionally durable, but it is not invincible. UV exposure and improper chemical cleaners will break down the synthetic rubber, leaving your dumbbells sticky and prone to tearing.' — Home Gym Engineering Best Practices
- Cleaning Protocol: Never use bleach or ammonia-based cleaners on neoprene. Wipe down the hex heads and handles after every session with a microfiber cloth dampened with a mild dish soap and water solution.
- UV Degradation: If your home gym is in a garage or sunroom, keep the dumbbells out of direct sunlight. Prolonged UV exposure causes the neoprene to dry rot, crack, and eventually peel away from the cast iron core.
- Edge Case - The Sticky Grip: If your neoprene handles become slick over time due to accumulated body oils, lightly scuff the grip area with a fine-grit (400) sandpaper to restore the factory texture without compromising the structural integrity of the coating.
Frequently Asked Questions
Can I drop neoprene dumbbells on my floor?
While neoprene offers excellent floor protection compared to bare iron, you should never intentionally drop them from the top of a press. The cast iron core can still fracture, or the neoprene can split at the seams upon high-velocity impact. Always control the eccentric (lowering) phase and set them down firmly on your 3/4-inch rubber mats.
Why do my shoulders hurt during the 30 degree incline dumbbell press?
Shoulder pain during this movement is almost always a result of flaring the elbows out to 90 degrees. Tuck your elbows slightly (about 45 to 60 degrees from your torso) to keep the humerus aligned with the scapular plane, drastically reducing impingement risk on the rotator cuff tendons.
Are adjustable dumbbells better than fixed neoprene for this exercise?
Adjustable dumbbells (like Bowflex or PowerBlock) save space, but their blocky, rectangular profiles can make the 'kick-up' phase of the incline press awkward and unbalanced. Fixed neoprene hex dumbbells offer superior weight distribution and a more natural center of gravity, making them the preferred choice for heavy, precise pressing movements.
By meticulously installing your storage solutions, verifying your bench angles with digital precision, and respecting the unique ergonomics of neoprene-coated handles, you transform a standard home gym into a biomechanically optimized training facility. The 30 degree incline dumbbell press is a highly technical movement, and your environment should be engineered to support every rep.
More gear to consider
All reviews
Cast Iron vs Competition Kettlebells Beyond Standard Dumbbell Curls
Beyond Dumbbell Curls Women Use: Olympic Barbell Weight & Knurling

Dumbbell Rack Layouts: Space Planning for Chest Flies with Dumbbells

Bumper vs Iron Plates: Budget & Dumbbell Rear Lateral Raises

Space-Saving Rotator Cuff Dumbbell Workout: Hex vs Urethane
