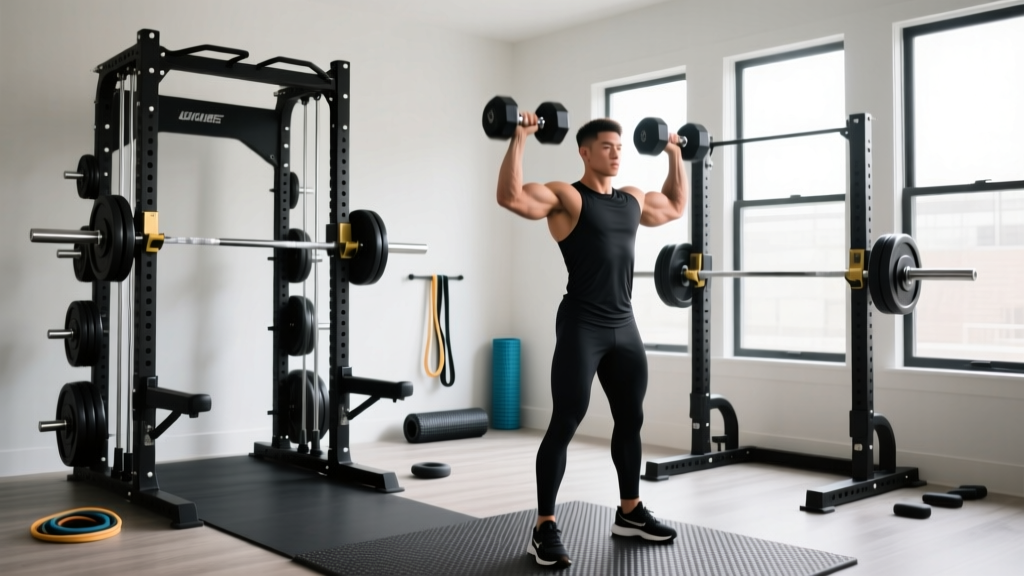
Power Rack vs Squat Rack vs Stand: Dumbbell Scaption Setup
Compare power racks, squat racks, and stands for your home gym. Includes installation steps and layout tips for the dumbbell scaption.

Building a comprehensive home gym in 2026 requires more than just buying the heaviest barbell you can find. True functional fitness demands a setup that accommodates both maximal load-bearing compound movements and precise, joint-friendly isolation exercises. One of the most critical, yet frequently overlooked, isolation movements for shoulder health and medial deltoid development is the dumbbell scaption. When planning your rig, the debate between a power rack, a squat rack, and a squat stand isn't just about footprint and budget—it fundamentally dictates how you will execute precision movements like the scaption, how you anchor your equipment, and how your floor space flows.
The Hardware Breakdown: Racks vs. Stands
Before unboxing any hardware, you must understand the structural differences between the three main categories of barbell enclosures. Each offers distinct advantages and limitations regarding stability, attachment ecosystems, and spatial awareness during lateral dumbbell movements.
| Feature | Power Rack (e.g., Rogue RML-390F) | Squat Rack (e.g., Rep Fitness PR-1100) | Squat Stand (e.g., Titan T-2) |
|---|---|---|---|
| Footprint (Depth x Width) | 36" x 53" (Standard) | 24" x 48" (Compact) | 24" x 48" (Minimalist) |
| Upright Dimensions | 3"x3" 11-Gauge Steel | 2"x2" or 2"x3" Steel | 2"x2" or 3"x3" Steel |
| Weight Capacity | 1,000+ lbs | 700 - 1,000 lbs | 800+ lbs (When Anchored) |
| Attachment Ecosystem | Extensive (Cables, Pulleys, Lat Towers) | Moderate (J-cups, Safeties, Dip Bars) | Minimal (J-cups, Safeties only) |
| Avg. Price Range (2026) | $650 - $1,400 | $350 - $600 | $180 - $350 |
Biomechanics Meet Hardware: Accommodating the Dumbbell Scaption
Why does a heavy-duty steel cage matter for a light dumbbell exercise? The dumbbell scaption involves elevating the arms in the scapular plane—roughly 30 to 45 degrees anterior to the frontal plane. This movement requires unhindered lateral and anterior space to prevent the elbows or dumbbells from striking the uprights during the concentric phase.
The Scapular Plane Rule: If you are performing a seated scaption inside a standard 24-inch deep squat rack, taller lifters (over 5'10") will frequently strike their elbows against the front uprights when using a 90-degree incline bench. A power rack with a 30-inch interior depth, or an open-concept squat stand, is vastly superior for accommodating the natural arc of the scapular plane without forcing the lifter to compromise their biomechanics.
Furthermore, modern lifters increasingly use cable attachments to perform scaption with constant tension. If you opt for a squat stand, you lose the ability to mount a low-pulley system directly to your rig, forcing you to purchase a standalone functional trainer. A full power rack allows you to integrate a cable tower directly into the footprint, enabling seamless transitions from heavy barbell squats to low-pulley cable scaption without leaving your platform.
Complete Installation Walkthrough: From Subfloor to Final Bolt
Whether you choose a standalone squat rack or a massive power rack, improper installation is the leading cause of equipment failure and injury. Follow this exact protocol to ensure your rig is plumb, level, and secure.
-
Step 1: Subfloor Assessment and Matting
Do not place your rack directly on laminate or finished hardwood. You need a high-density, vulcanized rubber matting system. The industry standard is 3/4-inch thick horse stall mats. Cut the mats to fit your designated 8x8 foot lifting zone. If you are on a concrete slab, ensure the floor has no major divots; use a self-leveling concrete compound if the variance exceeds 1/8th of an inch over a 10-foot span.
-
Step 2: Positioning and Laser Leveling
Assemble the base of your rack loosely. Do not fully tighten the hardware. Place the assembled base on your rubber matting. Use a 48-inch magnetic torpedo level and a laser level to check the floor's pitch. If your concrete slab slopes (common in garages for drainage), you must use heavy-duty steel shims under the lower upright base plates to achieve a perfectly level starting point. A rack that is out of plumb will cause uneven barbell loading and premature wear on linear bearings.
-
Step 3: Drilling for Wedge Anchors (Concrete Only)
If you are using squat stands or a boltless squat rack, anchoring to the floor is non-negotiable. Mark the bolt holes through the base plates. Move the rack aside and use a rotary hammer drill with a 1/2-inch SDS-Max bit (for 3/8-inch wedge anchors) or a 5/8-inch bit (for 1/2-inch wedge anchors). Drill exactly 3.5 inches deep. Use a shop vac to extract all concrete dust from the hole—this is the most common failure point, as dust prevents the anchor wedge from expanding properly.
-
Step 4: Drop, Drive, and Torque
Move the rack back over the holes. Drop the Red Head or Simpson wedge anchors through the base plates into the concrete. Strike the nut with a brass or dead-blow hammer until the washer is flush with the steel plate. Finally, use a calibrated torque wrench to tighten the nuts. For 3/8-inch anchors, torque to roughly 30-35 ft-lbs. For 1/2-inch anchors, torque to 55-60 ft-lbs. Do not overtighten, or you will snap the bolt inside the slab.
-
Step 5: Upright Assembly and Squaring
Once the base is anchored and level, attach the vertical uprights and top crossmembers. Before finalizing the top bolts, measure the diagonals from the top-left corner to the bottom-right corner, and vice versa. If the measurements are identical down to the millimeter, your rack is perfectly square. Tighten all grade-8 hardware using an impact wrench on a low-torque setting, finishing with a hand ratchet.
Real-World Failure Modes & Edge Cases
Warning: The Squat Stand Re-Rack Hazard
Squat stands are inherently top-heavy. When performing heavy rack pulls or squats, the act of re-racking the barbell pushes forward momentum into the J-cups. If your squat stands are not bolted to the floor and lack rear weight-storage pegs loaded with heavy bumper plates, the entire stand can tip forward. Always load the rear storage pegs first to act as a counterbalance.
Edge Case: Overhead Clearance in Short Racks
Many lifters buy 72-inch short racks to fit in basements with low ceilings. However, if you are 6'0" and perform standing overhead presses or standing dumbbell scaption inside the rack, your hands or the dumbbells will strike the top crossmember. Always calculate your standing reach plus the height of the dumbbell before purchasing a short rack. If your ceiling is 84 inches or lower, consider an open squat stand to eliminate vertical constraints.
Final Verdict: Which Rig Wins for the Versatile Lifter?
If your primary goal is raw powerlifting and you have the space and budget, a 36-inch deep Power Rack is the undisputed king. It provides the interior volume necessary to position an adjustable bench for unimpeded dumbbell scaption, supports heavy cable attachments for constant-tension variations, and offers maximum safety for solo lifting.
However, if you are outfitting a tight garage gym and prioritize open lateral space for wide-range isolation movements, a pair of heavily anchored Squat Stands paired with a standalone folding bench provides the most unrestrictive environment for exercises like the scaption, lateral raises, and dumbbell flyes. Just remember: safety and proper concrete anchoring are the non-negotiable prices of admission for the open-concept stand setup.
More gear to consider
All reviews
Dumbbell Squat vs Barbell Squat: Rack Setup & Installation Guide
Bumper vs Iron Plates: Gym Layouts & Dumbbell Lateral Raise Form

Olympic vs Standard Plates: Fixing Dumbbell Bench Press Variations

Space-Saving Loadable Handles for the Dumbbell Farmer's Walk

EZ Curl Bar vs Straight Bar: Upgrading Dumbbell Forearm Exercises
