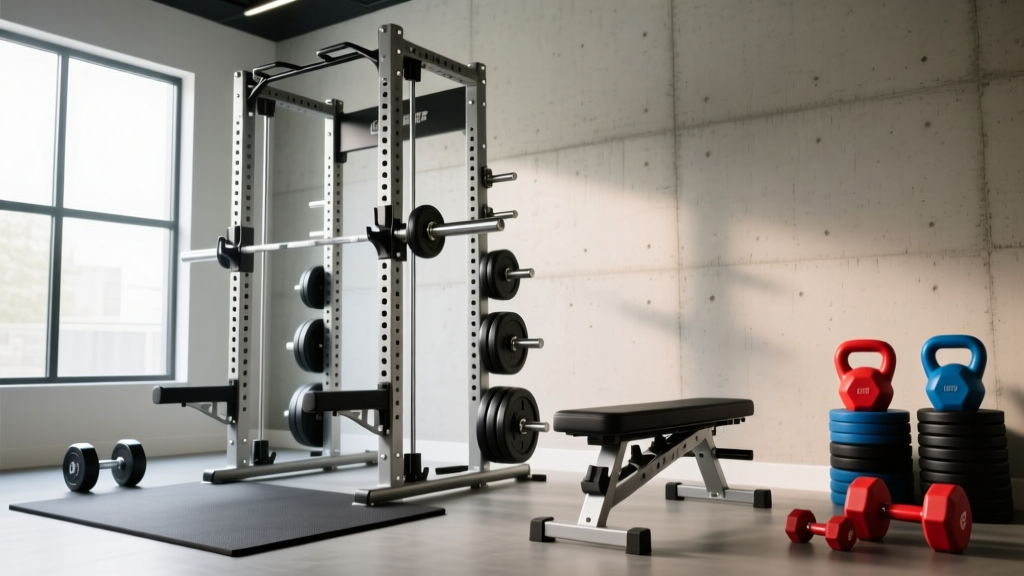
Power Rack vs Squat Stand: Setup for Daily Dumbbell Exercises
Compare power racks, squat racks, and stands. Learn step-by-step installation and space planning for heavy lifts and daily dumbbell exercises.

The Home Gym Dilemma: Barbell Racks vs. Dumbbell Workflows
Designing a home gym in 2026 requires a delicate balancing act. You need a robust, anchored structure for heavy barbell squats and bench presses, but you also need an open, adaptable footprint to seamlessly transition into your daily dumbbell exercises. Whether you are performing high-volume dumbbell lunges, heavy renegade rows, or unilateral dumbbell floor presses, the type of rack you install—and how you configure the surrounding space—dictates the efficiency of your workouts.
Many lifters make the mistake of buying a massive four-post power rack, only to realize the interior depth is too cramped for lateral dumbbell movements. Others opt for minimalist squat stands, sacrificing safety and storage for floor space. This comprehensive setup and installation walkthrough breaks down the power rack vs squat rack vs squat stand debate, specifically focusing on how to install and configure your chosen rig to support both heavy barbell loads and a high-frequency routine of daily dumbbell exercises.
Quick Definitions: The Big Three
- Power Rack (Full Cage): Four uprights connected by crossmembers. Fully enclosed. Example: Rep Fitness PR-4000.
- Squat Rack (Half Rack): Two front uprights and two rear uprights, open in the front. Example: Titan Fitness T-3 Half Rack.
- Squat Stand: Two independent uprights with adjustable height and spotter arms. Example: Rogue Fitness SML-2C.
Space & Footprint Analysis: Accommodating Daily Dumbbell Exercises
When planning your layout, you must account for the 'drop zone' and 'swing zone' required for daily dumbbell exercises. A standard barbell requires a fixed 7-foot linear path. Dumbbells, however, require multidirectional clearance. If you are doing dumbbell step-ups, goblet squats, or Romanian deadlifts inside your rack, the interior dimensions matter immensely.
| Rig Type | Standard Footprint (W x D) | Interior DB Clearance | 2026 Avg. Price | Best For |
|---|---|---|---|---|
| Power Rack (30in Depth) | 48in x 30in | Poor (Cramped for DB Bench) | $899 - $1,199 | Heavy solo barbell lifting |
| Power Rack (41in+ Depth) | 48in x 43in | Excellent | $1,099 - $1,499 | Hybrid barbell & DB routines |
| Half Rack | 48in x 48in | Good (Open front) | $599 - $899 | Olympic lifts & DB work |
| Squat Stand | 48in x 18in | Unlimited (Open floor) | $395 - $550 | Small spaces & pure DB focus |
Step-by-Step Installation Walkthrough
For this walkthrough, we will focus on installing a 4-post Power Rack with a 41-inch depth (like the PR-4000 or Rogue RML-390F), as this is the gold standard for lifters who refuse to compromise on safety or their daily dumbbell exercises. Proper installation ensures the rack can handle dynamic loads, such as dropping heavy dumbbells onto the spotter straps during a failed set of dumbbell bench presses.
Phase 1: Subfloor Preparation and Matting
Before unboxing a single bolt, you must prepare the floor. Dropping 70-pound dumbbells during high-rep daily dumbbell exercises will shatter cheap interlocking foam tiles and crack standard garage concrete over time.
- Clean and Level: Sweep the concrete and use a 6-foot spirit level to check for slopes. A variance greater than 1/4 inch over 6 feet requires self-leveling concrete compound.
- Install Rubber Matting: Lay down 3/4-inch (20mm) vulcanized rubber stall mats. According to guidelines referenced by ACE Fitness Home Gym Safety protocols, dense rubber is mandatory for shock absorption and equipment stability. Cut the mats precisely so they fit wall-to-wall under the rack footprint.
- Seal the Seams: Use heavy-duty double-sided carpet tape or mat connectors to prevent the mats from separating when you perform lateral dumbbell lunges.
Phase 2: Upright Assembly and Anchoring
A power rack subjected to the dynamic forces of kipping pull-ups or heavy dumbbell drop-sets must be anchored. If you are bolting into a standard 4-inch thick concrete slab, follow this exact procedure:
- Position and Mark: Assemble the base crossmembers loosely. Slide the rack into position. Use a carpenter's square to ensure the base is perfectly rectangular. Mark the anchor holes through the base plates with a grease pencil.
- Drill the Concrete: Move the rack aside. Use a hammer drill with a 1/2-inch masonry bit to drill 4.5 inches deep into the concrete at your marked spots. Vacuum out the concrete dust from the holes—this is a critical step often missed by beginners, as dust prevents the anchor from expanding fully.
- Set the Wedge Anchors: Insert 1/2-inch x 4-inch zinc-plated wedge anchors through the rack base plates and into the holes. As detailed in the Rep Fitness Anchoring Guide, tighten the nuts with a torque wrench to exactly 60 ft-lbs. Do not overtighten, or you will snap the bolt shaft inside the concrete.
Phase 3: Rigging for Dumbbell Storage and Accessories
To make your daily dumbbell exercises efficient, your weights must be within arm's reach of the rack. Floor-standing dumbbell trees eat up valuable swing space.
- Install Rack-Mounted DB Shelves: Bolt a heavy-duty dumbbell shelf (such as the Rogue Monster Dumbbell Shelf) to the rear or side crossmembers at waist height. This keeps the floor clear for walking lunges and Bulgarian split squats.
- Configure Spotter Arms vs. Straps: For barbell benching, use UHMW-lined spotter arms. However, if your daily dumbbell exercises include heavy dumbbell floor presses or incline DB presses inside the rack, swap the arms for nylon spotter straps. Straps catch the dumbbells silently and prevent the metal-on-metal clanging and potential damage to your dumbbell knurling.
Expert Tip: When mounting accessories to 3x3-inch 11-gauge steel uprights with 5/8-inch holes, always use sandwich-style attachment brackets. Single-pin attachments can wobble and scratch the uprights when you are loading and unloading heavy dumbbells from adjacent shelves.
Failure Modes & Edge Cases in Rack Setup
Even experienced home gym owners run into installation edge cases. Here are the most common failure modes to avoid when setting up a hybrid lifting zone:
Warning: Common Installation Mistakes
- The Joist Seam Error: If your gym is on a wooden subfloor (not concrete), anchoring directly into a single floor joist is dangerous. The lateral force of failed dumbbell exercises can rip the lag bolts out. You must install a 3/4-inch plywood sub-layer spanning multiple joists to distribute the load before bolting the rack down.
- Upright Misalignment: If you fully tighten the crossmember bolts before the uprights are perfectly plumb (vertical), the J-cups will sit at slightly different heights. This causes barbells to roll and makes racking heavy dumbbells awkward and unsafe. Always use a magnetic torpedo level on all four uprights before final torquing.
- Ignoring Attachment Compatibility: As noted in the Rogue Monster Compatibility Guide, mixing 1-inch hole uprights with 5/8-inch pin attachments requires precise adapter sleeves. Forcing mismatched hardware compromises the structural integrity of the connection points.
Configuring Your Zone for Seamless Transitions
The ultimate goal of your setup is flow. A well-designed home gym allows you to move from a heavy barbell back squat directly into a superset of daily dumbbell exercises without tripping over equipment or wasting time adjusting the rack.
If you chose a Squat Stand due to space constraints, position the stands against a wall and use the open floor space in front of them as your dedicated dumbbell zone. Store your dumbbells on a low-profile, 3-tier horizontal rack placed perpendicular to the stands. This creates an 'L-shaped' workflow that maximizes a small garage footprint.
If you opted for the Power Rack, utilize the interior space. By choosing a 41-inch or 47-inch deep rack, you can place an adjustable FID (Flat/Incline/Decline) bench inside the cage. This allows you to perform barbell bench presses, and then immediately strip the bar, grab your dumbbells from the rear-mounted shelf, and execute your daily dumbbell exercises like incline presses or seated shoulder presses without ever leaving the safety of the cage.
Expert Verdict: Which Rig Wins for the Hybrid Athlete?
The choice between a power rack, squat rack, and squat stand ultimately comes down to your spatial constraints and your reliance on solo heavy lifting. For the dedicated athlete whose programming relies heavily on both maximal barbell loads and high-volume daily dumbbell exercises, the 4-post Power Rack with a 41-inch depth is the undisputed champion. It provides the necessary interior volume for multidirectional dumbbell movements, offers unparalleled safety for solo training, and allows for vertical storage integration that keeps your gym floor pristine and functional. Invest in proper 3/4-inch rubber flooring, use 1/2-inch wedge anchors, and rig your attachments for smooth transitions. Your home gym will be equipped to handle whatever 2026 throws at it.
More gear to consider
All reviews
Olympic vs Standard Plates: Troubleshooting & PowerBlock Pro Dumbbells

Kettlebell Longevity: Cast Iron vs Competition Care & What Muscle Do Dumbbell Rows Work

Dumbbell Rear Delt Rows: Adjustable Dumbbell Review & Fixes

Space-Saving Dumbbell Racks & The Dumbbell Row No Bench

Rubber Hex vs Urethane: Maintenance for Calf Workouts with Dumbbells
