Power Rack vs Squat Rack & Dumbbell Arm Exercises for Beginners
Compare power racks, squat racks, and stands for your 2026 home gym. Includes setup tips and rack-supported dumbbell arm exercises for beginners.

The Home Gym Dilemma: Scaling Beyond the Basics
Building a home gym is a milestone in any fitness journey, but choosing the right foundational equipment can quickly become overwhelming. Many newcomers start their routines focusing exclusively on dumbbell arm exercises for beginners, such as basic bicep curls, hammer curls, and overhead triceps extensions. While dumbbells are fantastic for building foundational strength and joint stability, there comes a point where progressive overload demands a more robust infrastructure.
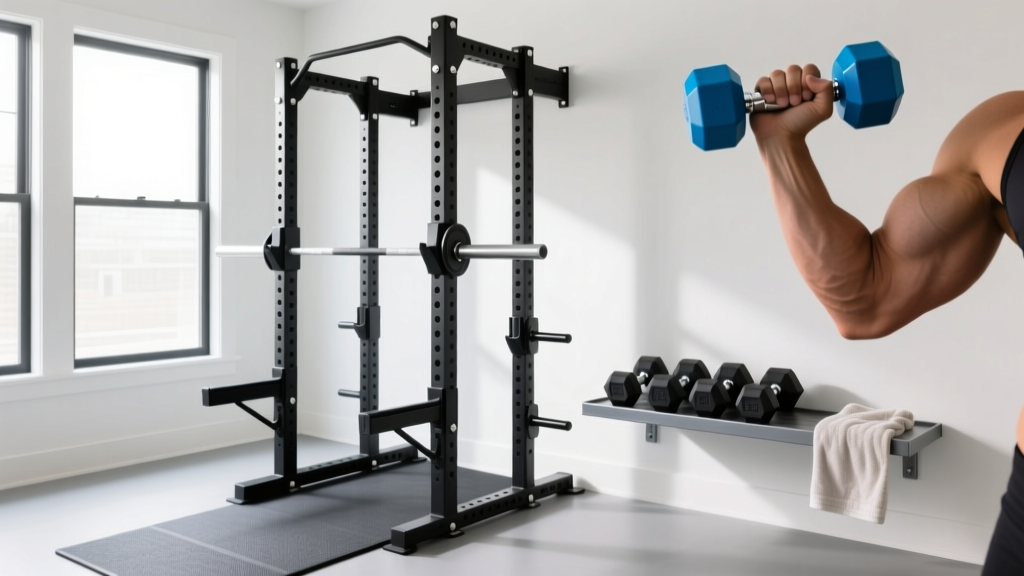
This brings us to the ultimate home gym crossroads: Should you invest in a full power rack, a half squat rack, or a minimalist squat stand? Why invest in a massive steel cage if your current routine is heavily dumbbell-focused? The answer lies in versatility and safety. A rack doesn't just hold barbells; it transforms your dumbbell training by providing anchor points for resistance bands, safe catchers for heavy seated presses, and adjustable bench integration for chest-supported isolation work.
In this step-by-step guide, we will break down the structural differences, 2026 pricing benchmarks, and safety profiles of the big three, before showing you how to integrate your new rack into your arm-building arsenal.
Step 1: Decoding the Big Three (Comparison Matrix)
Before dropping hundreds of dollars on steel, you need to understand the architectural differences between these three categories. The table below outlines the core specifications you will encounter when shopping in 2026.
| Feature | Power Rack (Full Cage) | Squat Rack (Half Rack) | Squat Stand (Minimalist) |
|---|---|---|---|
| Uprights | 4 (Front and Rear) | 2 Front + 2 Rear Stabilizers | 2 Front Uprights Only |
| Footprint (Avg) | 48" x 48" to 53" x 53" | 48" x 48" | 24" x 24" to 30" x 30" |
| Safety Mechanism | Internal Pin-Pipes or Sandwich J-Cups | External Flip-Down or Strap Safeties | External Spotter Arms (Optional) |
| Pull-Up Bar | Standard (Rear or Front) | Standard (Rear Crossmember) | Rare (Usually requires separate purchase) |
| 2026 Price Range | $400 - $1,200+ | $350 - $800 | $150 - $350 |
Step 2: Evaluating Space, Budget, and Steel Gauge
The most critical mistake beginners make is ignoring the steel gauge and upright dimensions. In 2026, the industry standard for a safe, commercial-grade home rack is 11-gauge steel (approximately 0.120 inches thick). Avoid 14-gauge or 16-gauge steel often found in budget big-box store models; they are prone to warping under heavy loads and lack the rigidity required for safe band anchoring.
Pro-Tip: Hole Spacing MattersLook for racks with 1-inch Westside hole spacing in the bench press zone. This allows you to micro-adjust your J-cups and safety spotter arms, which is crucial when transitioning from barbell presses to heavy, rack-supported dumbbell work where clearance is tight.
Space Constraints vs. Functionality
- The Power Rack: Requires a minimum ceiling height of 84 inches and a 7x7 foot dedicated zone (including plate loading space). Best for garage gyms where you train alone and need internal safeties to catch failed lifts.
- The Squat Rack: Offers a slightly more open feel, making it easier to load plates and step in and out. However, the rear stabilizers still demand a 4x4 foot footprint.
- The Squat Stand: The undisputed king of small spaces. Models like the Titan T-2 can be pushed into a corner when not in use. However, they must be bolted to the floor or heavily weighted with rear storage pegs to prevent tipping during re-racking.
Step 3: Safety Mechanisms and Spotter Arm Anatomy
According to the National Strength and Conditioning Association (NSCA), proper spotting and safety catchers are non-negotiable for any facility, including home gyms. When training to failure, your safety system is your only lifeline.
"Never rely on a training partner as your primary safety mechanism when training with heavy loads. Mechanical spotter arms, properly positioned just below the active range of motion, are the gold standard for injury prevention." — NSCA Facility Safety Guidelines
Pin-Pipe Safeties (Power Racks): These slide through both front and back uprights. They are incredibly safe for barbell squats and bench presses but can be cumbersome to move if you frequently switch between barbell and dumbbell work.
Strap Safeties (Half Racks/Power Racks): Made of heavy-duty nylon, these are easier to adjust with one hand and protect the knurling on your barbells. They are highly recommended for dynamic lifters.
Flip-Down Spotter Arms (Squat Stands): These attach to the outside of the uprights. They are adequate for light-to-moderate loads but can fail if a heavy barbell is dropped off-center.
Step 4: Elevating Dumbbell Arm Exercises for Beginners Inside the Rack
Why bring dumbbells into a power rack? Because the rack solves the biggest limitations of free-weight isolation work: momentum cheating, lack of stability, and band-resistance anchoring. Here is how to use your new rack to supercharge your dumbbell arm exercises for beginners, leveraging biomechanics data outlined by resources like ExRx.net's exercise directory.
-
Rack-Supported Incline Dumbbell Curls
Set an adjustable bench to a 45-degree incline and place it inside the power rack. By doing your curls inside the cage, you eliminate the temptation to swing your hips. If you reach failure, you can simply drop the dumbbells safely onto the rack's pin-pipe safeties rather than straining your lower back to control them down.
-
Band-Resisted Triceps Pushdowns
Most beginners struggle to isolate the triceps using only dumbbells. Use your rack's pull-up bar to anchor a heavy resistance band. Loop the band around the center of your dumbbell, grip both ends, and perform pushdowns. The rack provides the high-anchor point necessary for constant tension, mimicking a $2,000 cable machine.
-
Chest-Supported Rear Delt & Bicep Rows
Set the J-cups to waist height and rest an incline bench face-down against them. This creates a makeshift chest-supported row station. Performing dumbbell hammer curls or rear-delt rows from this position completely removes lower-back shear force, allowing beginners to focus purely on the mind-muscle connection.
Step 5: 2026 Equipment Benchmarks & Specific Models
If you are ready to pull the trigger, here are three benchmark models dominating the 2026 market, chosen for their balance of price, 11-gauge steel construction, and attachment ecosystems.
- The Budget Power Rack: REP Fitness PR-1100 (~$399)
Features 2x2 inch 14-gauge steel (acceptable for beginners under 300 lbs), 1-inch hole spacing, and includes a multi-grip pull-up bar. It's compact enough for most spare bedrooms. - The Gold Standard Squat Stand: Rogue Fitness SML-2C (~$445)
Built from 3x3 inch 11-gauge steel. It is virtually indestructible. While expensive for a stand, the UHMW plastic-lined J-cups protect your bars, and the rear gussets provide immense stability without floor bolting. - The Versatile Half Rack: Titan Fitness T-2 Series (~$299)
An entry-level half rack that punches way above its weight class. It offers the open feel of a squat stand but includes rear uprights for band storage and a pull-up bar, making it ideal for the dumbbell-to-barbell transition phase.
Frequently Asked Questions
Can I do dumbbell arm exercises for beginners without a rack?
Absolutely. Dumbbells are highly versatile and require zero infrastructure. However, as you progress to heavier weights (e.g., 50+ lb dumbbells for overhead extensions or seated presses), a rack provides a safe zone to rest the weights, catch dropped reps, and integrate resistance bands for variable tension.
Do I need to bolt my squat stand to the floor?
If you are using a 2-upright squat stand without a rear weight storage peg, yes. Bolting it to a concrete floor or using a weighted rear crossmember base is mandatory to prevent the stand from tipping forward when you re-rack a heavy barbell or lean into the uprights during band exercises.
What is the best attachment for arm isolation work?
Invest in a lat pulldown / low row cable attachment that pins into the back of your power rack. While it adds $300-$500 to your budget, it instantly turns your rack into a full cable tower, unlocking hundreds of tricep and bicep isolation movements that are difficult to replicate with free weights alone.
More gear to consider
All reviews
Beyond Workouts Using Dumbbells Only: 2026 Kettlebell Trends
Standing Dumbbell Front Raise: Neoprene Dumbbell Mistakes & Fixes

Barbell Setup vs Dumbbell Exercises for Hamstrings: Weight Guide

Cast Iron vs Competition Kettlebells & Dumbbell Wrist Rotation

Barbell vs Dumbbell Shoulder Press: Setup & Barbell Guide