Power Rack vs Squat Rack vs Squat Stand: Bowflex 1090 Dumbbell Setup
Compare power racks, squat racks, and stands for your home gym. A complete installation walkthrough optimized for heavy Bowflex 1090 dumbbell workflows.

The Heavy Dumbbell Dilemma: Spatial Requirements for the Bowflex 1090
Building a comprehensive home gym in 2026 requires more than just buying equipment; it demands a strategic approach to spatial geometry and structural integrity. When your arsenal includes the bowflex 1090 dumbbell, the stakes are significantly higher. Unlike standard hex dumbbells or compact 5-52 lb adjustable models, the Bowflex 1090 is an absolute behemoth. Each dumbbell spans 17.5 inches in length, measures 10 inches in width, and maxes out at 90 pounds.
These dimensions create a unique installation paradox: you need a rack system robust enough to handle heavy barbell squats, yet geometrically accommodating enough to allow for safe 90-pound dumbbell bench presses, floor presses, and proper storage. According to safety guidelines published by the National Strength and Conditioning Association (NSCA), home gym environments must account for the specific failure modes and clearance requirements of oversized adjustable equipment. In this complete setup and installation walkthrough, we break down the power rack vs squat rack vs squat stand debate specifically through the lens of integrating the Bowflex 1090 into your workflow.
Power Rack vs Squat Rack vs Squat Stand: 2026 Comparison Matrix
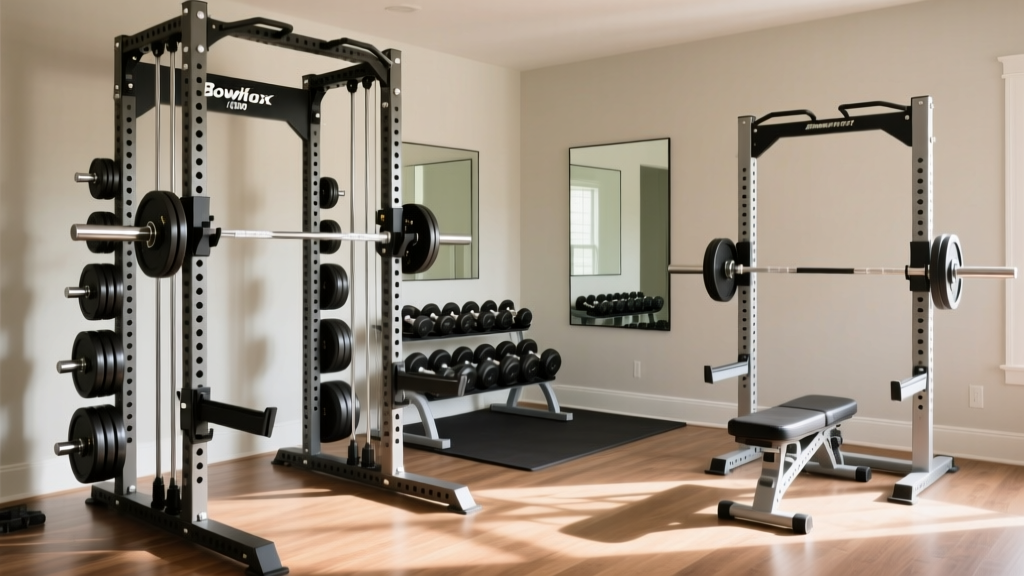
Before unboxing your rack and unrolling the rubber mats, you must select the right chassis. When reviewing rack geometries from the Rogue Fitness Rack Specifications catalog and cross-referencing them with the footprint of the Bowflex 1090 base tray, clear winners and losers emerge.
| Equipment Type | Avg. Footprint (2026) | Bowflex 1090 Compatibility | Safety for Heavy DB Press | Est. Price Range |
|---|---|---|---|---|
| Full Power Rack | 48" x 48" (Enclosed) | Excellent (Tray mounts outside) | Superior (4-point spotter arms) | $650 - $1,200 |
| Half Squat Rack | 48" x 48" (Open Front) | Very Good (Open front access) | Great (24"+ spotter arms) | $450 - $800 |
| Squat Stand | 47" x 49" (Minimalist) | Poor (Width restricts DB movement) | Dangerous (Short catchers) | $250 - $450 |
Phase 1: Subfloor Preparation and Weight Distribution
Installation begins from the ground up. A fully loaded power rack, combined with a pair of 90-pound Bowflex 1090 dumbbells, a 45-pound barbell, and several plate pairs, concentrates an immense amount of downward force (PSI) onto your subfloor.
Calculating the Load
- Rack Weight: ~350 lbs (e.g., standard 3x3 11-gauge steel cage)
- Barbell & Plates: ~300 lbs
- Bowflex 1090 Pair + Tray: 195 lbs
- Total Static Load: ~845 lbs distributed across 4 to 6 upright base plates.
Flooring Installation Steps
- Clean the Subfloor: Sweep and vacuum the concrete or wood subfloor. Any debris left under the mats will create pressure points that degrade the rubber over time.
- Lay the Vapor Barrier: If installing over concrete in a garage or basement, lay down a 6-mil polyethylene vapor barrier to prevent moisture from degrading your mats and rusting your rack base.
- Install 3/4" Vulcanized Rubber Mats: Do not use cheap foam puzzle mats. They will compress under the 17.5-inch length of the 1090s when dropped, causing the dial mechanism to snap. Use 3/4" (19mm) thick horse stall mats or vulcanized gym tiles.
- Seal the Seams: Use heavy-duty mat tape on the seams directly beneath the rack footprint to prevent the mats from shifting when you rack heavy dumbbells.
Phase 2: Anchoring the Uprights (Concrete vs. Timber)
Because the Bowflex 1090 requires you to perform heavy unilateral and bilateral movements that generate lateral force (like heavy dumbbell lunges or RDLs near the rack), anchoring is non-negotiable. An unanchored squat stand can easily tip if a 90-lb dumbbell is dropped off-center.
Scenario A: Anchoring to Concrete
For garage gyms with concrete slabs, you will use wedge anchors.
- Position the rack base plates and mark the drill holes with a Sharpie.
- Move the rack aside. Using a hammer drill and a 1/2" masonry bit, drill down to a depth of 3.5 inches. (Always drill 1/2" deeper than the anchor length to allow for dust).
- Vacuum the concrete dust out of the holes. Pro Tip: Failure to clean the hole reduces holding strength by up to 40%.
- Insert 1/2" x 3-3/4" zinc-plated wedge anchors through the base plates.
- Tighten with a torque wrench set to 60 ft-lbs. The collar will expand, locking the rack to the slab.
Scenario B: Anchoring to Wood Subfloors
If your gym is on a second floor or over a crawlspace, you must anchor directly into the floor joists.
- Use a stud finder to locate the 2x10 or 2x12 joists beneath the plywood subfloor.
- Align the rack's rear crossmember holes directly over the joists.
- Drive 5/8" structural lag screws (minimum 4 inches long) through the base plates and subfloor, biting at least 2.5 inches into the joist itself.
Phase 3: Configuring Spotter Arms for 17.5-Inch Dumbbells
This is where the power rack vs squat rack vs squat stand debate is settled for Bowflex 1090 owners. The 17.5-inch length of the 1090 means that when you are lying on a bench, the inner collars of the dumbbells are significantly wider than a standard barbell grip.
The Clearance Problem
If you are using a narrow squat stand with an inside width of 41 inches, the massive heads of the Bowflex 1090 will physically collide with the uprights during a bench press. You need a rack with an interior width of at least 43 to 49 inches to allow a natural dumbbell pressing arc.
Setting Up Safety Straps vs. Pin-Pipe Catchers
When setting up your safeties for heavy dumbbell work, the type of catcher you install matters immensely:
- Pin-Pipe Catchers: While great for barbells, steel pipes will scratch and dent the plastic housing of the Bowflex 1090 if you fail a rep and drop the dumbbell onto the catcher. Furthermore, the round surface of a pipe can cause the dumbbell to roll off.
- UHMW Plastic-Lined Strap Safeties: This is the mandatory choice for 1090 owners. Heavy-duty nylon straps lined with ultra-high-molecular-weight polyethylene absorb the shock of a dropped 90-lb dumbbell, protecting the internal dial mechanism while providing a flat, wide surface that prevents the dumbbell from bouncing away.
Setup Measurement: Position your bench so that the spotter straps are exactly 2 inches below your chest at the bottom of your pressing range of motion. Because the 1090 handle is thick, account for an extra 1.5 inches of grip depth compared to a standard Olympic barbell.
Phase 4: Storage Solutions and Tray Integration
The Bowflex 1090 requires its proprietary storage tray to keep the dials aligned and the weights calibrated. You cannot simply leave them on the floor where they are vulnerable to being kicked or stepped on.
Rack-Mounted vs. Freestanding Storage
If you opted for a Full Power Rack, you can purchase bolt-on dumbbell shelves that mount to the rear or side uprights. However, because the 1090 base is 10 inches wide and 12.5 inches high, standard 8-inch dumbbell shelves will not fit. You must source heavy-duty, 12-inch deep shelving brackets rated for at least 200 lbs per tier.
If you are using a Half Squat Rack, the best installation workflow is to place the freestanding Bowflex tray directly adjacent to the open side of the rack. Ensure you leave a minimum 36-inch walkway between the tray and the rack uprights to safely lift the 90-lb dumbbells out of the cradle without your knuckles scraping the steel uprights.
Final Walkthrough and Maintenance Checklist
Once the rack is bolted down, the mats are taped, and the spotter straps are tensioned, perform this final installation checklist before loading your first barbell or dialing up the 1090s:
- The Shake Test: Grab the front uprights and apply 50 lbs of lateral force. The rack should not shift, squeak, or lift off the mats.
- Spotter Arm Angle: Angle your safety straps slightly downward (toward the back of the rack). If you fail a heavy dumbbell press, gravity will pull the dumbbells away from your face and toward the secure rear crossmember.
- Dial Calibration Check: After moving the Bowflex 1090s into their new permanent tray, cycle the dials from 10 to 90 lbs three times. Moving the heavy bases can sometimes shift the internal weight plates; cycling them ensures the selector pins are fully seated.
- Hardware Re-Torque: Set a calendar reminder for 30 days post-installation. The vibration from heavy rack pulls and dropped dumbbells will cause initial hardware settling. Re-torque all 5/8" carriage bolts and lag screws after the first month of use.
By treating your home gym installation as a structural engineering project rather than a simple furniture assembly, you ensure that your equipment survives the extreme demands of heavy, adjustable dumbbell training. Choosing the right rack geometry, anchoring it properly, and configuring soft-catch safety systems will allow you to push the Bowflex 1090 to its absolute 90-pound limit with total confidence.
More gear to consider
All reviews
12 Practical DIY Plunge Pool Ideas You Can Build in Under 8 Weeks

Best Adjustable Dumbbells for the Trapezius Dumbbell Exercise (2026)
Bumper vs Iron Plates: Upgrading the Beginner Home Dumbbell Workout

Bumper vs Iron Plates: Space & Straight Legged Dumbbell Deadlifts

Optimize Space: Dumbbell Racks & Shrugs Workout Layouts