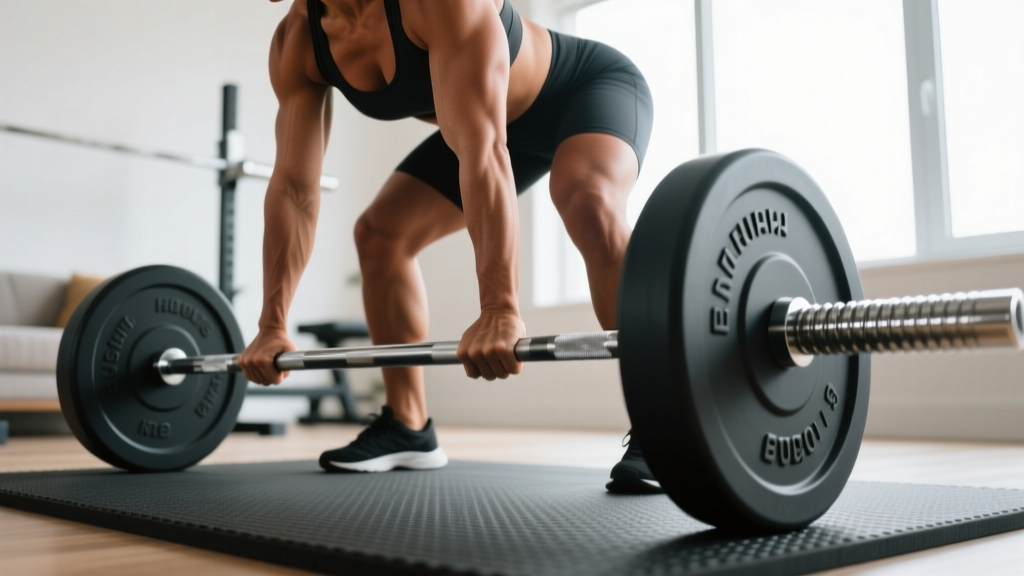
Olympic vs Standard Plates: Setup and Dumbbell Row Guide for Women
Master your home gym setup with our Olympic vs standard weight plates installation walkthrough, optimized for the dumbbell row and women's back training.

Phase 1: The Foundation — Olympic vs. Standard Weight Plates
Building a functional, safe, and aesthetically pleasing home gym in 2026 starts from the ground up: your weight plates and the racks that hold them. Before you unbox a single upright or tighten a bolt, you must resolve the most critical equipment dichotomy in fitness: Olympic vs. Standard weight plates. Making the wrong choice here will cascade into incompatible barbells, useless squat racks, and a frustrating spatial layout.
Standard Weight Plates feature a 1-inch center hole. Typically cast in raw iron or encased in cement-filled vinyl, these plates are designed for lightweight, entry-level home gyms. A standard 7-foot barbell usually maxes out at a 200 to 250-pound weight capacity due to the thinner 1-inch sleeve diameter. Brands like CAP Barbell offer these at an accessible price point (roughly $1.20 to $1.60 per pound in 2026), but they are strictly limited for progressive overload.
Olympic Weight Plates feature a 2-inch center hole and are the undisputed gold standard for serious lifters. Whether you choose raw cast iron, rubber-coated, or premium urethane (like the Rogue Fitness Urethane line, priced around $3.50 to $4.50 per pound), Olympic plates pair with heavy-duty 2-inch sleeve barbells capable of holding 800+ pounds. Furthermore, virtually all commercial-grade power racks, squat stands, and plate-loaded machines are engineered exclusively around the 2-inch Olympic standard.
⚠️ CRITICAL SETUP WARNING: Never purchase standard 1-inch plates if you plan to buy a commercial-style power rack or Olympic barbell. The plates will not fit the bar, and standard bars will not rest safely on the J-cups of an Olympic rack, creating a severe tipping and crushing hazard.Phase 2: Complete Rack and Storage Installation Walkthrough
Once you have committed to your plate type (we strongly recommend Olympic for long-term scalability), it is time to install the infrastructure. This walkthrough assumes a standard 4x4-inch, 11-gauge steel squat stand or power rack setup, which is necessary to safely store and utilize heavy Olympic plates.
Step 1: Spatial Planning and Floor Prep
Before assembly, map out an 8x10-foot footprint. You need a minimum of 24 inches of clearance behind the rack for plate loading, and 36 inches on each side for dumbbell movements. Lay down 3/4-inch thick horse stall mats over your subfloor. This not only protects your concrete or wood flooring from dropped Olympic plates but also provides a level, high-traction surface for heavy rows and lifts.
Step 2: Assembling the Uprights and Crossmembers
- Align the Base: Position the left and right upright bases parallel to each other. Insert the rear and front crossmembers.
- Insert M8 Hardware: Feed the M8x60mm bolts through the pre-drilled holes. Use a nylon insert lock nut on the opposite side. Pro-Tip: Do not fully tighten the bolts until all crossmembers are loosely in place; this allows the steel frame to self-square.
- Torque and Level: Using a socket wrench, tighten all bolts to roughly 40 ft-lbs. Place a carpenter's level across the J-cups. If your floor is uneven, insert steel shims under the base feet until perfectly level.
Step 3: Installing the Weight Storage Tree
If you opted for Olympic plates, you need an Olympic weight tree. Slide the tree's base bracket over the front uprights of your rack (if it's an integrated tree) or bolt the A-frame tree to the floor using 3/8-inch wedge anchors. Loading heavy 45-pound plates onto a freestanding tree without floor anchors is a major tipping risk.
Phase 3: Optimizing the Dumbbell Row (Women's Biomechanics & Setup)
With the rack and plates installed, we must configure the space for targeted back development. When programming and setting up for the dumbbell row, women often require specific spatial and equipment adjustments to maximize latissimus dorsi and rhomboid engagement while minimizing lumbar strain. Anthropometric differences in average shoulder width, torso length, and grip diameter mean that a 'one-size-fits-all' commercial setup often leads to suboptimal biomechanics.
Bench Selection and Placement
The standard commercial flat bench is 17 to 18 inches high. For many women executing a unilateral dumbbell row, a 17-inch bench height allows the non-working arm to lock out fully, keeping the torso perfectly parallel to the floor. If the bench is too high (over 19 inches), the torso angles upward, shifting the load away from the lats and onto the rear delts and biceps. Position an adjustable FID (Flat/Incline/Decline) bench set to 0 degrees roughly 12 inches away from your dumbbell storage rack to minimize walking distance with heavy weights.
Dumbbell Storage and Grip Considerations
Because you are utilizing Olympic plates for your barbell work, ensure your dumbbell rack is a heavy-duty, 3-tier steel A-frame capable of holding 500+ pounds. When selecting the dumbbells themselves, women with smaller hand circumferences should look for hex dumbbells with contoured or knurled handles (typically 32mm to 34mm in diameter) rather than thick 38mm grips, which can cause premature forearm fatigue before the back muscles reach failure during high-rep rowing sets.
'Proper setup of the environment dictates the quality of the movement. If you have to awkwardly maneuver around a poorly placed weight tree to grab your dumbbells for a row, you are bleeding mental energy before the set even begins.' — FitGearPulse Setup Methodology, 2026
Phase 4: Execution and Biomechanical Breakdown
According to biomechanical analyses provided by ExRx.net, the one-arm dumbbell row is a superior compound movement for unilateral back development. Here is how to execute it perfectly in your newly configured space:
- The Stance: Place your left knee on the far end of the 17-inch bench. Hinge at the hips and plant your right foot firmly on the rubber matting, roughly 18 inches outside the bench's edge for a stable tripod base.
- The Grip: Grasp the dumbbell with a neutral grip (palm facing your torso). Do not use wrist straps for warm-up sets; reserve them only for your heaviest working sets where grip strength becomes the limiting factor.
- The Pull: Initiate the movement by depressing the scapula (pulling the shoulder blade down and back), then drive the elbow toward the ceiling, brushing the dumbbell against your hip pocket. Avoid the common error of rotating the torso to heave the weight up.
- The Eccentric: Lower the weight under a strict 2-second tempo, feeling a deep stretch in the latissimus dorsi at the bottom of the movement.
Comparison Matrix: Olympic vs. Standard Home Gym Setups
| Feature | Standard (1-Inch) Setup | Olympic (2-Inch) Setup |
|---|---|---|
| Plate Cost (Avg) | $1.20 - $1.60 / lb | $2.50 - $4.50 / lb |
| Barbell Capacity | 200 - 250 lbs max | 500 - 1,500+ lbs |
| Rack Compatibility | Proprietary/Light-duty only | Universal commercial standard |
| Resale Value | Very Low (Hard to sell) | High (Retains 60-80% value) |
| Space Requirement | Smaller (Shorter sleeves) | Larger (Requires 8x10 ft min) |
Final Thoughts on Long-Term Progression
As highlighted by the National Strength and Conditioning Association (NSCA), progressive overload is the primary driver of muscular hypertrophy and strength gains. While a standard 1-inch plate setup might suffice for the first six months of your fitness journey, it will quickly become a bottleneck. By investing in an Olympic plate ecosystem and properly installing a heavy-duty rack, you future-proof your home gym. This allows you to seamlessly transition from lightweight isolation movements to heavy, compound barbell lifts, all while maintaining a perfectly optimized, safe environment for targeted exercises like the dumbbell row. Measure twice, bolt down securely, and train with precision.
More gear to consider
All reviews
Bumper vs Iron Plate Longevity & Rogue Urethane Dumbbells Care
Hammer Grip Dumbbell Curl: Home Gym Setup & Neoprene Guide

Trends: Urethane vs Rubber Hex Dumbbells for Men's Chest Workouts

Bumper Plate vs Iron Plate: 2026 Trends for Dumbbell Eyes

Best Adjustable Dumbbells for Arms: 2026 Setup Guide