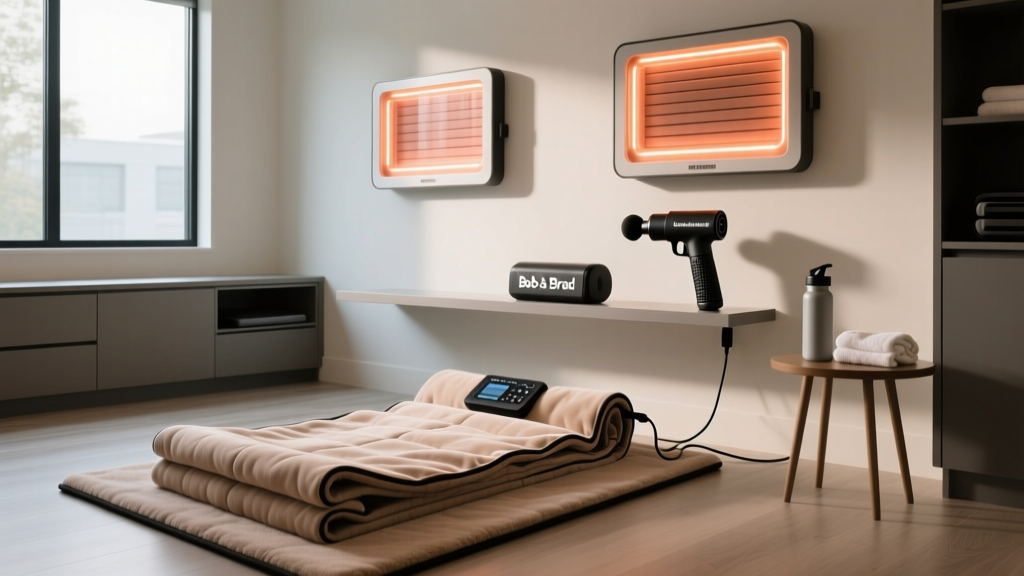
Dartwood Massage Gun Setup: Heat Therapy Pad vs Wrap Guide
Master your recovery station setup. We compare heat therapy pad vs wrap installation and integrate your Dartwood massage gun for optimal muscle relief.

The Recovery Station Blueprint: Spatial & Power Requirements
Building a dedicated recovery zone requires more than just buying equipment; it demands a strategic approach to spatial planning, power management, and ergonomic sequencing. When comparing a flat heat therapy pad against a contoured heat wrap, the physical installation dictates how seamlessly you can integrate percussive devices like the Dartwood massage gun into your routine. As of 2026, recovery technology has advanced, but the fundamental physics of heat transfer and cord management remain critical pain points for home athletes.
Setup Blueprint Requirement: Your recovery station requires a dedicated 15-amp circuit if you are running a far-infrared heating pad (drawing ~120W) simultaneously with a compression boot system. The Dartwood massage gun charger draws a negligible 18W, but its physical footprint and charging dock placement must be mapped to avoid cord-tangling during post-heat percussive therapy.Heat Therapy Pad vs. Wrap: Installation & Application Walkthrough
Choosing between a flat heating pad and a neoprene/graphene heat wrap is not just about target anatomy; it is about how the device installs into your physical space and daily workflow. Below is a comprehensive walkthrough of setting up both modalities.
Step-by-Step: Configuring the Far Infrared Heating Pad
Flat pads, such as the Thermotex Far Infrared Heating Pad or standard King Size UltraHeat models, are designed for supine or prone positioning on a treatment table or floor mat.
- Unboxing and Unfolding: Never forcefully unfold a cold heating pad. The internal carbon-fiber or nichrome wires become brittle at room temperature. Allow the pad to acclimate to room temperature for 30 minutes, then gently roll it out flat.
- Strain Relief Anchoring: The number one failure mode for heating pads is internal wire snapping at the junction where the power cord meets the pad. Use a velcro cable tie to anchor the power cord to the leg of your treatment table or a nearby heavy weight, ensuring zero tension is transferred to the pad’s internal solder joints.
- Controller Routing: Mount the digital PID controller to the side of your table using a 3M Command strip or a dedicated holster. Leaving it dangling creates a pendulum effect that yanks the internal wiring.
- Surface Layering: Far-infrared pads require direct line-of-sight to the skin for optimal photon penetration. Do not install thick cotton barriers; use a microfiber towel no thicker than 2mm.
Step-by-Step: Securing the Graphene Heat Wrap
Wraps, like the ARRIS Neoprene Graphene Wrap or Theraband contoured sleeves, are designed for joints (knees, shoulders, elbows) and require tension-based installation.
- The Overlap Rule: When wrapping the knee or shoulder, ensure a minimum 2.5-inch overlap of the neoprene material. This prevents the heating elements from creating localized hot spots and ensures even thermal distribution.
- Battery Pack Placement: For wireless 2026 graphene wraps utilizing 10,000mAh USB-C power banks, always route the battery pack into a dedicated pocket on the opposite side of the primary joint hinge. Placing it directly behind the knee joint will cause the hard plastic casing to dig into your popliteal fossa during flexion.
- Velcro Degradation Prevention: Before securing the wrap, use a lint roller on the interior neoprene. Sweat and dead skin cells quickly clog the hook-and-loop fasteners, reducing compression tension by up to 40% over a month of use.
Integrating the Dartwood Massage Gun into Your Heat Protocol
The Dartwood massage gun (specifically the Pro and Elite models) is a high-value percussive tool that must be physically and chronologically integrated with your heat therapy setup. Heat causes vasodilation, while percussive therapy mechanically moves interstitial fluid. Improper setup and sequencing can lead to blood pooling or diminished recovery outcomes.
Charging Station & EVA Case Management
The Dartwood utilizes a proprietary 24V DC charging port. Do not attempt to modify or use third-party USB-C PD cables by splicing wires; the Battery Management System (BMS) requires specific voltage handshakes to prevent lithium-ion degradation. Set up the charging station on a floating shelf exactly 3 feet from the head of your treatment table. This allows you to reach the device without breaking your supine position post-heat therapy.
Store the Dartwood’s EVA travel case with the zipper open 1 inch when not in use. The porous polyurethane foam attachments (especially the dampener and air cushion heads) trap ambient moisture and sweat, which can cultivate mold if sealed in an airtight case in a humid garage gym.
Technical Specifications & Setup Matrix
Use the following matrix to determine which heat modality best fits your spatial constraints and recovery requirements alongside your Dartwood integration.
| Feature | Far-Infrared Flat Pad (e.g., Thermotex) | Graphene Contoured Wrap (e.g., ARRIS) |
|---|---|---|
| Spatial Footprint | Large (24" x 36" requires dedicated table space) | Compact (Folds to 6" x 8", easily stored in Dartwood case) |
| Power Draw | 120W - 150W (Requires wall outlet) | 15W - 25W (Runs on standard 10k mAh USB-C power bank) |
| Setup Time | 3-5 Minutes (Cord routing, anchoring, layering) | 45 Seconds (Strap, overlap, power bank connection) |
| Dartwood Sequencing | Best for: Post-heat full-back & hamstring gliding | Best for: Targeted joint (knee/shoulder) localized flushing |
| Primary Failure Mode | Internal wire fatigue at cord junction | Velcro failure & battery bank overheating |
Troubleshooting Common Installation & Heating Failures
Even with meticulous setup, thermal and percussive equipment can experience edge-case failures. Here is how to troubleshoot the most common issues encountered in home recovery stations.
Heating Pad Blinking Error Codes
If your digital heating pad controller begins blinking or flashing an ‘E1’ or ‘E2’ error code immediately upon startup, this is rarely a broken heating element. It is almost always a thermistor disconnect. The thermistor (the sensor that reads skin temperature) is located near the cord junction. Unplug the device, massage the rubber strain-relief boot gently to re-seat the internal sensor wire, and plug it directly into a wall outlet (bypassing surge protectors, which can restrict the initial amperage draw and trigger a false short-circuit error).
Dartwood Stall Force Miscalibration
The Dartwood Pro boasts a ~35 lb stall force. However, if you are applying the device immediately after using a heat wrap, your skin will be lubricated with sweat and increased sebum production. This reduces surface friction, causing the massage gun head to skip across the skin rather than penetrating the fascia. Fix: Keep a microfiber towel and a light dusting of magnesium carbonate (chalk) near your setup station to restore grip on the skin before initiating percussive therapy.
Expert Sequencing: Heat, Vibration, and Cool Down
According to sports medicine research published in the National Center for Biotechnology Information (NCBI), the timing of heat application relative to mechanical loading drastically alters tissue viscosity and blood flow dynamics. Furthermore, the Cleveland Clinic emphasizes that heat therapy should be limited to specific timeframes to prevent rebound inflammation.
"Never apply percussive therapy during active heat application. The combination of extreme vasodilation and high-frequency mechanical impact can cause capillary pooling and increased localized inflammation. Sequence your modalities sequentially, not simultaneously."
The Optimal 35-Minute Recovery Protocol
- Phase 1: Thermal Prep (15 Minutes): Install the heat wrap or lie on the far-infrared pad set to 104°F (40°C). This increases tissue extensibility and synovial fluid viscosity.
- Phase 2: Transition & Dry (5 Minutes): Remove the heat source. Wipe the skin dry. Allow the core tissue temperature to stabilize while the surface moisture evaporates.
- Phase 3: Dartwood Percussive Flush (10 Minutes): Attach the dampener head to your Dartwood massage gun. Use 1750-2400 RPM, gliding along the muscle belly (avoiding joints and the spine). The mechanical pressure will now effectively push the newly oxygenated blood through the dilated vascular pathways.
- Phase 4: Elevation & Cooling (5 Minutes): Elevate the treated limb above the heart to assist venous return, completing the flush cycle.
By treating your recovery modalities as an integrated ecosystem rather than isolated tools, you maximize the physiological return on your equipment investment. Proper installation of your heat pads, meticulous care of your wrap fasteners, and strategic spatial planning for your Dartwood massage gun will ensure your recovery station remains safe, effective, and ready for daily use.
More gear to consider
All reviews
2026 Recovery Market: Home Cold Plunges vs Sharper Image Massage Guns

Theragun vs Hyperice 2026: Therabody Prime Plus Massage Gun Review

Normatec vs Hyperice & Massage Gun While Pregnant Third Trimester

Normatec vs Hyperice Boots vs Massage Gun for Foot Pain
Space-Saving Recovery: Cupping & FitPlus Massage Gun Setup