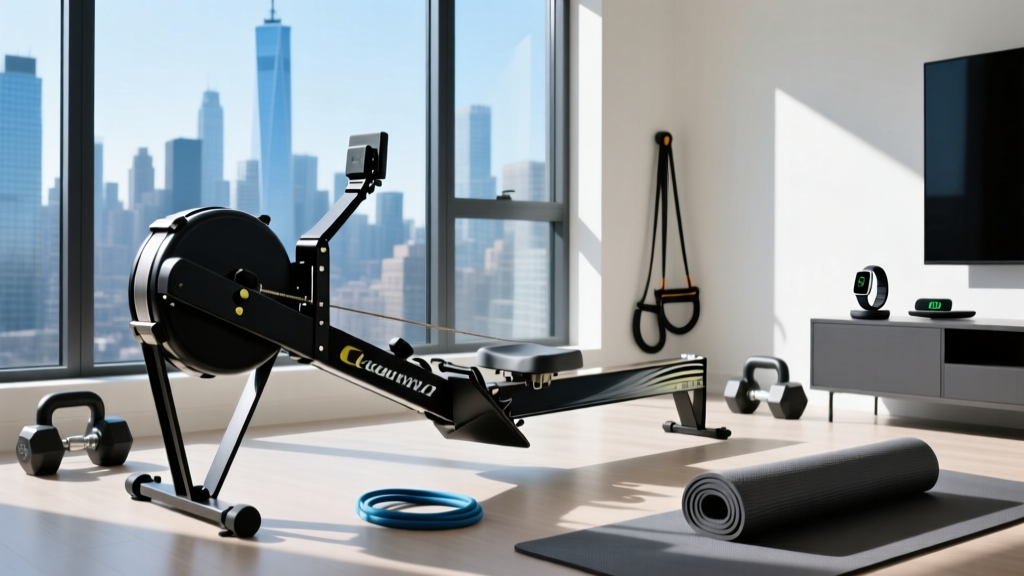
What's Better Walking Outside or Treadmill? The Rowing Machine Setup
Debating what's better walking outside or treadmill? Discover why a rowing machine setup offers superior full-body cardio, plus a complete installation guide.

Every year, our FitGearPulse inbox floods with the same foundational query: what's better walking outside or treadmill? It is a valid question for beginners and seasoned athletes alike. Walking outdoors offers varied terrain, fresh air, and natural biomechanical adaptations, while treadmills provide climate-controlled consistency and precise incline tracking. However, as we look at cardiovascular optimization in 2026, relying solely on ambulatory cardio leaves massive gaps in your posterior chain development and upper-body endurance.
While walking is a phenomenal baseline for heart health—as supported by the Mayo Clinic's extensive research on walking—it only engages the lower body and burns a fraction of the calories compared to full-body ergometrics. This is exactly why we advocate for the rowing machine (ergometer) as the ultimate indoor cardio upgrade. Below, we break down the buying process, a meticulous setup and installation walkthrough, and the exact technique required to master the rower.
The Biomechanical Reality: Walking vs. Treadmill vs. Rowing
Before we unbox your new rower, let us contextualize why this machine outperforms traditional walking modalities. According to the American Heart Association, adults need at least 150 minutes of moderate-intensity aerobic activity weekly. Rowing achieves this threshold with significantly higher muscular recruitment and lower joint impact.
| Modality | Caloric Burn (155lb individual / hr) | Joint Impact | Muscle Engagement | Spatial Footprint |
|---|---|---|---|---|
| Outdoor Walking (3.5 mph) | ~280 kcal | Low | Lower Body (40%) | N/A |
| Treadmill Walking (10% Incline) | ~450 kcal | Low-Moderate | Lower Body (60%) | ~30 sq ft |
| Rowing Machine (Moderate) | ~520 kcal | Zero (Seated) | Full Body (86%) | ~18 sq ft (stored) |
2026 Rowing Machine Buying Guide: Air, Magnetic, or Water?
Selecting the right resistance type is critical for your home gym environment. Here are the top-tier contenders currently dominating the market:
1. Air Resistance: Concept2 RowErg
Price: $1,250 | Best For: Data nerds, CrossFit athletes, and competitive rowers.
The Concept2 RowErg (the modern iteration of the legendary Model D) remains the gold standard. The flywheel creates dynamic resistance; the harder you pull, the more drag it generates. It is virtually indestructible and holds its resale value better than almost any fitness equipment on the market.
2. Electromagnetic Resistance: Hydrow
Price: $2,495 | Best For: Tech enthusiasts and boutique studio lovers.
Hydrow uses a smooth, silent electromagnetic brake system paired with a massive 22-inch HD touchscreen. It is significantly quieter than air rowers, making it ideal for apartments or shared living spaces where noise pollution is a concern.
3. Water Resistance: WaterRower Natural
Price: $1,595 | Best For: Aesthetics and acoustic feedback.
Crafted from solid ash wood, the WaterRower uses a water-filled tank to simulate the exact feel of a boat cutting through water. The 'whoosh' sound is deeply meditative, though it lacks the granular data tracking of the Concept2.
Complete Setup and Installation Walkthrough
Improper assembly is the leading cause of rail friction and monitor errors. For this walkthrough, we will focus on the industry-standard Concept2 RowErg, as its assembly principles apply broadly to most dual-rail air rowers.
Step 1: Space Planning and Floor Protection
Do not skip the mat. You need a dedicated space of at least 107 inches long by 24 inches wide (8'11' x 2') for full-slide usage.
- Subfloor Protection: Purchase a high-density PVC equipment mat (at least 3/8-inch thick). The repeated friction of the seat rollers and the downward force of the foot stretchers will permanently dent hardwood or luxury vinyl plank (LVP) flooring over time.
- Clearance: Ensure 18 inches of lateral clearance on both sides to prevent mid-stroke collisions with walls or furniture.
Step 2: Unboxing and Rail Attachment
The most critical failure mode during assembly is misaligning the monorail to the front cage. According to the official Concept2 Assembly Guidelines, the rail must be perfectly flush to prevent the seat rollers from 'hopping' or wearing unevenly.
- Position the Front Cage: Lay the front flywheel cage on its side on top of your PVC mat.
- Align the Monorail: Slide the rear rail into the front cage channel. Ensure the black rail pins seat completely into the mating holes.
- Torque the Bolts: Use the included 3/16-inch hex key to tighten the four rail bolts. Critical: Tighten them in a star pattern (top left, bottom right, top right, bottom left) to ensure even pressure distribution. Do not over-torque, or you will warp the aluminum channel.
- Level the Feet: Stand the machine upright. Adjust the four threaded leveling feet until the machine sits rock-solid without any wobble. A wobbly rower will skew your PM5 monitor data and cause premature bearing wear.
Step 3: Bungee Cord and Chain Tension Check
Out of the box, the bungee cord inside the flywheel housing should have roughly 1 to 2 inches of visible travel when the chain is fully extended. If the chain retracts sluggishly, the bungee tension is too loose; if it snaps back violently, it is too tight. Adjust the elastic cord clip on the side of the cage accordingly.
Warning: Never use WD-40 or standard grease on your rowing machine chain. These products attract microscopic dust and metal shavings, creating an abrasive paste that will destroy the chain and internal sprockets within 100 hours of use.Mastering the Technique: The 4-Phase Rowing Stroke
A rowing machine is only as effective as the technique driving it. Poor form leads to lumbar strain and diminished caloric output. The stroke is divided into four distinct phases, governed by a strict 1:2 time ratio (the drive takes 1 second, the recovery takes 2 seconds).
1. The Catch (Starting Position)
Shins should be vertical (90 degrees). Hinge forward at the hips with a neutral spine, arms fully extended, and lats engaged. Your shoulders should be slightly in front of your hips. Failure mode: 'Shooting the slide'—where the hips shoot back before the handle moves, placing sheer force on the lumbar spine.
2. The Drive (Power Phase)
The sequence is strictly Legs, Core, Arms. Push explosively through the mid-foot. As the legs approach 80% extension, swing the torso back to an 11 o'clock position, and finally, draw the handle to the lower sternum (xyphoid process).
3. The Finish (End Position)
Legs are fully extended (but not locked out). The torso is leaning back slightly, and the handle is resting just below the chest. The elbows should be drawn back past the ribcage, wrists flat.
4. The Recovery (Return Phase)
The sequence reverses: Arms, Core, Legs. Extend the arms fully, hinge the torso forward past the hips, and only then allow the knees to bend as the seat glides back to the catch. Failure mode: Bending the knees before the hands clear the knees, resulting in the chain slapping against the shins.
Maintenance Protocols for Peak Performance
To ensure your 2026 investment lasts a lifetime, adhere to this strict maintenance schedule:
- Daily: Wipe down the monorail with a damp microfiber cloth and mild glass cleaner. Sweat contains salt, which will pit the stainless steel rail and cause the seat rollers to grind.
- Every 40 Hours: Apply 1 teaspoon of purified mineral oil or 3-in-One oil to a paper towel and pull it along the entire length of the chain. Wipe off excess oil to prevent dust accumulation.
- Annually: Inspect the seat rollers for flat spots. If the machine has been stored with the seat parked in the exact same position on the rail for months, the polyurethane rollers can deform. Always store the seat near the flywheel when not in use.
Frequently Asked Questions
Can rowing completely replace my outdoor walking routine?
From a cardiovascular and caloric expenditure standpoint, yes. Rowing elevates the heart rate faster and engages more muscle mass. However, walking provides weight-bearing skeletal loading (beneficial for bone density) and vestibular balance training that a seated rower cannot replicate. We recommend a hybrid approach: 3 days of rowing, 2 days of outdoor walking.
Is a rowing machine safe for bad knees?
Yes, rowing is a closed-chain, zero-impact exercise. Because your feet are strapped in and there is no ground-strike force, it is widely recommended by physical therapists for knee rehabilitation. Just ensure you do not over-compress at the catch (shins must not go past vertical).
How do I store a Concept2 RowErg?
The machine separates into two pieces in under 15 seconds by pulling the quick-release frame lock pin. The front cage stands upright on its caster wheels, occupying a mere 25 x 33-inch footprint in the corner of your room.
More gear to consider
All reviews
Air Bike vs Assault Bike Guide: Therun Incline Treadmill Care

Curved vs Motorized: A Beginner Guide to Treadmill Length

How to Align Treadmill Belt: Curved vs Motorized Setup Guide

How to Log In iFIT on Treadmill Consoles & Fix Cardio Noise
How to Turn On Life Fitness Treadmill vs Portable Cardio Trends
