Upright, Recumbent, Spin Bikes & Treadmill Belt Adjustment
Compare upright, recumbent, and spin stationary bike types for your home gym. Plus, master treadmill belt adjustment with our expert maintenance guide.

The 2026 Home Cardio Dilemma: Bikes vs. Treadmills
When outfitting a home gym in 2026, the debate between stationary bikes and treadmills remains fierce. According to the CDC's physical activity guidelines, adults require at least 150 minutes of moderate-intensity cardiovascular exercise weekly. While treadmills are phenomenal for weight-bearing bone density work, they come with a notorious maintenance headache: the running belt. Conversely, modern stationary bikes offer near-zero maintenance but vary wildly in biomechanics.
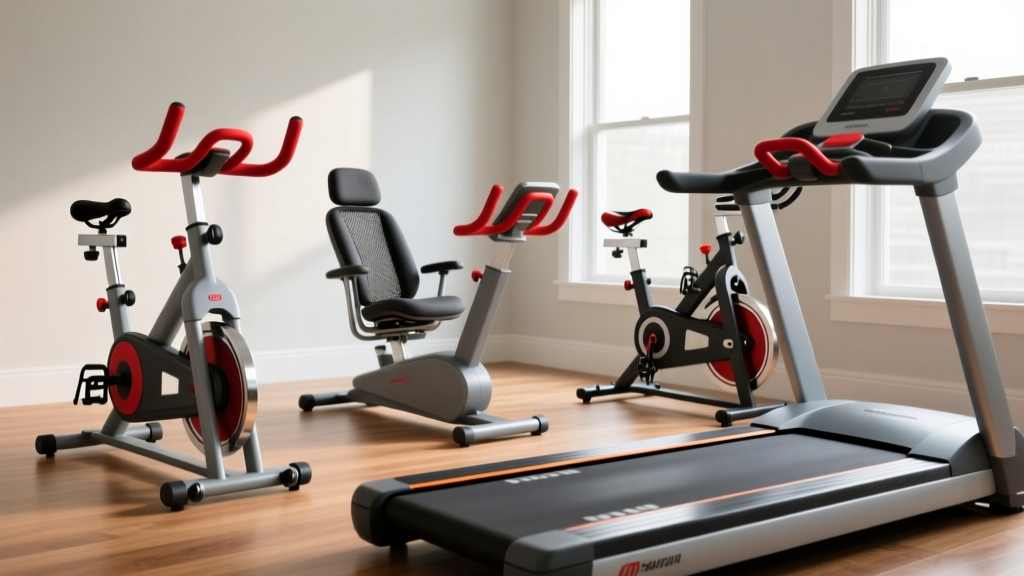
In this hands-on review, we break down the three primary stationary bike types—upright, recumbent, and spin—to help you choose the right ergonomic fit. Then, for those who already own (or are dead-set on buying) a treadmill, we provide an expert, step-by-step masterclass on treadmill belt adjustment to save you from costly motor burnouts.
Stationary Bike Types: Upright vs. Recumbent vs. Spin
Not all bikes are created equal. The American Council on Exercise (ACE) emphasizes that proper machine alignment is critical for preventing repetitive strain injuries. Here is how the big three stack up in our testing lab.
1. Spin Bikes (Indoor Cycles)
Spin bikes are designed to mimic the aggressive, forward-leaning geometry of outdoor road bikes. They feature a heavy flywheel (often 30-40 lbs) and a narrow 'Q-factor' (the distance between the pedals).
- Top Pick: Schwinn IC8 (Approx. $1,299)
- Best For: HIIT workouts, cycling enthusiasts, and high-calorie burn.
- Hands-On Note: The IC8's magnetic resistance is whisper-quiet, and its 160mm Q-factor feels incredibly natural for runners and cyclists transitioning to indoor training. However, the aggressive saddle can cause sit-bone discomfort for beginners until they adapt.
2. Upright Bikes
Upright bikes feature a more relaxed, vertical seating position with a wider, plush saddle and higher handlebars. They are the traditional 'gym staple' cardio machines.
- Top Pick: NordicTrack Commercial VU 29 (Approx. $1,799)
- Best For: Moderate steady-state cardio, seniors, and users who want upper-body engagement.
- Hands-On Note: The VU 29 offers a fantastic step-through design. The wider pedal stance (approx. 200mm Q-factor) reduces hip impingement, making it vastly more comfortable for 45+ minute sessions compared to a spin bike.
3. Recumbent Bikes
Recumbent bikes place the user in a laid-back, seated position with the legs extending forward. This design eliminates upper-body fatigue and drastically reduces lumbar shear force.
- Top Pick: Sole Fitness R92 (Approx. $1,599)
- Best For: Rehabilitation, users with lower back pain, and heavy-duty joint-friendly cardio.
- Hands-On Note: The R92's mesh backrest provides excellent lumbar support. Because your heart doesn't have to pump blood vertically against gravity as aggressively, perceived exertion is lower, allowing for longer duration workouts.
Comparison Matrix: 2026 Bike Types at a Glance
| Bike Type | Posture & Ergonomics | Drive System | Maintenance Level | Avg. Price (2026) |
|---|---|---|---|---|
| Spin (Indoor Cycle) | Aggressive, forward-leaning, narrow Q-factor | Poly-V Belt / Magnetic | Very Low (Wipe down only) | $1,000 - $2,500 |
| Upright | Vertical, relaxed, wide saddle | ECB Magnetic | Low (Occasional bolt check) | $1,200 - $2,200 |
| Recumbent | Reclined, full back support, forward extension | ECB Magnetic | Low (Track roller cleaning) | $1,300 - $2,500 |
The Maintenance Divide: Why Treadmill Belts Fail
While magnetic stationary bikes require virtually zero mechanical maintenance, treadmills are a different beast. The friction between the running belt and the deck generates immense heat and physical drag. Over time, the belt stretches, leading to two common failure modes: lateral drifting (the belt pulls to the left or right) and slippage (the belt hesitates when you plant your foot).
As noted by equipment testing experts at Consumer Reports, ignoring a slipping belt forces the drive motor to draw excess amperage, which will eventually fry the motor controller board—a repair that easily exceeds $350 in parts and labor. Mastering treadmill belt adjustment is the single most valuable skill a treadmill owner can learn.
Hands-On Guide: Mastering Treadmill Belt Adjustment
Before calling a technician, grab a 5mm or 3/16-inch Allen hex key (the exact size depends on your brand, such as NordicTrack, Sole, or ProForm). Follow this precise protocol to restore your belt's tension and tracking.
Step 1: Diagnose the Issue at 3 MPH
Turn the treadmill on and set the speed to exactly 3.0 MPH. Do not stand on the belt. Observe the rear edge of the belt. Is it creeping toward the left motor hood? Is it hesitating when you step on it? Diagnosis dictates your adjustment strategy.
Step 2: The 'Quarter-Turn' Rule for Tension
Locate the two rear roller adjustment bolts at the very back of the treadmill deck (left and right).
- If the belt is slipping underfoot, you need to increase tension. Insert your Allen key into the left bolt and turn it exactly one-quarter (1/4) turn clockwise.
- Move to the right bolt and turn it exactly one-quarter (1/4) turn clockwise.
- Crucial: Never adjust just one side for tension issues, or you will force the belt off-track and fray the edges against the plastic side rails.
Step 3: Correcting Lateral Drift
If the belt is drifting to the left, it means the left side is looser than the right. Turn the left rear bolt one-quarter turn clockwise, OR turn the right bolt one-quarter turn counter-clockwise. Watch the belt for 30 seconds at 3 MPH to see if it centers itself.
⚠️ Expert Warning: The Over-Tightening Trap
The most common mistake DIYers make during treadmill belt adjustment is over-tightening. If you crank the rear bolts too far, you will stretch the belt beyond its yield point and put catastrophic strain on the front roller bearings. The Lift Test: With the machine OFF, reach under the center of the belt and pull up. You should be able to lift the belt exactly 2 to 3 inches off the deck. If you can't lift it at least 2 inches, it is too tight and will burn out your motor.
Step 4: The Stomp Test
Once the belt is centered and passes the 2-to-3-inch lift test, set the speed to 2.0 MPH. Step onto the belt and plant your feet firmly, trying to 'stomp' or stall it. If the front roller continues to turn but the belt stops, your belt is still loose, or your deck lacks 100% silicone lubrication. (Never use WD-40; it will destroy the PVC belt matrix).
'Proper treadmill belt adjustment isn't just about keeping the machine straight; it's about managing the amperage draw on your drive motor. A well-tensioned and lubricated belt can extend the lifespan of a $2,000 treadmill by up to five years.' — FitGearPulse Lab Technicians
Final Verdict: Matching the Machine to Your Biomechanics
Choosing between stationary bike types and a treadmill ultimately comes down to your joint health, fitness goals, and willingness to perform maintenance.
- Choose a Spin Bike (e.g., Schwinn IC8) if you want high-intensity interval training, a road-bike feel, and zero belt maintenance.
- Choose a Recumbent Bike (e.g., Sole R92) if you are managing lumbar disc issues or recovering from lower-body physical therapy.
- Choose a Treadmill if you are training for a marathon or prioritize weight-bearing osteogenic exercise. Just remember to keep your 5mm Allen key handy, perform a 100% silicone deck lube every 150 miles, and use our treadmill belt adjustment guide to keep your motor running cool.
By understanding the ergonomic differences between upright, recumbent, and spin bikes, and knowing exactly how to maintain a motorized deck, you are now equipped to make a highly informed, long-lasting investment in your 2026 home gym.
More gear to consider
All reviews
High Incline Treadmill Buying Guide: Avoid These Feature Mistakes

Elliptical vs Treadmill: Is a Treadmill 30 Minutes a Day Better?
Hyrox Treadmill Guide: Curved vs Motorized for Beginners

Retro Walking Treadmill Belt Maintenance & Lubrication Guide

ProForm Carbon Pro 9000 Treadmill: Beginner's Feature Guide
