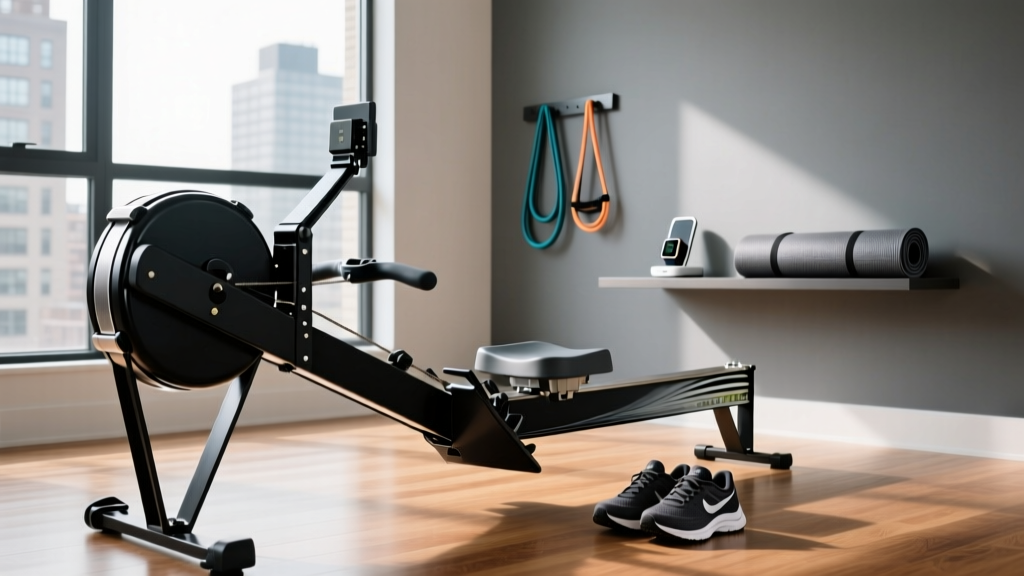
Rowing Machine Setup & Buying Guide vs 5.0 mph on Treadmill
Master your rowing machine setup, buying choices, and stroke technique. Discover how indoor rowing compares to walking 5.0 mph on treadmill for cardio.

The Cross-Training Paradigm: Beyond the Treadmill
For years, the gold standard for steady-state Zone 2 cardio has been maintaining a brisk 5.0 mph on treadmill decks. It is a reliable, low-impact benchmark for walkers and light joggers. However, as we move through 2026, hybrid fitness routines have taken over, and indoor rowing machines have emerged as the ultimate cross-training alternative. While a treadmill primarily targets the lower body, a rowing machine engages 86% of your muscle mass per stroke, offering a superior metabolic stimulus without the repetitive joint loading of a moving belt.
But buying a rower is only the first step. Unlike plug-and-play treadmills, rowing machines require precise assembly, calibration, and a mastery of biomechanical technique to avoid injury. This comprehensive guide covers everything from selecting the right ergometer to the complete setup and installation walkthrough, culminating in a direct metabolic comparison against your favorite treadmill pace.
Rowing Machine Buying Guide: Choosing Your Ergometer
Before you can unbox and assemble your machine, you must choose the right resistance profile. The 2026 market is dominated by three primary resistance types, each catering to different budgets and spatial constraints.
| Resistance Type | Top 2026 Model | Price Range | Best For | Noise Level |
|---|---|---|---|---|
| Air | Concept2 RowErg | $990 - $1,100 | Purists, CrossFit, Data Nerds | High (Whoosh) |
| Magnetic | Hydrow Standard | $2,495 - $2,695 | Immersive Tech, Quiet Homes | Very Low (Silent) |
| Water | WaterRower Natural | $1,595 - $1,795 | Aesthetics, Sensory Feedback | Medium (Sloshing) |
Expert Insight: If your primary goal is raw performance tracking and durability, the Concept2 RowErg remains unmatched. Its nickel-plated steel chain and PM5 monitor are industry standards. For those in shared apartments where the noise of an air flywheel is prohibitive, magnetic resistance models offer a near-silent stroke.
Complete Setup and Installation Walkthrough
Proper installation is critical. A misaligned monorail or loose flywheel housing can cause chain derailment and severe wobble during high-stroke-rate intervals. Below is the step-by-step installation walkthrough for a standard air-resistance ergometer (using the Concept2 footprint as the industry baseline).
Phase 1: Staging and Unboxing
Rowing machines ship in long, heavy boxes (often exceeding 60 lbs). Do not attempt to lift the flywheel assembly alone.
- Clear the Zone: You need a minimum footprint of 96 inches long by 24 inches wide, plus 2 feet of clearance behind the machine for the handle retraction.
- Unbox the Rail: Slide the monorail out of the box first. Inspect the aluminum extrusion for any shipping dents that could cause the seat rollers to stutter.
- Extract the Flywheel: With a partner, lift the front flywheel assembly out of the carton. Place it on a protective foam mat to prevent scratching your hardwood floors.
Phase 2: Mechanical Assembly
Most high-end rowers require minimal but precise bolting. You will typically need a 15mm socket wrench and the provided hex keys.
- Attach the Front Stabilizer: Align the front footplate with the flywheel housing. Insert the M8x20 hex bolts. Crucial: Do not fully tighten them until all four bolts are threaded. Once seated, torque them to approximately 15 Nm to ensure the frame does not twist under load.
- Mate the Monorail: Slide the rear of the monorail into the flywheel housing bracket. Secure with the provided quick-release pins or heavy-duty carriage bolts.
- Install the Monitor Arm: Slide the monitor arm into the top receiver tube. Ensure the internal cable is not pinched between the metal tubes before tightening the thumb screw.
Pro-Tip: Floor Protection and Leveling
Never place a rower directly on carpet or bare hardwood without a high-density PVC mat (at least 3/16-inch thick). Sweat is highly corrosive and will ruin polyurethane floor finishes. Once placed on the mat, adjust the two rear leveling feet. If the machine rocks even 2 millimeters during the drive phase, it will cause premature wear on the seat rollers.
Phase 3: Bungee Calibration and Chain Tension
The most common installation failure mode is improper bungee cord tension, leading to a sluggish handle retraction.
- Pull the handle out to the maximum catch position and let it go.
- The handle should snap back into the cage in under 1 second.
- If it retracts slowly, open the flywheel housing cover (usually 4 Phillips screws) and adjust the elastic cord knot to increase tension. Refer to the official manufacturer service guides for exact knot placements.
Mastering the Technique: The 4-Phase Stroke
Once your machine is assembled and calibrated, you must learn the stroke. Unlike walking at 5.0 mph on treadmill belts where your body naturally finds a rhythm, rowing requires conscious biomechanical sequencing. According to sports physiologists, the power distribution should be 60% legs, 20% core, and 20% arms.
'The rowing stroke is not a pull; it is a push. If your biceps are burning before your quads, your sequencing is fundamentally flawed.' - Elite Rowing Coaching Adage
1. The Catch
Shins vertical, torso hinged forward at roughly 11 o'clock, arms straight. You should feel a deep stretch in the hamstrings. Keep the chest up to avoid compressing the diaphragm.
2. The Drive
Initiate the movement by driving through the heels. The arms remain completely straight until the legs are 80% extended. Only then do you hinge the hips open and finally draw the handle to the lower sternum.
3. The Finish
Legs are flat, torso leaned back to 1 o'clock, handle hovering just below the pec line. Elbows are drawn back, wrists flat.
4. The Recovery
The exact reverse of the drive. Arms extend first, torso hinges forward past the knees, and only then do the knees bend to slide back to the catch. The recovery should take twice as long as the drive (a 1:2 stroke ratio).
For a deeper biomechanical breakdown, the Mayo Clinic's guide on aerobic exercise sequencing highlights the importance of core stabilization during repetitive hinge movements to prevent lumbar strain.
Energy Expenditure: Rowing vs. 5.0 mph on Treadmill
How does the ergometer stack up against your standard treadmill routine? Let us look at the metabolic data. According to comprehensive caloric expenditure studies published by Harvard Health Publishing, the calorie burn varies significantly based on intensity and modality.
| Activity (30 Minutes) | 125 lb Person | 155 lb Person | 185 lb Person | Joint Impact |
|---|---|---|---|---|
| Treadmill (5.0 mph / 12 min mi) | 240 kcal | 288 kcal | 336 kcal | Low-Moderate |
| Rowing (Moderate Effort) | 210 kcal | 252 kcal | 294 kcal | Zero Impact |
| Rowing (Vigorous Effort) | 255 kcal | 369 kcal | 440 kcal | Zero Impact |
The Takeaway: A casual, moderate row burns slightly fewer calories than a brisk 5.0 mph walk on a treadmill. However, once you push the rower into a vigorous intensity (e.g., holding a sub-2:00/500m split), the full-body muscle recruitment causes the calorie burn to skyrocket, vastly outpacing the treadmill while completely eliminating the ground reaction forces associated with walking or jogging.
Common Failure Modes and Troubleshooting
Even with a perfect installation, rowing machines require specific maintenance to avoid mechanical failures.
- Chain Sticking or Rust: The nickel-plated chain requires lubrication every 50 hours of use. Use purified mineral oil or 3-in-1 oil. Never use WD-40, as it strips existing lubricants and attracts dust, creating a grinding paste.
- Monitor Dropout: If the PM5 monitor flickers or dies mid-stroke, check the battery contacts for corrosion. Sweat dripping from the face onto the monitor arm is a common culprit. Wipe the arm down after every session.
- Heel Lift at the Catch: If your heels lift off the footplates when you compress into the catch, your ankle mobility is restricted. Do not strap your feet in tighter; instead, widen your stance slightly or perform ankle dorsiflexion stretches before your workout.
Final Thoughts on Your Cardio Setup
Transitioning from a steady 5.0 mph on treadmill routines to the dynamic, full-body demand of a rowing machine is one of the most effective cardiovascular upgrades you can make in 2026. By carefully selecting the right resistance profile, executing a meticulous mechanical setup, and respecting the biomechanics of the four-phase stroke, you will build a bulletproof engine that translates to every other athletic endeavor. Clear your space, torque your bolts, and start rowing.
More gear to consider
All reviews
Treadmill Motor Size Guide: Is the ProForm 385 Treadmill Enough?

How Much Are Woodway Treadmills vs. Under Desk Office Models?

Pad Setup: Calories Burned on Treadmill Calculator With Incline
Aviron Victory Treadmill Reviews & Stair Climber Troubleshooting Guide

The Fastest Treadmill for Small Spaces: 2026 Folding Reviews
