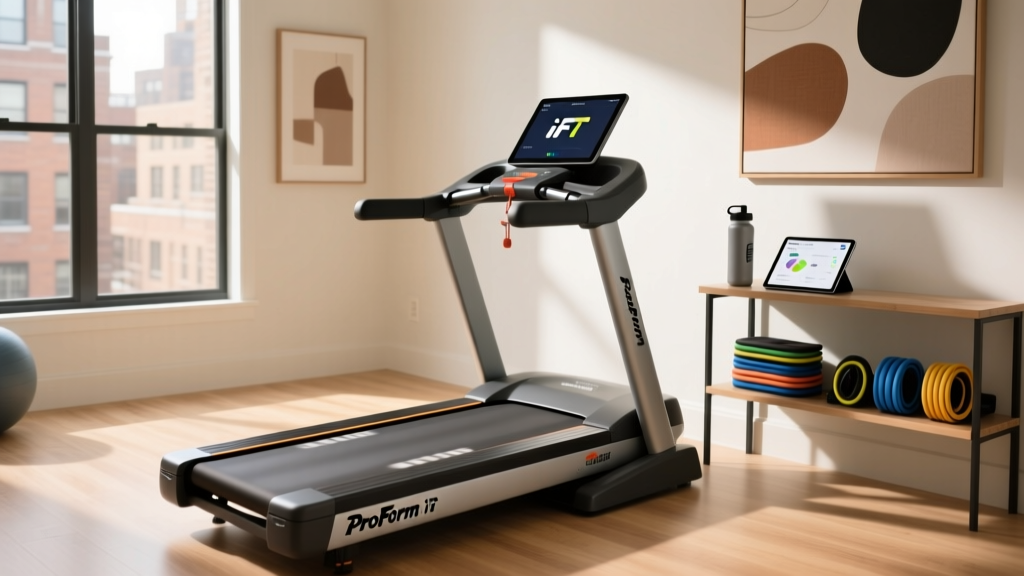
ProForm iFIT Treadmill Setup & Feature Comparison (2026)
Master your ProForm iFIT treadmill setup with our 2026 installation walkthrough. Compare features across Pro, Carbon, and City models for a flawless start.

Pre-Installation: Space, Power, and Safety Requirements
Unboxing a new piece of cardio equipment is exciting, but improper preparation is the leading cause of premature motor failure and console malfunctions. Before you cut the zip ties on your new ProForm iFIT treadmill, you must verify your installation environment. According to the U.S. Consumer Product Safety Commission (CPSC), inadequate clearance is a primary factor in home gym injuries.
⚠️ CRITICAL CLEARANCE & POWER RULES:- Rear Clearance: Maintain a minimum of 6 feet (72 inches) of unobstructed space directly behind the treadmill to prevent severe friction burns in the event of a fall.
- Side Clearance: Allow at least 2 feet on each side for emergency dismounts and ventilation.
- Electrical Circuit: Your treadmill requires a dedicated 15-amp, 120-volt circuit. Never plug your machine into a GFCI (Ground Fault Circuit Interrupter) outlet or a power strip. Treadmill motors draw massive initial amperage upon startup, which will instantly trip GFCI breakers and can corrupt the console's logic board.
ProForm iFIT Treadmill Feature Comparison Matrix
As you lay out your parts, it is crucial to verify that the components in your box match the model you purchased. ProForm’s lineup is heavily integrated with iFIT, but the hardware capabilities vary drastically between the Pro, Carbon, and City series. Use this 2026 comparison matrix to confirm your machine's specifications and understand the feature set you are about to assemble.
| Feature / Model | ProForm Pro 9000 | ProForm Carbon TL | ProForm City L6 |
|---|---|---|---|
| Motor Power | 3.6 CHP Mach Z | 3.0 CHP Mach Z | 2.6 HP Continuous |
| Display | 22" HD Smart Touchscreen | 10" LCD (Device shelf on some variants) | 5" Backlit LCD |
| Incline / Decline | -3% to 12% | 0% to 12% | 0% to 10% |
| Belt Dimensions | 20" x 60" | 18" x 55" | 17.5" x 45" |
| 2026 MSRP | $1,099 | $599 | $499 |
Step-by-Step Hardware Assembly Walkthrough
ProForm treadmills typically arrive 80% pre-assembled. However, the final 20%—specifically the uprights and console—accounts for 90% of user errors. Grab an 8mm hex wrench (usually included, but using your own ratcheting set saves time) and a second person. The Pro 9000 base weighs over 160 lbs; do not attempt to lift it alone.
- Base Positioning: Cut the box open from the bottom. Leave the styrofoam endcaps on the base frame. Tilt the base slightly, pull the cardboard sleeve off, and slide the base into its designated 6-foot clearance zone.
- Upright Wire Routing (The #1 Failure Point): Before bolting the left and right uprights to the base, locate the internal wiring harness. Do not pinch these wires between the metal bracket and the base frame. Feed the wires through the center channel. If you sever the data cable here, your console will power on, but the screen will remain black, requiring a total teardown to fix.
- Securing the Uprights: Insert the four main hex bolts per side. Tighten them to roughly 80% torque. Once both sides are attached, go back and fully tighten them in a star pattern to ensure the frame is square.
- Console Attachment: Connect the three primary wire harnesses (Power, Data, and Incline Sensor). Push the connectors until you hear a definitive 'click'. Secure the console to the uprights using the provided M8 bolts. Do not overtighten, as the plastic housing can crack under excessive pressure.
Expert Tip: ProForm running belts are pre-lubricated at the factory with a specialized silicone emulsion. Do not apply aftermarket treadmill lubricants during setup. Over-lubrication will cause the belt to slip and can void your warranty. Wait at least 6 months or 150 miles before checking lubrication levels.
Software Setup: Activating iFIT and Calibrating
Hardware assembly is only half the battle. The true value of a ProForm iFIT treadmill lies in its software ecosystem. According to iFIT Customer Support, skipping the initial calibration sequence is the most common reason users experience jerky incline movements during their first workout.
1. Network Connection and Firmware Flashing
Power on the machine using the red rocker switch at the front base. Insert the magnetic safety key into the console. Upon booting, the system will prompt you to connect to Wi-Fi. Select your 2.4GHz network (5GHz networks often struggle to penetrate interior walls to reach home gym equipment). Once connected, the machine will likely initiate a mandatory firmware update. Warning: This process can take 15 to 25 minutes. The screen may go black or display a progress bar. Do not unplug the machine, or you risk bricking the logic board.
2. Incline Calibration Mode
Once the firmware is updated and you have logged into your iFIT account, you must calibrate the incline motor. This ensures the machine's internal sensors match the physical angle of the deck.
- Remove the safety key, then place it back on the console to wake the system.
- Press and hold the Speed Up and Incline Up buttons simultaneously for 3 to 5 seconds.
- The console will enter 'Calibration Mode'. The deck will automatically rise to its maximum incline (e.g., 12% or 15%), pause, and then lower to its minimum (or decline, if you own the Pro 9000).
- Once the deck stops moving and the console beeps, calibration is complete. Press the safety key to exit.
Troubleshooting Common Setup Failures
Even with meticulous assembly, you may encounter a few edge cases during your first week. Here is how to diagnose and resolve the most frequent setup anomalies without waiting on hold with ProForm Official Support.
- Console Powers On, But Screen is Black: This almost always indicates a pinched data cable between the upright and the base. You will need to loosen the upright bolts, carefully pull the wire harness out of the pinch point, and reconnect it at the console.
- Walking Belt Slips During Heavy Footstrikes: The belt may have stretched during transit. Locate the two rear roller adjustment bolts at the back of the deck. Turn both bolts exactly one-quarter (1/4) turn clockwise using an Allen wrench. Test the belt. Repeat if necessary, but never turn them more than a half-turn total, or you will overstress the motor.
- Error Code 1 or 2 (Speed/Incline Sensor Fault): Unplug the machine for 60 seconds. Remove the motor hood cover (usually 4-6 Phillips head screws). Check that the optical sensor near the motor flywheel is clean and properly aligned with the slotted disk. Dust from shipping can block the infrared beam.
- iFIT Auto-Adjusts Feel 'Jerky': Ensure your Wi-Fi signal strength is above -65dBm in the gym area. iFIT sends micro-adjustments to the incline motor in real-time; high latency or packet loss causes the machine to 'catch up' abruptly, resulting in a jerky deck movement.
By following this comprehensive setup protocol and understanding the specific feature set of your chosen model, your ProForm iFIT treadmill will be perfectly calibrated, safe, and ready to deliver years of interactive cardio training.
More gear to consider
All reviews
Compact Cardio 2026: 770T Treadmill & Portable Picks

AFG Treadmill 7.3 AT Maintenance: Compact Cardio Longevity Tips

Curved vs Motorized: Troubleshooting Treadmill Weight Limit 300 lbs

Funmily Treadmill vs. Spin, Upright & Recumbent Bike Types (2026)

How Long Walking on Treadmill to Lose Weight vs Stair Climbers
