Stair Climber Setup Guide: Better Than a Water Treadmill for Humans?
Master your home stair climber installation with our complete setup walkthrough. See why it beats the complex plumbing of a water treadmill for humans.

The Aquatic Illusion: Why We Skip the Water Treadmill for Humans
As we navigate the 2026 home fitness landscape, elite physical therapy clinics and high-end wellness centers are increasingly installing a water treadmill for humans to leverage aquatic resistance and joint unloading. The biomechanical benefits of subaquatic cardio are undeniable, but bringing this technology into a residential garage or basement is a logistical nightmare. A standard residential aquatic setup requires a 10x15 ft reinforced concrete basin, 1,500+ gallons of water (adding roughly 12,500 lbs of dead load to your floor joists), and a commercial HVAC dehumidification system to prevent structural mold.
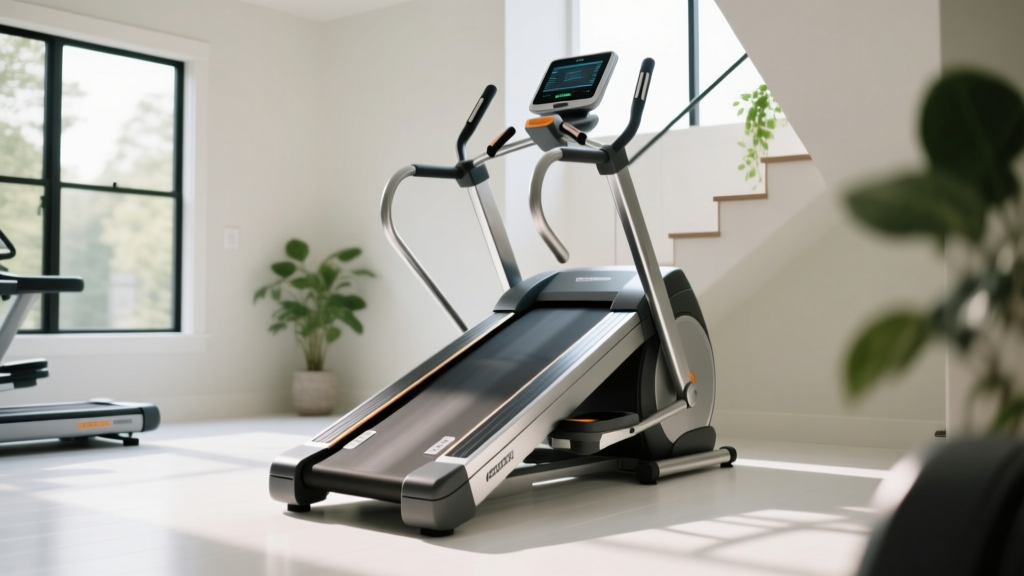
For 99% of home gym owners, a motorized stair climber remains the ultimate high-ROI, low-impact alternative. Whether you are unboxing a StairMaster StepMill (Home Series) or a Matrix Fitness ClimbMill, the installation process requires precision, structural awareness, and electrical foresight. This complete setup and installation walkthrough will guide you through transforming a pallet of heavy steel into a fully calibrated, gym-ready cardio machine.
⚠️ Structural Warning: Never place a motorized stair climber on an unreinforced second-floor balcony or cantilevered deck. The dynamic impact force of a 200 lb user at 120 steps-per-minute generates localized downward spikes exceeding 350 lbs per square foot.Pre-Installation: Spatial Geometry and Floor Load
Before you cut the zip ties, you must verify your spatial envelope. Stair climbers are notoriously deceptive regarding their spatial requirements.
- Footprint: Most commercial-grade home models (like the StairMaster SM3000) require a 35" x 55" physical footprint, but you must leave a 24" clearance behind the machine for emergency dismounts and ventilation.
- Ceiling Clearance: This is the most common installation failure. While the user's elevation doesn't change on a revolving step treadmill, the console and handrails extend up to 78 inches. If you are mounting overhead lighting or fans, ensure a minimum 8.5-foot ceiling height to prevent visual claustrophobia and allow for safe posture extension.
- Flooring: Lay down a 3/8-inch thick vulcanized rubber mat. This isn't just for noise dampening; it increases the friction coefficient of the machine's leveling feet, preventing the unit from 'walking' across hardwood floors during high-resistance intervals.
Step-by-Step Assembly: The Heavy Lifting
Assembling a 300+ lb stair climber is a two-person job. Do not attempt to lift the main drive housing alone. Follow this sequence to avoid stripping the primary chassis threads.
- Base Frame Positioning: Move the base frame onto your rubber mat. Use a carpenter's level across the front and rear stabilizers. Adjust the threaded leveling feet until the bubble is dead center. An unlevel base will cause the internal drive belt to track improperly, leading to premature fraying.
- Upright Column Installation: Feed the primary data and power cables through the left upright before bolting it to the base. Use the provided 3/8" hex bolts. Pro-Tip: Hand-thread all bolts first, then torque them to 25 ft-lbs using a calibrated torque wrench in a star pattern. Overtightening can warp the steel mounting brackets.
- Console and Handrail Mounting: Connect the multi-pin data harness. Ensure the locking collar clicks into place. A loose data harness is the #1 cause of 'Error Code 3' (Communication Fault) on first boot. Secure the shrouds using the pre-drilled Phillips screws.
Installation Showdown: Stair Climber vs. Water Treadmill
To put the sheer practicality of a home stair climber into perspective, compare its installation metrics against the increasingly hyped aquatic alternatives.
| Metric | Home Stair Climber (2026 Models) | Residential Water Treadmill for Humans |
|---|---|---|
| Total Installation Cost | $4,500 - $8,500 (Machine + Mat) | $35,000 - $60,000+ (Plumbing + HVAC) |
| Setup Time | 3 to 5 hours (2 people) | 4 to 8 weeks (Contractors required) |
| Dead Load Impact | ~320 lbs | 12,000+ lbs (Water + Concrete) |
| Electrical Requirement | Standard 120V / 15A Dedicated | 240V / 50A (Heaters + Pumps) |
| Ongoing Maintenance | Belt tensioning, silicone lube | Chemical balancing, filter changes |
Electrical Setup and First-Boot Calibration
Modern stair climbers feature massive alternators and DC motors that draw significant amperage during the initial inertia-breaking phase of a workout. According to the American Council on Exercise (ACE), proper equipment power management is vital for both safety and machine longevity.
The Dedicated Circuit Rule
Never plug a motorized stair climber into a shared 15-amp circuit that also powers your basement freezer or space heater. The motor's surge draw can easily trip a standard breaker mid-stride, which not only interrupts your workout but can corrupt the console's firmware. Install a dedicated 20-amp circuit with a commercial-grade surge protector rated for at least 4,000 Joules.
Calibration Sequence
Once powered on, do not immediately step onto the machine. Access the hidden diagnostic menu (usually by holding the 'Level Up' and 'Start' buttons simultaneously for 5 seconds). Run the Auto-Calibration Routine. This cycles the step mechanism through its entire resistance spectrum, allowing the logic board to map the motor's voltage output against the physical brake pad tension.
Long-Term Maintenance and Belt Tensioning
Unlike the constant water filtration required by an aquatic treadmill, a stair climber's maintenance is purely mechanical. The primary failure mode in home units is drive belt stretch.
"A slipping drive belt on a stair climber doesn't just ruin your workout cadence; it forces the DC motor to overwork to compensate for the lost kinetic transfer, eventually frying the motor control board." — FitGearPulse Service Manual, 2025 Edition
The 90-Day Tension Check: Every three months, unplug the unit and remove the lower front shroud. Press your thumb into the center of the main drive belt. It should deflect exactly 1/2 inch. If it deflects more than 3/4 inch, loosen the motor mount bolts, slide the motor housing back by 1/8 inch using a pry bar, and retighten. Apply a light coat of 100% silicone spray to the step-chain guides to eliminate high-pitched squeaking.
Final Thoughts on Home Cardio Integration
While the therapeutic allure of a water treadmill for humans is well-documented in clinical rehabilitation settings—supported by extensive cardiovascular guidelines from organizations like the Centers for Disease Control and Prevention (CDC)—the reality of residential installation makes it a pipe dream for most. A meticulously installed, properly calibrated home stair climber delivers 90% of the low-impact, high-yield cardiovascular benefits at a fraction of the cost, space, and structural headache. Respect the torque specs, secure your electricals, and your machine will deliver a decade of relentless vertical gains.
More gear to consider
All reviews
ProForm Treadmill 415 Crosswalk & Air vs Assault Bike Guide

NordicTrack EXP 14i Treadmill Setup & Noise Level Comparison

Costway SuperFit Treadmill vs Stationary Bike Types: Space Guide
Temu Treadmill Belt Maintenance: True Cost & Value Analysis

2026 Smart Cardio Market: Air Bikes & RUNN Smart Treadmill Sensor