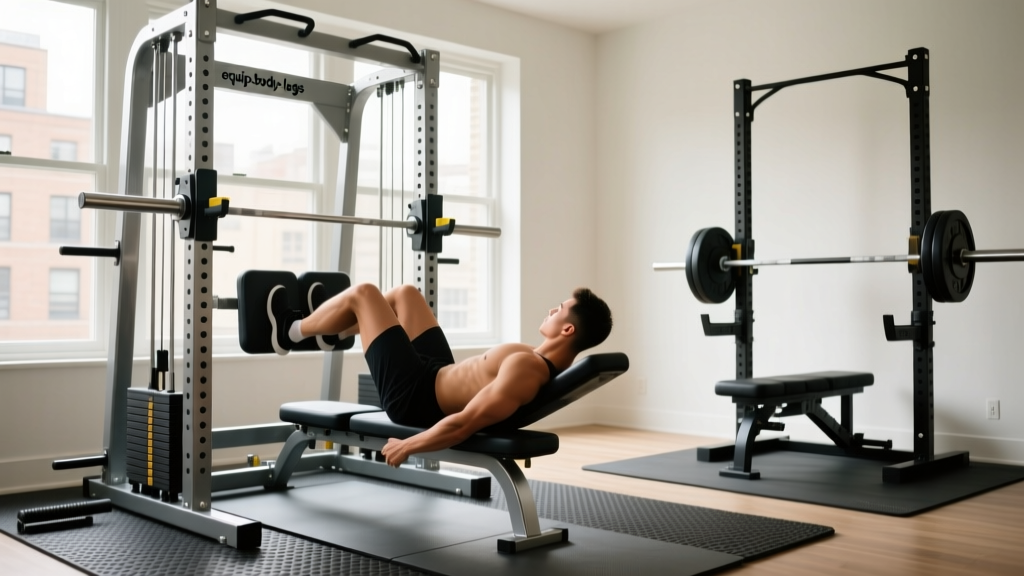
Hack Squat vs Leg Press: Setup a Leg Press at Home Without a Machine
Compare the hack squat machine vs leg press, and learn our complete installation walkthrough to build a leg press at home without a machine.

The Home Gym Space Dilemma: Hack Squat Machine vs Leg Press
When outfitting a garage or basement gym, lower-body development often hits a spatial and financial wall. The traditional 45-degree commercial leg press is a staple for quad isolation, but it commands a massive footprint—often exceeding 85 inches in length and weighing upwards of 850 pounds. For the home gym owner, this makes the commercial leg press practically obsolete. This forces a critical decision: do you invest in a rack-mounted hack squat machine, or do you engineer a leg press at home without machine footprint?
In this complete setup and installation walkthrough, we will break down the biomechanical differences between the hack squat and the leg press. More importantly, we will provide exact, step-by-step installation guides for both a modern rack-mounted hack squat attachment and a DIY zero-machine leg press alternative, ensuring you can train your lower body safely and effectively in 2026 without sacrificing your garage space.
Biomechanics and Muscle Activation Matrix
Before unbolting any hardware, it is vital to understand what you are trying to replicate. According to the anatomical and kinesiological data mapped by ExRx.net, both movements target the quadriceps femoris, but the kinetic chain and spinal loading differ drastically.
- The Hack Squat: Operates on a fixed vertical or slightly angled track (usually 7 to 15 degrees off vertical). Because your torso is supported against a pad, lumbar shear force is virtually eliminated. However, the fixed path demands high ankle mobility and places immense stress on the patellar tendon at the bottom of the movement.
- The Leg Press: Operates on a 45-degree sled. The seated position alters the hip angle, reducing the stretch on the gluteus maximus and shifting a higher percentage of the load directly onto the vastus lateralis and rectus femoris.
Expert Insight: If your primary goal is pure quad hypertrophy with zero lower-back fatigue, the leg press wins. If you want a compound movement that translates better to athletic barbell squats while sparing the spine, the hack squat is superior.
Walkthrough 1: Installing a Rack-Mounted Hack Squat
The most space-efficient way to bring a hack squat into your home gym is via a rack-mounted carriage system. Premium models like the Rogue Monster Lite Hack Squat Attachment (approx. $495) or the Bells of Steel Rack Mounted Hack Squat (approx. $399) utilize your existing power rack uprights, cutting the required footprint by more than 60%.
Prerequisites and Hardware Check
Before beginning, verify your power rack specifications. These attachments universally require 3x3-inch steel uprights with 5/8-inch pin holes. If you have a 2x2 or 3x4 rack, you will need to purchase specialized adapter brackets or swap your uprights.
Step-by-Step Installation
- Mount the Lower Guide Brackets: Position the lower carriage brackets at the very bottom of your rack's front uprights. Insert the 3/4-inch steel hitch pins through the 5/8-inch holes. Secure them with the provided locking detent pins to prevent accidental dislodging during heavy eccentric loads.
- Install the Linear Bearings: Slide the UHMW (Ultra-High Molecular Weight) plastic linear bearings onto the dual steel guide rods. Crucial Step: Apply a light coat of PTFE (Teflon) dry lubricant to the rods. Do not use WD-40 or wet oils, as they will attract garage dust and grind the bearings to a halt within months.
- Attach the Carriage and Shoulder Pads: Lift the main carriage plate onto the guide rods. Align the upper mounting brackets with the rear uprights of your rack (typically requiring a rack depth of 24 to 30 inches). Pin the upper brackets securely.
- Set the Safety Catches: Install the adjustable safety stops on the guide rods. Set them exactly two inches below your maximum depth to catch the carriage in case of muscular failure, mimicking the safety pins of a traditional squat rack.
Walkthrough 2: Building a Leg Press at Home Without a Machine
If you lack a power rack entirely, or simply refuse to dedicate 16 square feet to a hack squat, you can successfully execute a leg press at home without machine hardware. We will cover two distinct, highly effective setups: the Friction Slider method and the Functional Trainer Cable method.
Method A: The UHMW Slider and Heavy Band Setup
This method uses floor friction and elastic resistance to mimic the 45-degree sled press. It costs under $150 to build and stores in a closet.
- Source the Slider Board: Purchase a 24x24-inch sheet of 1/2-inch thick UHMW polyethylene plastic from a local plastics supplier or hardware store. UHMW has an incredibly low coefficient of friction, allowing it to glide smoothly over smooth concrete, hardwood, or laminate floors just like a steel sled on rails.
- Anchor the Resistance: Take two 41-inch, 1.75-inch wide heavy-duty loop bands (each providing roughly 75-100 lbs of resistance at 2x stretch). Anchor them to the base of a squat rack, a heavy sandbag, or structural wall brackets.
- The Execution Setup: Lie supine (on your back) on a yoga mat. Place your feet flat against the center of the UHMW board. Loop the resistance bands over the top of the UHMW board and hold the loops securely in your hands, or route them over your shoulders if using a specialized band harness. Press the board outward, allowing it to glide across the floor, and control the eccentric return.
Method B: The Functional Trainer Cable Strap
If you own a home cable crossover or functional trainer, you can convert it into a seated leg press. You will need a specialized accessory like the Spud Inc. Cable Leg Press Strap (approx. $45).
- Setup: Pin the weight stacks to your desired load. Attach the Spud Inc. strap to the low pulleys using carabiners.
- Positioning: Sit on the floor or a low bench directly in front of the cable machine. Loop the heavy-duty nylon strap over the soles of your shoes.
- Movement: Press your legs outward to full extension. Because the cables pull horizontally rather than at a 45-degree angle, this variation heavily targets the rectus femoris and mimics a seated hack press.
Comparison Matrix: Cost, Space, and Setup
| Setup Type | Estimated Cost (2026) | Footprint Required | Max Load Capacity | Setup/Teardown Time |
|---|---|---|---|---|
| Commercial 45-Degree Leg Press | $3,500 - $6,000+ | 85" x 35" (Permanent) | 1,000+ lbs | N/A (Permanent) |
| Rack-Mounted Hack Squat | $399 - $495 (+ Rack) | 48" x 48" (Integrated) | 600 - 800 lbs | 5-10 Minutes |
| UHMW Slider + Heavy Bands | $80 - $140 | 4' x 8' (Clear Floor) | ~300 lbs (Band Tension) | 2 Minutes |
| Cable Strap Leg Press | $45 (+ Cable Machine) | 6' x 4' (Clear Floor) | Machine Stack Limit | 1 Minute |
⚠️ Safety Warning: Lumbar Shear and Knee Tracking
When performing the UHMW Slider Band Press, ensure your lower back remains flush against the floor. If your core fatigues and your lumbar spine arches (anterior pelvic tilt) during the eccentric phase, you risk severe disc compression. For the Rack-Mounted Hack Squat, never place your feet too low on the platform; this forces extreme knee flexion and can cause patellar tendonitis over time. Keep your feet high and wide to engage the glutes and protect the knee joint.
Final Verdict: Which Setup Belongs in Your Garage?
The choice between a hack squat machine vs leg press alternatives ultimately comes down to your existing equipment and biomechanical needs. If you already own a 3x3 power rack, the rack-mounted hack squat is an unparalleled investment. It provides the heavy, spinal-supported loading necessary for advanced hypertrophy without eating up your entire garage.
However, if you are working with a minimal budget, travel frequently, or simply want to isolate the quads without the compressive forces of a shoulder pad, learning how to build a leg press at home without machine hardware via the UHMW slider and band method is a stroke of DIY genius. It delivers high-tension, joint-friendly quad isolation that can be packed away in a closet the moment your set is over.
More gear to consider
All reviews
Hip Thrusts vs Leg Press Machine Variations: 2026 Budget Guide

Care Guide: Cable Attachments and Your Leg Press Machine RitFit
Horizontal vs 45° Press: The Compact Leg Press Hack Squat Machine

Leg Extension and Curl Guide: Hack Squat Leg Press Machine Setup

Leg Press Machine Feet Position vs Standing & Seated Calf Raises
