
Chest Press Machine Types: Setup & Installation Guide
Compare chest press machine types and master your setup. This installation guide covers space, flooring, and assembly for pin-loaded and plate-loaded rigs.

Introduction to Gym Engineering and Chest Press Machine Types
Designing a high-performance training space requires more than just purchasing premium iron; it demands a rigorous understanding of spatial planning, structural engineering, and biomechanical alignment. When evaluating chest press machine types for a commercial facility or an elite home gym, the installation phase is where long-term durability and user safety are ultimately determined. In 2026, the line between commercial and residential fitness equipment has blurred, with hybrid facilities demanding rigorous setup protocols that account for dynamic load distribution, acoustic dampening, and precise clearance metrics.
This comprehensive setup and installation walkthrough dissects the three primary chest press machine types—selectorized pin-loaded, plate-loaded converging, and pneumatic smart-resistance systems. We will cover exact footprint requirements, subfloor reinforcement strategies, and post-assembly calibration procedures to ensure your equipment operates flawlessly for decades. According to facility design guidelines published by the National Strength and Conditioning Association (NSCA), improper equipment spacing and inadequate floor load distribution are the leading causes of premature machine wear and facility liability claims.
Selectorized Pin-Loaded Systems: Commercial Standards and Spatial Planning
Selectorized machines, such as the Life Fitness Signature Series Chest Press or the Matrix Magnum, remain the backbone of commercial fitness floors. These units utilize a centralized weight stack guided by precision steel rods and aircraft-grade cables. While they offer unparalleled ease of use, their installation requires meticulous attention to vertical clearances and rear-access spacing.
Footprint and Clearance Metrics
A standard commercial selectorized chest press features a footprint of approximately 53 inches in length and 50 inches in width, with a frame weight ranging from 550 to 620 pounds. However, the physical footprint is only half the equation. You must allocate a minimum of 36 inches of clearance behind the machine for weight stack maintenance and cable inspection, alongside 48 inches of frontal clearance for safe user ingress and egress. Failing to provide adequate rear clearance is a common failure mode that leads to neglected guide rods, resulting in excessive friction, accelerated cable fraying, and eventual catastrophic snapping.
Expert Insight: When assembling the weight stack, never use petroleum-based lubricants on the guide rods. These attract dust and create an abrasive paste. Instead, apply a high-grade white lithium grease or a specialized silicone-based Teflon spray every 90 days to maintain frictionless vertical travel.Electrical and Smart-Stack Integration
Modern 2026 iterations of selectorized machines often feature integrated digital displays and electromagnetic resistance modifiers. If your chosen model requires 120V power for smart-stack telemetry, ensure your floor plan incorporates recessed floor outlets or overhead drop ceilings to eliminate tripping hazards. Routing power cables beneath 3/4-inch rubber flooring requires specialized conduit channels to prevent cable crushing under the machine's static load.
Plate-Loaded Converging Machines: Heavy-Duty Anchor Requirements
Plate-loaded converging chest press machines, epitomized by the Hammer Strength Iso-Lateral series, are favored by powerlifters and bodybuilders for their independent arm movement and accommodating resistance curves. Because they lack a built-in weight stack, the frame is significantly lighter—typically around 245 to 280 pounds—but the dynamic load during operation is exponentially higher.
Anchor Points and Horn Clearance
Installation of plate-loaded rigs hinges on two critical factors: floor anchoring and plate clearance. The loading horns on these machines are designed for standard 2-inch Olympic plates. A fully loaded machine with six 45-pound bumper plates per side requires a lateral clearance of at least 75 inches to accommodate the 17.5-inch diameter of the plates. Furthermore, the ACE Fitness equipment guidelines emphasize that dynamic eccentric loading can generate downward forces exceeding 1,200 pounds of pressure on the machine's rear stabilizer feet.
For concrete subfloors, we recommend securing the rear stabilizers using 3/8-inch wedge anchors drilled 3 inches deep into the slab. For facilities with wood-framed subfloors or luxury vinyl tile (LVT) where drilling is prohibited, you must utilize 3/4-inch vulcanized rubber mats to maximize the coefficient of friction, paired with heavy-duty sandbag ballasts placed discreetly on the rear cross-members.
Pneumatic and Smart-Resistance Systems: Air Routing and Compressor Setup
Pneumatic chest press systems, such as those engineered by Keiser, represent the pinnacle of variable resistance technology, utilizing compressed air rather than gravity-fed iron. The installation of a pneumatic chest press is less about structural anchoring and more about fluid dynamics and acoustic management.
Compressor Placement and Tubing Routing
The Keiser Air 300 compressor is the heart of this ecosystem. To maintain consistent PSI (pounds per square inch) and ensure the chest press cylinder responds instantly to user input, the compressor must be located within 50 feet of the machine. Exceeding this distance with standard 1/4-inch polyurethane tubing results in pressure drop and a sluggish 'dead spot' at the initiation of the concentric phase.
When routing the air lines, avoid sharp 90-degree bends which can kink the tubing and restrict airflow. Instead, use sweeping curves and secure the lines to wall studs or beneath raised access floors using padded P-clamps. Additionally, because air compressors generate between 60 and 75 decibels of ambient noise, it is highly recommended to house the compressor in an adjacent mechanical closet or build an acoustic dampening enclosure lined with mass-loaded vinyl (MLV).
Comparative Installation Matrix
To streamline your facility planning, refer to the following comparison matrix detailing the core installation variables across the primary chest press machine types.
| Machine Type | Avg Frame Weight | Footprint (L x W) | Floor Load (Static) | Assembly Time |
|---|---|---|---|---|
| Selectorized Pin-Loaded | 580 lbs | 53" x 50" | ~3.2 PSI | 3-4 Hours |
| Plate-Loaded Converging | 260 lbs | 52" x 51" | ~1.5 PSI (Unloaded) | 1.5-2 Hours |
| Pneumatic (Air-Based) | 180 lbs | 48" x 45" | ~1.1 PSI | 2-3 Hours |
Subfloor Preparation, Load Distribution, and Flooring Specs
Regardless of the chest press machine types you select, the integrity of your subfloor dictates the lifespan of your equipment. Dropping heavy iron or the repetitive impact of a weight stack slamming down generates severe kinetic shockwaves. According to Rogue Fitness flooring guides, standard interlocking foam tiles are entirely insufficient for heavy resistance equipment; they compress unevenly, causing the machine frame to torque and bind the pivot bearings.
The 3/4-Inch Vulcanized Rubber Standard
For any dedicated chest press station, 3/4-inch (19mm) vulcanized rubber mats are the absolute minimum requirement. These mats possess a density of approximately 90 lbs per cubic foot, providing enough rigidity to support the machine's static load while absorbing the high-frequency vibrations of dynamic repetitions. If your facility is located on a second story or above a finished basement, you must consult a structural engineer to verify the floor joists can handle the live load. Upgrading to LVL (Laminated Veneer Lumber) joists or adding mid-span blocking is often necessary to prevent floor deflection, which can cause the chest press frame to twist and misalign the pressing arms.
Post-Installation Calibration, Torque Specs, and Safety Testing
The final phase of the installation walkthrough is calibration. A machine is only as safe as its weakest fastener. During the initial assembly, hand-tighten all bolts to allow the frame to settle into its natural geometry on the rubber matting. Once the machine is fully erected and positioned, use a calibrated torque wrench to tighten all structural bolts to the manufacturer's specifications—typically 45 to 60 foot-pounds for main pivot points and 30 foot-pounds for stabilizer feet.
Cable Tension and Pivot Point Lubrication
For selectorized units, check the cable tension. The cable should be taut enough that the top weight plate lifts immediately when the selector pin is engaged, but not so tight that it lifts the stack slightly when at rest. Adjust the tension via the threaded turnbuckle located near the top pulley. Finally, apply a synthetic marine-grade grease to all sealed pivot bearings. This specific type of lubricant resists breaking down under high heat and friction, ensuring the converging pressing arms move smoothly through the entire range of motion without the dreaded 'sticking point' that plagues poorly maintained machines.
Warning: Never use standard WD-40 on machine pivot points or cables. It is a solvent, not a long-term lubricant, and will strip away factory-applied grease, leading to rapid metal-on-metal degradation and voiding your manufacturer warranty.By adhering to these stringent installation protocols, you ensure that your chosen chest press machine types not only fit seamlessly into your facility's layout but also provide a safe, biomechanically sound, and durable training experience for years to come.
More gear to consider
All reviewsDensity Alternatives to Sauna: Evidence-Based Heat & Recovery Modalities for Body Composition Optimization

Fixing Common Chest Press Cable Machine Mistakes in Your Home Gym

Chest Machine vs Bench Press: Dumbbell Fly vs Cable Fly Setup Guide

Space Homegym Compare Essentials: Real-World Metrics, Brand Benchmarks, and Smart Layout Decisions
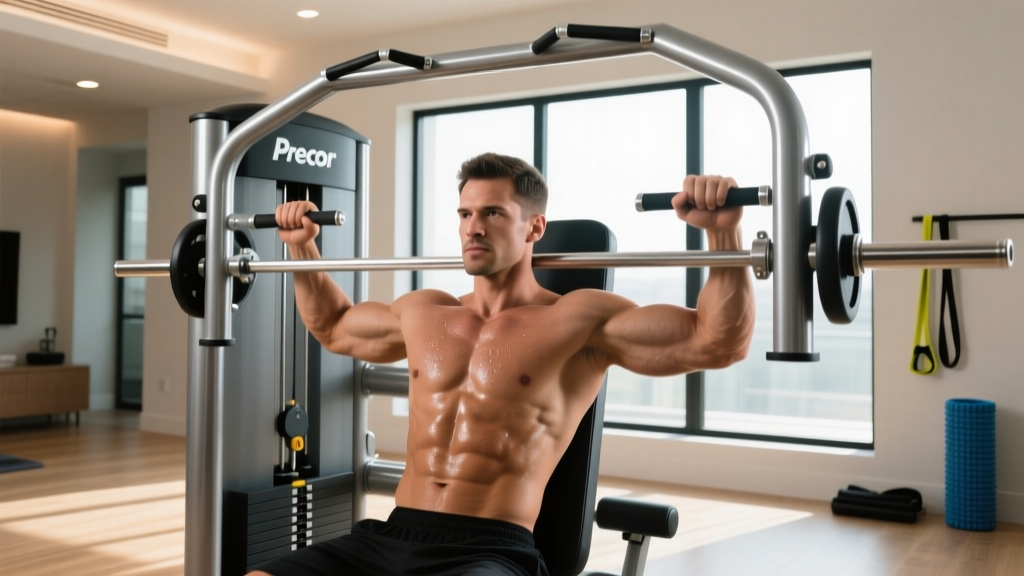
Precor Converging Chest Press Machine: Home Gym Troubleshooting
