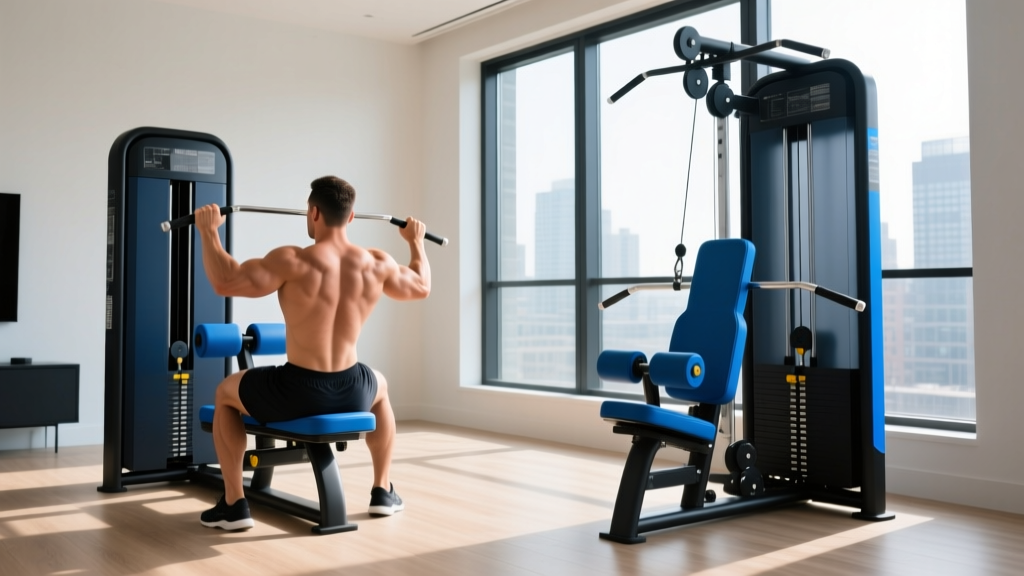
Install Guide: Seated Rows & Lat Pulldown Machine Workouts Setup
Master your home gym with our complete setup guide for seated row machines and lat pulldown machine workouts, covering anchoring, cabling, and ergonomics.

Introduction: Engineering Your Cable Back Station
Building a dedicated back training station in your home or commercial gym requires more than just bolting steel together. When setting up a dual-function unit—like the Titan Fitness Lat Pulldown and Low Row or a Rogue Fitness Selectorized Combo—precision in assembly directly dictates the biomechanical safety and longevity of the equipment. A poorly tensioned cable or misaligned footplate doesn't just ruin your workout; it introduces sheer forces that can snap aircraft cables or cause lumbar herniations.
This comprehensive walkthrough covers the exact installation protocols, ergonomic calibrations, and maintenance routines required to optimize your machine for both heavy seated rows and high-volume lat pulldown machine workouts. Whether you are working with a 250 lb selectorized stack or a plate-loaded carriage, these 2026 installation standards will ensure your rig performs flawlessly.
Expert Note: Before beginning assembly, verify your floor load capacity. A fully loaded selectorized combo machine can weigh upwards of 650 lbs. Ensure your subfloor or concrete slab can handle a point-load distribution of at least 120 PSI.Phase 1: Footprint, Clearances, and Structural Anchoring
The foundation of any cable machine is its stability during dynamic loading. When performing explosive seated rows, the carriage experiences rapid deceleration, transferring kinetic energy into the frame.
Calculating Your Clearance Zone
Do not rely on the manufacturer's stated 'footprint' alone. You must calculate the operational clearance. According to the Consumer Product Safety Commission (CPSC) guidelines for fitness equipment, you need a minimum 36-inch safety perimeter on all sides of the machine. For the seated row station specifically, add an additional 48 inches of frontal clearance to account for full arm extension and the use of wide-grip attachments like a 36-inch lat bar.
Anchoring Protocols by Floor Type
- Poured Concrete (Minimum 4-inch thickness): Use 3/8-inch x 3-inch zinc-plated wedge anchors. Drill a 3/8-inch hole exactly 3.5 inches deep, blow out the concrete dust with compressed air, and torque the anchors to 20 ft-lbs. Never use sleeve anchors in cracked or aged concrete.
- Wood Subfloors / Garage Gyms: Do not anchor directly into OSB or plywood. Instead, place the machine on a 3/4-inch thick vulcanized rubber mat to dampen harmonic vibrations. If anchoring is mandatory, locate the floor joists and secure the base plates using 1/2-inch structural lag bolts driven at least 3 inches into the joist center.
Phase 2: Cable Routing and Pulley Calibration
The transition between lat pulldown machine workouts and low rows relies on a complex system of floating and fixed pulleys. Most modern dual-machines utilize a 1:2 or 1:1 mechanical advantage ratio. Incorrect routing is the number one cause of cable fraying and weight stack friction.
Selecting the Right Cable
Ensure your machine uses a 1/4-inch or 3/16-inch nylon-coated aircraft cable (typically rated for 2,000+ lbs of tensile strength). Never use uncoated galvanized steel cables; the bare metal creates micro-abrasions against the nylon pulley wheels, leading to catastrophic failure under loads exceeding 150 lbs.
The Turnbuckle Tensioning Method
Once the cable is routed through the high and low pulleys, you must calibrate the tension via the turnbuckle.
- Thread the cable end into the turnbuckle eyelet.
- With the weight stack fully resting on the bottom bumpers, the cable should have zero slack but should not lift the top plate off the stack.
- Adjust the turnbuckle so that exactly 1.5 inches of threading is exposed on both sides. This provides adequate travel room for the cable to stretch (typically 1/4-inch over the first 500 repetitions) without bottoming out the threads.
- Secure the locknuts tightly against the turnbuckle body to prevent vibrational loosening.
Phase 3: Ergonomic Calibration for the Seated Row Machine
A seated row machine is only as effective as its ergonomic setup. If the footplate is too close, you risk lumbar flexion at the catch position; if it is too far, you compromise the stretch on the latissimus dorsi. As detailed in biomechanical analyses by ExRx, maintaining a neutral spine is paramount for targeting the rhomboids and middle trapezius without overloading the erector spinae.
User Height vs. Setup Matrix
| User Height | Footplate Distance | Chest Pad Angle (If Equipped) | Optimal Grip Width |
|---|---|---|---|
| Under 5'6" | 14 - 16 inches | 15° Incline | Neutral / V-Bar |
| 5'7" - 6'0" | 17 - 20 inches | 10° Incline | Shoulder Width |
| Over 6'1" | 21 - 24 inches | 5° Incline or Flat | Wide / Lat Bar |
"When setting up the footplate, your knees should maintain a soft 15-to-20-degree bend at the bottom of the rowing stroke. Locking the knees completely straight shifts the shear force directly into the lumbar discs."
Phase 4: Rigging for Lat Pulldown Machine Workouts
Transitioning your combo unit for lat pulldown machine workouts requires specific adjustments to the thigh hold-down pads and the high-pulley attachment. The most common failure mode in home gyms is users being physically lifted off the seat during heavy eccentric phases because the knee pads are improperly calibrated.
The 90-to-105 Degree Femur Lock
To safely execute heavy pulldowns, the thigh pads must compress the quadriceps by roughly 10-15%. Adjust the pop-pin so that when you are seated, your hips are slightly higher than your knees, creating a 90-to-105-degree angle at the knee joint. This wedges your femurs downward, utilizing your skeletal structure to anchor you to the frame rather than relying solely on grip strength or core tension.
Pulley Angle and Attachment Selection
For standard lat pulldowns, ensure the high pulley is angled forward at roughly 15 degrees. If your machine features an adjustable swivel pulley, lock it into this forward tilt. Pulling from a perfectly vertical (90-degree) pulley forces the cervical spine into extension as you lean back, a mechanic heavily linked to gym-induced neck strains, according to Cleveland Clinic physical therapy guidelines.
Phase 5: Real-World Troubleshooting and Maintenance
Even premium 11-gauge steel machines require ongoing maintenance to preserve the smooth 1:2 resistance curve. Implement this quarterly checklist to prevent catastrophic wear.
Diagnosing Weight Stack Friction
If the weight stack feels 'sticky' or drops unevenly during the eccentric phase of a seated row, inspect the guide rods. Many 2024-2026 models use precision-ground steel rods. Never use WD-40 or petroleum-based lubricants, as they attract dust and create a grinding paste. Instead, wipe the rods with a microfiber cloth and apply a light coat of 100% pure silicone spray.
Inspecting Cable Integrity
Run a damp cloth along the entire length of the aircraft cable once a month. If the cloth snags, you have a broken internal wire strand. A cable with more than two broken strands within a 12-inch span has lost up to 20% of its tensile strength and must be replaced immediately. Check the swage fittings (the crimped metal sleeves at the cable ends) for micro-cracks using a bright LED flashlight.
Warning: Never attempt to re-crimp or repair a frayed aircraft cable with hardware store clamps. Fitness cables undergo thousands of dynamic flex cycles; only factory-swaged, looped-end replacements rated for your specific machine's pulley diameter should be used.Summary: Building a Lifetime Rig
Proper installation of a seated row and lat pulldown combo machine bridges the gap between a frustrating piece of metal and a world-class back training station. By anchoring the frame correctly, tensioning the aircraft cables to exact specifications, and dialing in the ergonomic touchpoints for your specific anthropometry, you ensure that every rep of your lat pulldown machine workouts and heavy cable rows is safe, effective, and biomechanically sound. Treat your equipment with the precision of an engineer, and it will reward you with years of uninterrupted gains.
More gear to consider
All reviews
Lat Pulldown Without a Machine: 2026 Alternative Equipment Guide

Lat Pulldown Machine Wide Grip: 2026 Buyer's Guide

2026 Market Trend: Diverging Lat Pulldown Machine for Lumbar Support

Best Pull-Up Bars for Lat Pulldown Machine Exercises (2026)

DIY Lat Pulldown Machine vs Buying: 2026 Cost & Build Guide
