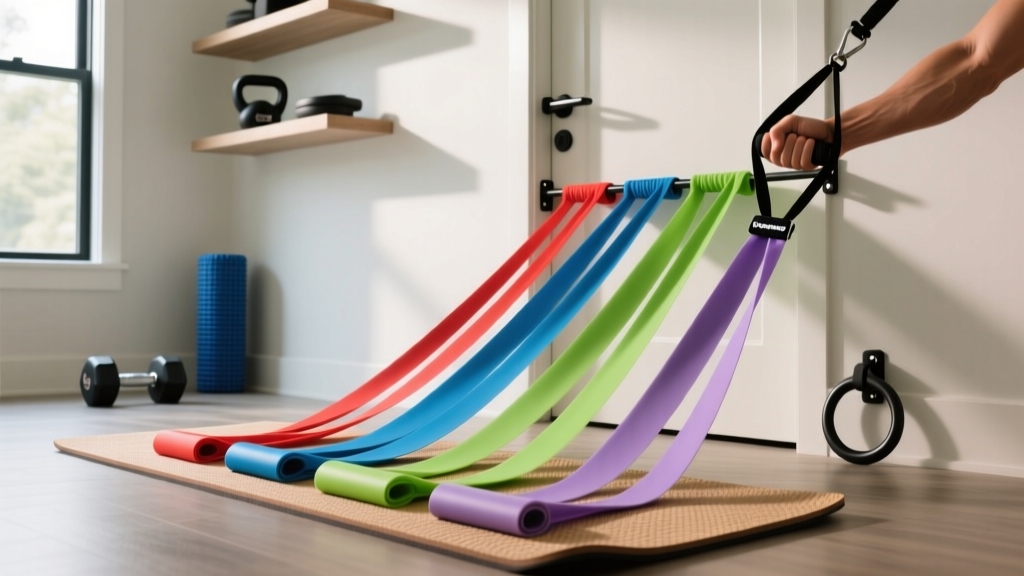
Resistance Band Set Setup: Levels, Types & Manuka Eco Yoga Mat Guide
Master your home gym setup with our walkthrough on resistance band set levels, types, safe anchoring, and pairing with a Manuka eco yoga mat.

Building a functional, space-efficient home gym in 2026 requires more than just purchasing equipment; it demands a strategic approach to spatial planning, biomechanics, and equipment synergy. Resistance bands remain the most versatile and cost-effective tools for hypertrophy, rehabilitation, and explosive power training. However, a resistance band set is only as effective as its anchor points and foundational base. This complete setup and installation walkthrough will guide you through the critical buying decisions regarding resistance band levels and types, and demonstrate how to properly integrate your system with a Manuka eco yoga mat to create a safe, high-performance training zone.
Decoding Resistance Band Levels and Tension Profiles
Unlike free weights, which provide constant gravitational resistance, elastic bands offer variable resistance—meaning the tension increases as the band is stretched. According to guidelines from the American College of Sports Medicine (ACSM), understanding the exact tension profile (measured in pounds of force, or lbf) is crucial for progressive overload. When buying a resistance band set, manufacturers typically color-code their products based on thickness and width. Below is the industry-standard tension matrix for 41-inch continuous loop bands, which are the gold standard for home gym anchoring.
| Band Color / Width | Tension Range (lbf) | Best Use Case | Avg. 2026 Price |
|---|---|---|---|
| Yellow (1/4 inch) | 5 - 15 lbs | Rotator cuff rehab, mobility, warm-ups | $8 - $12 |
| Red (1/2 inch) | 15 - 35 lbs | Assisted pull-ups, light isolation work | $12 - $16 |
| Black (3/4 inch) | 30 - 60 lbs | General strength, squats, presses | $16 - $22 |
| Purple (1.25 inch) | 50 - 90 lbs | Heavy compound lifts, deadlifts | $22 - $28 |
| Green (1.75 inch) | 60 - 120 lbs | Powerlifting assistance, heavy shrugs | $28 - $35 |
| Blue (2.5 inch) | 80 - 150 lbs | Advanced strongman training, heavy racks | $35 - $45 |
Types of Resistance Bands for Your Setup
The market is saturated with different band profiles, each serving a distinct mechanical purpose. As noted in comprehensive fitness equipment reviews by Healthline, selecting the right type dictates your anchor strategy.
- Flat Continuous Loop Bands: Made from layered natural latex or eco-friendly TPE. These are essential for anchoring to pull-up bars, squat racks, and heavy furniture. They distribute tension evenly and are the safest option for high-load setups.
- Tube Bands with Handles: Featuring a braided nylon sleeve over an inner latex tube, these terminate in carabiners. They are excellent for cable-machine mimicking (like tricep pushdowns) but carry a higher failure risk at the carabiner joint under loads exceeding 50 lbs.
- Therapy Bands (Unlooped): Thin, flat ribbons of latex. Strictly for rehabilitation and low-load physical therapy. They cannot be safely anchored to structural hardware.
The Foundation: Integrating the Manuka Eco Yoga Mat
When performing standing resisted exercises—such as banded lateral walks, resisted squats, or floor-anchored hamstring curls—the base layer is a critical safety component. Standard PVC or cheap TPE yoga mats fail under high lateral tension, slipping when band force exceeds 30 lbs. This is where the Manuka eco yoga mat becomes an indispensable part of your installation.
Constructed from sustainably harvested natural tree rubber with a microfiber suede top layer, the Manuka eco yoga mat (typically measuring 71 x 26 inches with a 5mm thickness) provides an exceptionally high static friction coefficient. When you stand on the Manuka eco yoga mat to anchor a loop band under your feet, the natural rubber base grips hardwood and laminate flooring, preventing the dangerous 'slip-and-snap' effect that causes thousands of home gym injuries annually. Furthermore, the 5mm density provides necessary metatarsal cushioning when a heavy black or purple band is looped directly under the arch of your foot.
Step-by-Step Installation and Anchoring Walkthrough
Proper installation of your anchor points ensures your equipment can handle the kinetic energy of a snapping band. Follow this walkthrough to secure your training zone.
- Wall Mount Installation (For Permanent Setups): Locate a structural wall stud using a magnetic stud finder. Do not use drywall anchors. Drill a pilot hole and install a heavy-duty steel wall mount using two 3/8-inch by 3-inch lag bolts. Torque the bolts to 40 ft-lbs. This setup provides a shear strength of over 1,000 lbs, far exceeding the maximum tension of stacked resistance bands.
- Door Anchor Setup (For Temporary Setups): Use a door anchor with a minimum 1.5-inch dense foam wheel. Critical Safety Rule: Always anchor the band on the hinge side of the door, never the latch side. The hinge side distributes force across the entire door frame, whereas the latch side can rip the strike plate out of the wood, causing the door to fly open and the band to snap back at you.
- Mat Placement and Alignment: Unroll your Manuka eco yoga mat perpendicular to your anchor point. For standing exercises, position your heels exactly 12 inches from the edge of the mat closest to the anchor. This ensures that if the band slips, your feet remain on the high-friction rubber surface rather than the bare floor.
- Tension Testing: Before stepping into the band, loop it over the wall mount, step back to your working distance, and pull the band with your hands to 80% of its maximum stretch. Inspect the anchor point for any creaking, shifting, or wood splintering.
Safety Protocols and Material Degradation
According to the Cleveland Clinic, resistance bands are highly effective but require strict inspection routines to prevent catastrophic failure. Natural latex and TPE materials degrade over time due to UV exposure, ozone, and skin oils.
'Inspect your bands before every single workout. Look for micro-tears, white stress marks, or a sticky, gummy texture on the surface. If a band shows any of these signs, its structural integrity is compromised and it must be replaced immediately.' — Sports Medicine Safety Guidelines
To maximize the lifespan of your bands and your Manuka eco yoga mat, store them in a cool, dark environment (ideally between 60°F and 75°F). Do not leave them in a hot car or near a sunlit window. Wipe down the bands and the suede surface of your mat with a damp microfiber cloth after use to remove corrosive sweat salts.
Frequently Asked Questions
Can I use tube bands with handles for heavy squats?
No. Tube bands max out around 50 lbs of tension and the plastic carabiners are prone to snapping under heavy compound loads. Always use flat continuous loop bands for squats and deadlifts.
How do I clean the Manuka eco yoga mat after banded workouts?
Avoid harsh chemical cleaners or essential oil sprays, as oils break down natural tree rubber. Use a mild solution of distilled water and a few drops of gentle dish soap, wiping it down with a soft cloth and letting it air dry flat.
What if my door frame is metal?
Metal commercial doors often have sharp edges that can slice latex bands. If using a metal door, wrap the anchor point in a thick towel or use a specialized nylon door sleeve to protect the band from abrasion.
More gear to consider
All reviews
Exercise Ball Size Guide, Buying Tips & Yoga Mat Sticky Pairings

Beyond the Viral Animal Print Yoga Mat: Foam Roller Density Guide

Loop vs Tube Band Care & Best Way to Wash a Yoga Mat

Speed vs Weighted Jump Ropes: Beginner Guide & Blue Yoga Mat Tips

How to Carry Yoga Mat and Jump Rope Gear: Troubleshooting
