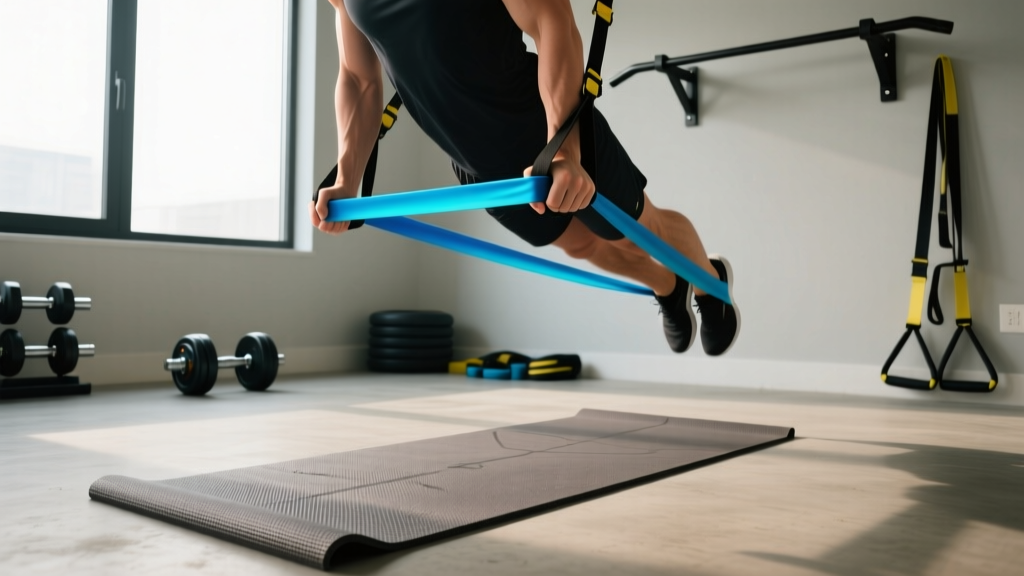
Pull Up Assist Band Sizing & DIY Yoga Mat Holder Pattern
Master pull up assist band sizing with our 2026 comparison chart. Plus, get a free DIY yoga mat holder pattern to organize your fitness gear.

The Biomechanics of Band-Assisted Pull-Ups
Selecting the correct pull-up assist band is not merely about picking a color; it is an exercise in applied physics. When you loop a resistance band around a pull-up rig, you are introducing a non-linear elastic variable into your biomechanical chain. According to Hooke's Law, the tension provided by the band is directly proportional to its elongation. At the bottom of your pull-up (dead hang), the band is stretched to its maximum, providing peak assistance. As you pull your chin over the bar, the band contracts, and the assistance drops significantly. This means the band perfectly mimics the natural strength curve of a pull-up, where the movement is hardest at the bottom and easiest at the top.
However, choosing a band that is too thick will rob you of the necessary eccentric overload required to build latissimus dorsi and rhomboid strength. Conversely, a band that is too thin will lead to premature muscle failure and compromised form. Below, we break down the exact sizing matrices, material sciences, and failure modes of modern pull-up bands, before concluding with a custom yoga mat holder pattern to keep your new gear organized and protected from environmental degradation.
Comprehensive Pull Up Assist Band Sizing Matrix
Industry standards for continuous loop bands have largely been standardized by premium manufacturers like Rogue Fitness and Serious Steel. The assistance weight listed below represents the tension at roughly 100% to 150% elongation (the bottom of a standard pull-up).
| Band Color | Dimensions (L x W x Thick) | Assistance Range (lbs) | Target User Profile | Avg. Price (2026) |
|---|---|---|---|---|
| Red | 41" x 0.5" x 4.5mm | 15 - 35 lbs | Advanced: 1-3 unassisted reps, mobility work | $16 - $22 |
| Black | 41" x 0.75" x 4.5mm | 30 - 50 lbs | Intermediate: Close to unassisted, volume sets | $20 - $26 |
| Blue | 41" x 1.0" x 4.5mm | 50 - 85 lbs | Beginner: Can do 0 unassisted reps, learning form | $25 - $32 |
| Green | 41" x 1.75" x 4.5mm | 80 - 120 lbs | Novice: Heavy assistance, rehabilitation | $35 - $45 |
| Purple | 41" x 2.5" x 4.5mm | 120 - 175 lbs | Rehab / Mobility: Squat assists, heavy stretching | $45 - $55 |
Material Science: Natural Latex vs. TPE
Not all elastomers are created equal. The vast majority of premium pull-up assist bands are manufactured from 100% natural Malaysian latex. Natural latex offers superior elongation limits (up to 600% stretch before structural failure) and excellent memory, meaning it returns to its original 41-inch resting length without permanent deformation.
The TPE Alternative
Thermoplastic Elastomer (TPE) bands are marketed as hypoallergenic and eco-friendly alternatives. While they are safe for users with severe latex allergies, TPE suffers from a lower tensile strength and a higher susceptibility to micro-tearing under high-friction loads. If you are using a knurled steel pull-up bar, TPE bands will degrade up to 40% faster than natural latex due to abrasive shearing at the contact point.
Expert Warning: UV and Ozone DegradationNatural latex is highly susceptible to photo-oxidation. Leaving your bands in direct sunlight or a humid, ozone-rich environment (like a garage gym with poor ventilation) will cause dry rot. Inspect the inner rim of the band monthly for micro-fissures. If you see a chalky white residue or small tears, retire the band immediately to prevent catastrophic snapping under load.
Step-by-Step Selection Framework
Do not guess your band size based on body weight alone. Your strength-to-weight ratio and neurological adaptation dictate your band needs. Follow this protocol to select your primary band:
- Test Your Baseline: Perform a strict, dead-hang pull-up test. Record your maximum unassisted repetitions with perfect form (chin over bar, full extension at the bottom).
- Map to Assistance: If your max is 0, start with the Blue (50-85 lbs) band. If your max is 1-3, use the Black (30-50 lbs) band. If your max is 4-7, use the Red (15-35 lbs) band.
- The 20% Rule: Your goal is to use a band that allows you to complete 3 sets of 8 reps, where the last 2 reps of the final set feel incredibly difficult but do not break your form. If you can easily hit 3x10, drop down one band size.
- Eccentric Focus: As noted by the Mayo Clinic, eccentric muscle actions are crucial for hypertrophy and strength. Use a heavier band to pull yourself up, then remove one foot from the band to perform a slow, 4-second negative descent.
Gear Organization: DIY Yoga Mat Holder Pattern
A common issue with home and garage gym owners is the improper storage of resistance bands. Tossing them into a bin causes them to tangle, and leaving them draped over rig uprights exposes them to UV light and accidental tears. To solve this, we have designed a custom yoga mat holder pattern that doubles as a resistance band organizer.
Materials Required
- 1.5 yards of 10 oz Duck Canvas (Navy or Charcoal recommended)
- Heavy-duty upholstery thread (Nylon bonded)
- 3 yards of 1-inch Nylon Webbing
- 1 heavy-duty D-ring (2-inch width)
- Matching cotton bias tape for edge binding
The Pattern and Assembly
This pattern creates a cylindrical sling (26 inches long, 6 inches in diameter) capable of holding a standard 5mm or 6mm yoga mat, with exterior loops specifically engineered for band storage.
- Cut the Main Body: Cut a rectangle of canvas measuring 28" x 20" (this includes a 1-inch seam allowance).
- Prepare the Webbing Loops: Cut three 8-inch lengths of nylon webbing. Fold each in half to create a 4-inch loop.
- Attach the Loops: Pin the raw edges of the webbing loops to the right side of the canvas, spacing them evenly along one of the 28-inch long edges. Stitch them down using a box-X stitch pattern for maximum shear strength. These loops will hold your folded pull-up bands securely.
- Form the Cylinder: Fold the canvas in half lengthwise (right sides together) so the 28-inch edges meet. Sew a straight seam down the length using a 1/2-inch seam allowance. Turn right side out.
- Create the Base: Cut a 7-inch diameter circle from the remaining canvas. Pin it to one open end of the cylinder, right sides together, and sew around the perimeter. Bind the raw edge with bias tape to prevent fraying.
- Add the Drawstring Closure: Fold the top open edge down by 1.5 inches to create a casing. Stitch around, leaving a 2-inch gap. Thread a 30-inch length of paracord through the casing and attach the D-ring to the end for easy hanging on your gym rig.
Pro-Tip: When storing your pull-up bands in the exterior webbing loops of your new yoga mat holder, always fold the band in half, then in half again, before slipping it through the loop. This prevents the latex from being stretched while in storage, preserving its elastic memory and extending its lifespan by up to 3 years.
Safety Protocols and Edge Cases
Even the highest-quality continuous loop bands are subject to catastrophic failure if misused. Never anchor a pull-up band to a rough surface, a rusty barbell sleeve, or a piece of equipment with sharp burrs. Always anchor the band to a smooth, powder-coated pull-up bar or a dedicated band peg. When stepping into the band, ensure your footwear has a clean, flat sole; aggressive trail-running treads can pinch and tear the inner latex layers. Finally, never release a stretched band without a controlled grip—snap-back injuries to the face and eyes are a leading cause of gym-related emergency room visits. Treat your elastomers with the same respect you afford heavy iron.
More gear to consider
All reviews
Yoga Mat Thickness Guide & Mini Gym Bag With Yoga Mat Holder Tips
Foam Roller Density Selection & Can You Wash Yoga Mats in the Washer?
Beyond the Take Form Yoga Mat: 2026 Block and Strap Buying Guide

Smart Yoga Mat Setup: Foam Roller Density & Size Guide

Beyond the Bunny Yoga Mat: A Beginner's Resistance Band Guide