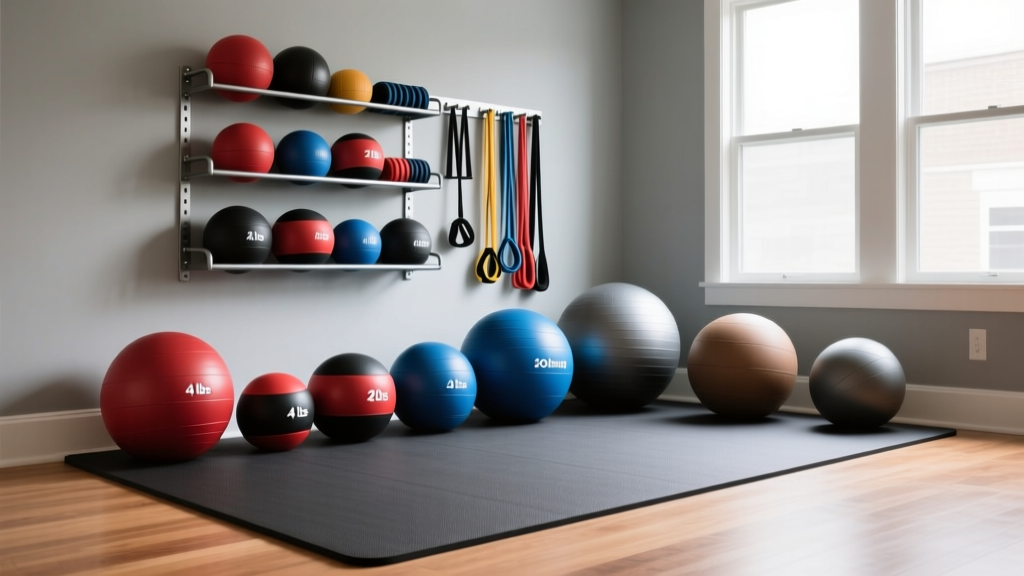
Medicine Ball Weight Guide: Setup Beyond a Typical Yoga Mat Size
Master medicine ball weight selection and home gym setup. Learn spatial requirements, flooring protection, and rack installation for safe training.

The Spatial Blueprint: Mapping Your Medicine Ball Zone
When mapping out a functional training zone, many home gym owners use the typical yoga mat size (24 by 68 inches) as a baseline grid for floor space. However, relying on this exact footprint for a medicine ball station is a critical error that leads to drywall damage, restricted biomechanics, and compromised safety. While a standard mat accommodates static floor work, dynamic medicine ball training—encompassing overhead slams, rotational throws, and lateral tosses—requires a minimum operational clearance of 6 feet by 8 feet.
Setting up a dedicated medicine ball station in 2026 goes far beyond simply purchasing a spherical weight. It requires a calculated approach to spatial geometry, impact mitigation, and precise weight selection based on your specific training adaptations. According to the National Strength and Conditioning Association (NSCA), the velocity and trajectory of medicine ball throws demand specific environmental clearances to ensure the athlete can achieve peak rotational torque without subconscious deceleration caused by spatial constraints.
Medicine Ball Weight Selection Matrix
Selecting the correct mass is highly dependent on the intended movement pattern. A ball that is too heavy will destroy the stretch-shortening cycle (SSC) required for explosive throws, while a ball that is too light will fail to recruit high-threshold motor units. Below is a comprehensive selection guide based on current 2026 market offerings and biomechanical requirements.
| Weight Range | Diameter / Material | Primary Use Case | Estimated Cost (2026) |
|---|---|---|---|
| 4 lbs - 8 lbs | 14" / Soft PVC or Leather | Rotational throws, rehab, high-velocity core work | $35 - $65 |
| 10 lbs - 14 lbs | 14" / Rubber Shell (Bouncy) | Wall balls, chest passes, CrossFit WODs | $70 - $110 |
| 15 lbs - 25 lbs | 15"+ / Heavy Rubber or Sand-filled | Overhead slams, heavy carries, V-ups | $90 - $140 |
| 30 lbs - 50+ lbs | 15"+ / Sand-filled (Dead bounce) | Strongman training, static holds, heavy slams | $120 - $200+ |
Material Nuances: Slam Balls vs. Wall Balls
Do not confuse a 'slam ball' with a standard 'wall ball'. Slam balls (like the TRX Slam Ball or Rogue Echo Slam Ball) are filled with sand and encased in thick, non-bouncy rubber. They are designed to absorb impact and stay on the floor. Standard rubber medicine balls (like those from Rep Fitness) have an air-filled or gel-filled core designed to rebound off walls and floors. Using a bouncy rubber ball for maximal-effort overhead slams is a severe safety hazard that can result in facial or joint injuries upon rebound.
Flooring Installation & Impact Protection
Medicine ball slams generate immense localized force. Dropping a 30-pound sand-filled ball from a 7-foot apex repeatedly onto standard EVA foam puzzle mats will compress and destroy the foam within weeks, eventually transferring the shock directly to your concrete subfloor.
⚠️ WARNING: Never perform heavy medicine ball slams on hardwood floors, ceramic tile, or standard garage epoxy without a dedicated impact barrier. The point-load impact can crack concrete or shatter tiles.The Solution: Install 3/4-inch thick vulcanized rubber mats. Often sold as horse stall mats (available at agricultural supply stores for roughly $50 to $60 per 4x6 foot sheet), these dense rubber slabs provide the exact kinetic absorption required for heavy slams while maintaining a stable, non-slip surface for lateral movements.
Wall-Mount Target and Rack Setup: Step-by-Step
If your training includes rotational wall throws or chest passes, you must install a reinforced target zone. Drywall will shatter after a few sessions with a 10-pound rubber ball. Here is the professional installation walkthrough for a durable, home-gym wall target.
Materials Required
- One 4x4 foot sheet of 3/4-inch CDX or sanded plywood
- Four 3/8-inch x 3-inch galvanized lag bolts with washers
- Stud finder and impact driver
- Optional: High-density EVA foam matting to overlay the wood
Installation Walkthrough
- Locate the Studs: Use a stud finder to mark the center of at least two vertical wall studs (typically spaced 16 inches on-center) in your desired throw zone.
- Mark and Drill Pilot Holes: Position the plywood sheet against the wall, ensuring the bottom edge is roughly 12 inches off the floor to allow for baseboard clearance and easy cleaning. Mark the stud centers on the wood, then drill 1/4-inch pilot holes completely through the plywood and into the wall studs.
- Mount the Backer Board: Drive the 3/8-inch lag bolts (with washers) through the plywood and deep into the structural studs. The 3-inch length ensures at least 2 inches of bite into the stud behind the 1/2-inch drywall and 3/4-inch plywood.
- Apply the Target Surface (Optional): To reduce noise and protect the rubber shell of your medicine ball, use spray adhesive to mount a layer of high-density EVA foam or a dedicated wall-ball target pad over the plywood.
'The angle of the wall target matters. For rotational oblique throws, mounting the plywood slightly off-center to your dominant throwing side allows for a more natural hip-clearance path, a technique heavily utilized in ExRx.net's rotational power testing protocols.' — Biomechanics Coaching Staff
Storage Solutions: Keeping the Zone Clear
Because medicine balls are spherical, they roll. Leaving them on the floor creates a massive ankle-sprain hazard, especially in a multi-use home gym. You must integrate vertical storage into your setup.
- Wall-Mounted Ball Racks: Brands like Rogue Fitness and Titan offer heavy-gauge steel wall-mounted racks. These utilize a cradle design that holds the ball by its equator. Install these at waist height (approx. 36 inches from the floor) to prevent lower-back strain when picking up heavy 50lb slam balls.
- Freestanding Vertical Towers: If you cannot drill into your walls, a freestanding 3-tier or 4-tier vertical rack is ideal. Ensure the base footprint is weighted or wide enough to prevent tipping when loading a heavy ball onto the top tier.
Final Calibration: Testing Your Setup
Before running a full high-intensity interval session, perform a spatial calibration test. Stand in the center of your 6x8 foot vulcanized rubber mat zone. Execute three maximal-effort rotational throws against your newly installed plywood target, and three maximal overhead slams. Observe the rebound trajectory and the floor's shock absorption. If the ball rebounds unpredictably off uneven flooring seams, or if you feel the concrete shock traveling up your shins, you need to adjust your mat placement or add a secondary layer of 1/2-inch crumb rubber.
By respecting the spatial requirements that extend far beyond the typical yoga mat size, and by rigorously matching the ball's mass and material to your specific training goals, your medicine ball station will become one of the most versatile and durable installations in your 2026 home gym setup.
More gear to consider
All reviews
Mobility Setup: Foam Roller Sizing & Manduka PRO Lite Yoga Mat

BOSU vs Stability Ball Care: Can You Wash a Yoga Mat in a Washer?

Medicine Ball Weight Selection vs Traditional Yoga Mat: Core Face-Off

Battle Rope Length & Thickness Guide + Yoga Mat Bag Sewing Pattern

Stability Ball vs BOSU: 2026 Trends & The Yoga Mat Rolled Up Test
