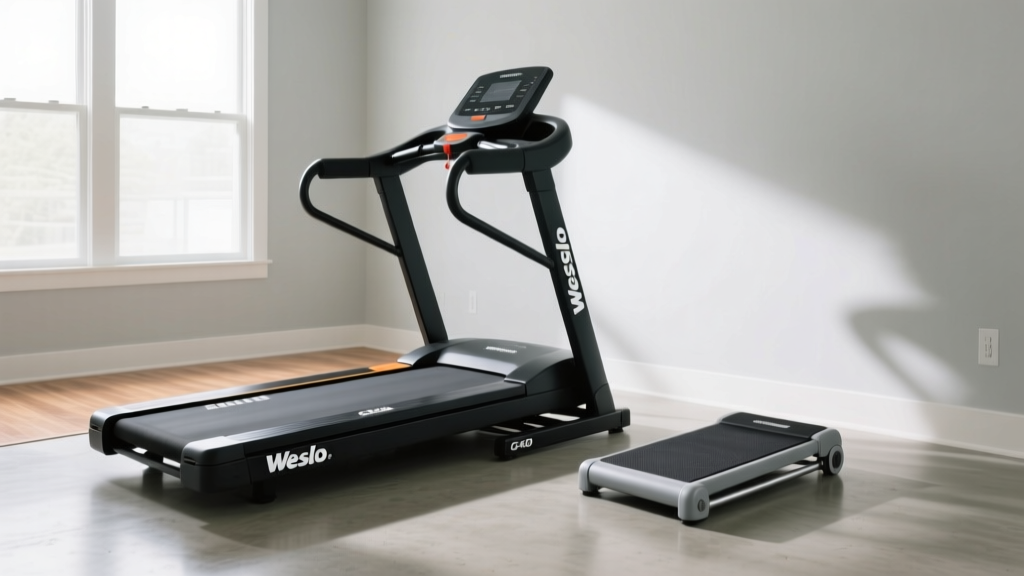
Weslo Cadence Treadmill G40 Setup & Walking Pad Review
Compare the Weslo Cadence Treadmill G40 setup process with modern walking pads. Read our complete installation walkthrough and spatial review.

The Home Cardio Dilemma: Traditional Folding vs. Under-Desk
Choosing the right home cardio equipment often comes down to a battle between spatial convenience and biomechanical performance. On one side, we have budget-friendly traditional folding models like the Weslo Cadence Treadmill G40, a machine that offers a full 50-inch track length and manual incline capabilities. On the other side, the market is flooded with ultra-compact under-desk walking pads that promise zero-assembly convenience. This comprehensive walking pad treadmill comparison and review focuses heavily on the physical realities of bringing these machines into your home. We will provide a complete setup and installation walkthrough for the Weslo Cadence G40, contrasting its mechanical demands with the out-of-the-box calibration required for modern walking pads.
Spatial Footprint and Unboxing Realities
Before you unbox any cardio equipment, you must account for the delivery footprint and operational clearance. The Weslo Cadence G40 ships in a single, densely packed corrugated box measuring roughly 78 x 30 x 10 inches, weighing in at approximately 135 pounds. In contrast, a standard 2026 walking pad (such as the UREVO Strol 2E or Akluer under-desk models) ships in a box half that size, weighing between 55 and 70 pounds.
| Specification | Weslo Cadence Treadmill G40 | Standard 2026 Walking Pad |
|---|---|---|
| Shipping Weight | ~135 lbs (Requires 2-person lift) | ~65 lbs (Single-person manageable) |
| Operational Footprint | 64' L x 27' W | 49' L x 20' W |
| Assembly Time | 60 - 90 Minutes | 2 - 5 Minutes (Unboxing & Pairing) |
| Required Tools | 6mm/8mm Allen Wrenches, Phillips | None (Included remote pairing only) |
| Power Requirements | Dedicated 120V / 15A Circuit | Standard 120V Wall Outlet |
Complete Weslo Cadence Treadmill G40 Installation Walkthrough
Setting up a traditional folding treadmill involves structural assembly, electrical routing, and mechanical calibration. Skipping or rushing any of these steps on the G40 can lead to premature motor burnout or console failure. Below is our expert, step-by-step installation guide.
Phase 1: Base Stabilization and Upright Pivot
The G40 features a folding hinge mechanism that requires precise alignment. After removing the cardboard shell, do not attempt to lift the machine by the console mast. Instead, use the integrated front transport wheels to position the base. You will need to attach the rear stabilizer bar using the provided 8mm hex bolts. Pro Tip: Do not fully tighten these bolts until the machine is resting level on your floor. Tightening them while the frame is suspended can warp the base tubing, causing a persistent 'wobble' at speeds above 3.5 MPH.
Phase 2: Console Mast Wiring (The Critical Failure Point)
The most common point of failure during home treadmill assembly is the pinching of the console ribbon cable. As you raise the upright masts on the Weslo G40, you must carefully feed the wiring harness through the central plastic grommet.
Warning: Ensure the blue alignment line on the ribbon cable connector perfectly matches the notch on the console motherboard. Forcing this connection will bend the micro-pins, resulting in a blank console or erratic speed surges. Secure the excess wire with a zip-tie inside the mast cavity before tightening the mast bolts with the 6mm Allen wrench.Phase 3: Belt Tracking and Tension Calibration
Out of the box, the G40's 16' x 50' running belt may sit slightly off-center due to shipping shifts. Plug the machine into a dedicated 15-amp circuit (sharing a circuit with a refrigerator or AC unit can trip the breaker when the 2.25 HP motor surges). Start the belt at 2.0 MPH. If the belt drifts to the left, insert the included T-wrench into the left rear roller cap and turn it exactly one-quarter (1/4) turn clockwise. Wait 15 seconds for the belt to track. Never adjust the tension bolts more than a half-turn in total, as overtightening will stretch the belt and destroy the front roller bearings.
The Walking Pad Alternative: Zero-Assembly Calibration
Compared to the 90-minute mechanical marathon of the Weslo G40, setting up a modern walking pad is an exercise in minimalism. However, 'zero assembly' does not mean 'zero setup.' When you slide a walking pad out of its foam packaging, the primary installation task is digital pairing and initial belt tracking.
- Remote Pairing: Most 2026 walking pads require you to hold the 'Mode' and 'Stop' buttons on the physical console for 5 seconds to enter Bluetooth pairing mode. Failing to do this will leave you reliant on the physical speed buttons, which are often awkwardly placed near the floor.
- Surface Leveling: Walking pads lack adjustable rear feet. If your hardwood floor has a slight grade, the belt will continuously drift. You must place high-density EVA foam shims under the lower side of the frame to achieve a true level before your first walk.
- Break-in Period: Walking pad motors (typically 1.5 HP peak / 0.75 CHP) are highly sensitive to initial friction. You must apply the included silicone lubricant under the belt before exceeding 2.0 MPH, or risk triggering the internal thermal overload switch within the first 20 minutes of use.
Long-Term Maintenance and Edge Case Failures
How do these machines hold up after the setup is complete? The Weslo Cadence G40, with its traditional deck and roller system, requires silicone lubrication every 130 miles or every three months, whichever comes first. Its manual 2-position incline relies on a physical pin at the rear stabilizer; a common edge-case failure is the plastic grommet wearing out, causing the pin to slip during heavy strides.
Walking pads, conversely, suffer from thermal throttling. Because the motor is housed in a flat, unventilated front casing, continuous use beyond 60 minutes often forces the machine to shut down to protect the circuitry. Furthermore, walking pads lack a front handrail, which alters human biomechanics. According to Harvard Health Publishing, maintaining natural arm swing and upright posture is crucial for maximizing the cardiovascular and joint-health benefits of walking. The G40 allows for this natural gait, whereas walking pads often force users into a slightly hunched posture, especially when navigating under a standing desk.
From an installation and longevity standpoint, the Weslo G40 demands more upfront sweat equity but rewards the user with a repairable, traditional drivetrain. Walking pads offer instant gratification but operate as sealed, largely unrepairable units once the internal motor controller fails.
Final Verdict: Matching the Machine to Your Floorplan
If your primary goal is to increase your daily Non-Exercise Activity Thermogenesis (NEAT) while working at a standing desk, a walking pad is the undisputed champion of spatial efficiency. The CDC recommends consistent, moderate daily movement for long-term health, and a walking pad removes the friction of 'setting up' for a workout. You simply slide it out and step on.
However, if you require a machine that accommodates a full running stride, supports users over 220 pounds, and allows for natural biomechanical arm swing, the Weslo Cadence Treadmill G40 remains a highly capable budget option. The installation walkthrough detailed above proves that while the G40 requires careful attention to wiring and belt tension during setup, the result is a robust, dedicated fitness station that walking pads simply cannot replicate. Choose the walking pad for convenience and concealment; choose the G40 for dedicated, traditional cardio performance.
More gear to consider
All reviews
ProForm Pro 5000 Treadmill vs Rowing: Beginner Step-by-Step Guide
2026 Automotive Comparison Trends: Electrification, AI Integration, and Structural Shifts in Performance Metrics

Can a Plane Take Off on a Treadmill? Stair Climber Setup Guide

Stair Climber Setup: Static Shocks & Anti Static Spray for Treadmill

Sole Treadmill F80 vs F85 Setup: Curved vs Motorized Installation
