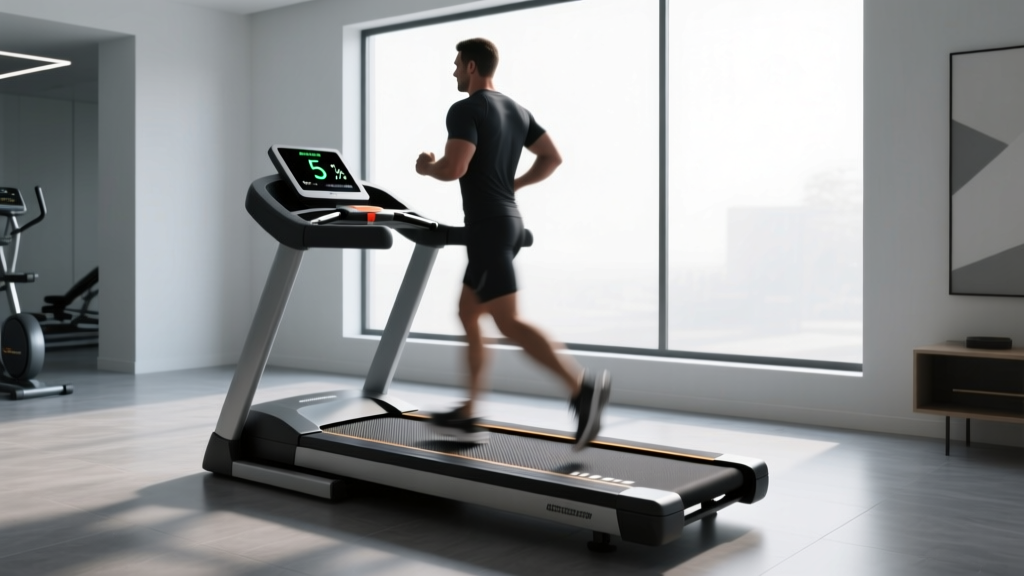
Treadmill Buying Guide: Features Comparison & What Incline Should I Use?
Compare treadmill incline features, follow our setup walkthrough, and learn exactly what incline you should use on a treadmill for your specific fitness goals.

Treadmill Buying Guide: Comparing Incline & Deck Features
When evaluating cardio machines for your home gym in 2026, the incline motor is often the most overlooked component. Buyers hyper-fixate on continuous horsepower (CHP) and touchscreen displays, but the incline mechanism dictates the biomechanical versatility of your workouts. A robust incline system not only simulates outdoor terrain but also significantly reduces impact forces on the patellofemoral joint while increasing posterior chain activation.
Below is a feature comparison of three top-tier treadmills dominating the 2026 market, focusing on incline mechanics, deck sizing, and pricing.
| Model (2026) | Incline Range | Motor (CHP) | Belt Dimensions | Price Range |
|---|---|---|---|---|
| Sole F80 | 0% to 15% | 3.5 CHP | 22' x 60' | $1,199 - $1,299 |
| Horizon 7.4 | 0% to 15% | 3.0 CHP | 22' x 60' | $999 - $1,099 |
| NordicTrack Commercial 1750 | -3% to 15% | 3.5 CHP | 22' x 60' | $1,799 - $1,999 |
Expert Insight: Notice the NordicTrack's -3% decline feature. Decline training is crucial for eccentric muscle loading and preparing the quadriceps for downhill hiking or marathon courses. If your budget restricts you to a standard 0-15% range, the Sole F80 offers the most reliable push-motor incline assembly in its price bracket.
Complete Setup and Installation Walkthrough
Before you can test the gradients, proper installation is critical. Treadmills are heavy, high-draw appliances that require specific environmental clearances to operate safely and prevent motor overheating.
⚠️ Electrical Warning: Never plug a treadmill into a GFCI outlet or share a circuit with high-draw appliances (like a refrigerator or microwave). Treadmills require a dedicated 15-amp, 120-volt circuit. Using an undersized extension cord will cause voltage drops, leading to incline motor stalling and control board failure.Step-by-Step Installation
- Clearance Verification: According to the Consumer Product Safety Commission (CPSC), you must maintain at least 48 inches of clear space behind the treadmill to prevent severe friction burn injuries in the event of a fall. Additionally, ensure 78 inches of vertical clearance to accommodate the user's height plus the maximum incline deck elevation.
- Base Assembly: With a second person, lift the main frame onto the uprights. Secure the M10 x 25mm bolts using the provided hex wrench, but do not fully tighten until all four bolts are threaded to prevent cross-threading.
- Upright Wiring: Carefully feed the console wire through the right upright. Crucial: Ensure the wire is not pinched between the metal brackets. A pinched wire will short out the incline data cable, resulting in an immediate E01 error code upon startup.
- Belt Tensioning: Out of the box, belts are often slightly loose. Run the machine at 2.0 MPH. If the belt slips when you step on it, tighten the rear roller bolts by exactly one-quarter turn clockwise on both sides. Do not over-tighten, as this will destroy the walking board wax coating and over-amp the drive motor.
Calibrating the Incline Potentiometer
After assembly, the console might not accurately read the physical deck position. You must calibrate the incline potentiometer. While the exact button combination varies by manufacturer, the standard engineering mode sequence for most Icon Health & Fitness and Sole Fitness models is as follows:
- Remove the safety key.
- Press and hold the Speed Up and Incline Up buttons simultaneously while reinserting the safety key.
- The console will display 'Engineering Mode' or 'EPROM Test'.
- Press Incline Up to cycle to the calibration phase. The deck will automatically rise to 15% and drop to 0% to map the sensor limits.
- Once the deck rests at 0%, remove the safety key to save the calibration data.
What Incline Should I Use on a Treadmill?
This is the most common question we receive from new owners. The answer to 'what incline should i use on a treadmill' depends entirely on your biomechanical goals, joint health, and training phase. Here is the definitive breakdown based on sports science data:
0% to 1%: The Outdoor Simulation Zone
Running on a perfectly flat (0%) treadmill is actually easier than running outdoors due to the lack of wind resistance and the belt assisting with leg turnover. A landmark study by Jones and Doust established that setting the treadmill to a 1% incline accurately offsets the lack of air resistance, making the energetic cost identical to outdoor running on level ground. Use 1% for all standard tempo runs and marathon pacing.
2% to 5%: Fat Oxidation and Endurance
Walking or jogging at a 2% to 5% incline shifts the metabolic demand. According to the Centers for Disease Control and Prevention (CDC), increasing the intensity of your cardiovascular activity yields greater health benefits without necessarily increasing the duration. A 3-5% incline elevates your heart rate into Zone 2 or Zone 3 while keeping impact forces low, making it ideal for active recovery days or heavy runners protecting their tibialis anterior and knees.
6% to 10%: Posterior Chain Hypertrophy
Once you cross the 6% threshold, the biomechanics shift from elastic energy return to muscular force production. This range heavily recruits the gluteus maximus, hamstrings, and calves. It is the optimal range for hikers preparing for elevation gains and sprinters building explosive hill power.
'Walking at a steep incline dramatically reduces the ground reaction forces compared to flat running, while simultaneously matching or exceeding the caloric expenditure. It is one of the most joint-friendly ways to achieve high-intensity cardiovascular conditioning.' — Mayo Clinic Fitness Guidelines
11% to 15%+: The '12-3-30' Protocol
Made famous by social media but backed by solid physiological principles, the 12-3-30 workout (12% incline, 3.0 MPH, 30 minutes) is a brutal test of muscular endurance. At 12%, you must engage your core and maintain a forward lean from the ankles (not the hips). Never hold the handrails at this incline; doing so alters your spinal alignment, negates the caloric burn by up to 30%, and places undue shear stress on the lumbar spine.
Troubleshooting Incline Drift and Motor Stalls
Even with premium 2026 models, incline systems can experience mechanical or electrical faults. Here is how to diagnose the most common edge cases:
- Incline Stuck at 0% (Error Code E01/E02): This indicates a communication failure between the console and the incline sensor. Check the wire harness near the motor hood. If the wires are intact, the optical sensor or potentiometer inside the lift motor has likely failed and requires a $45-$80 replacement part.
- Deck Drifts Downward During Use: This is a classic symptom of a worn internal brake pad inside the incline motor gearbox, or a failing relay on the lower control board. If the deck slowly sinks while you are running at a 10% grade, stop immediately. The control board is failing to send the holding voltage to the lift motor.
- Loud 'Clicking' When Adjusting Grade: The drive screw inside the lift tube lacks lubrication. Unplug the machine, remove the motor hood, and apply a generous amount of white lithium grease to the threaded incline screw. Avoid WD-40, which will strip existing factory grease and accelerate wear.
By understanding the mechanical nuances of your treadmill's incline system and applying the correct gradients to your specific training zones, you will maximize both the lifespan of your equipment and the physiological return on your workout time.
More gear to consider
All reviews
What Treadmills Does Orangetheory Use? Air Bike Maintenance Guide
Rowing Machine Buying Guide: Beating 6.5 Speed on Treadmill
Air Bike vs Assault Bike & Vikingastryr Treadmill Care
Home Stair Climber Guide vs. Treadmill for Dogs and Humans
Gold's Gym Trainer 430i Treadmill vs Walking Pads: Beginner Guide
