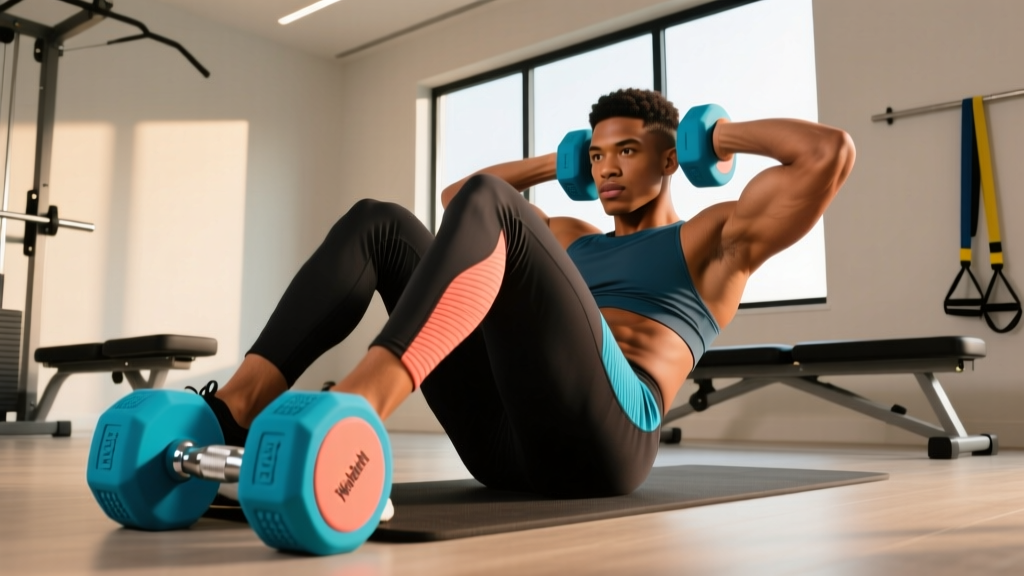
Standard vs Olympic Plates for the One Arm Seated Dumbbell Extension
Learn the differences between standard and Olympic weight plates, and follow our step-by-step guide to the one arm seated dumbbell extension.

The Home Gym Dilemma: Standard vs. Olympic Plates
When outfitting a home gym in 2026, beginners face an immediate fork in the road: should you invest in standard or Olympic weight plates? While this choice seems purely about budget and barbell compatibility, it profoundly impacts your adjustable dumbbell setup. If your goal is to master strict isolation movements like the one arm seated dumbbell extension, the thickness of your dumbbell handle sleeves, the profile of your plates, and your ability to micro-load are all dictated by whether you choose 1-inch standard gear or 2-inch Olympic equipment.
Many novices assume that buying Olympic gear is always the superior choice because it is the 'professional standard.' However, when dealing with single-joint isolation exercises that require precise wrist alignment and strict range of motion, the bulky nature of Olympic dumbbell handles can actually hinder your progress. In this comprehensive guide, we will break down the exact specifications of both plate types, how they affect your loadable dumbbells, and provide a biomechanically sound, step-by-step tutorial for executing the one arm seated dumbbell extension for maximum triceps hypertrophy.
Spec-by-Spec Comparison Matrix
Before loading up your dumbbell handles, it is crucial to understand the physical and financial differences between the two primary weight plate standards available on the market today.
| Feature | Standard Plates (1-Inch Hole) | Olympic Plates (2-Inch Hole) |
|---|---|---|
| Center Hole Diameter | 1 inch (25.4 mm) | 2 inches (50.8 mm) |
| Average Cost per Pound (2026) | $1.10 - $1.50 | $2.50 - $4.00 |
| Dumbbell Handle Sleeve Length | Usually 4.5 to 6 inches | Usually 6 to 8 inches |
| Max Load per 14" Handle | ~40 - 60 lbs | ~100 - 120 lbs |
| Plate Material Options | Cast Iron, Cement-Filled Vinyl | Cast Iron, Rubber, Urethane, Bumper |
| Best Use Case | Beginners, Isolation, Budget Builds | Advanced Lifters, Heavy Compounds, Dropping |
According to BarBend's comprehensive guide to weight plate standards, standard plates remain the undisputed king of budget-friendly home gyms, particularly for lifters who do not plan on performing heavy Olympic lifts or dropping weights from overhead.
How Plate Choice Alters Your Dumbbell Handles
The plate you choose dictates the dumbbell handle you must buy. This is where the physics of the one arm seated dumbbell extension come into play. To perform this exercise, you must hold a dumbbell overhead with one hand, bend the elbow, and lower the weight behind your head. This requires immense wrist stability and a clear path of motion.
- Standard 14-Inch Handles: Typically weighing around 2.5 lbs empty, these handles feature 1-inch diameter sleeves. They are slim, allowing you to load smaller 2.5 lb and 5 lb standard cast iron plates close to the grip. This creates a compact, balanced dumbbell that is easy to maneuver behind your head without the plates clipping your skull or forearm.
- Olympic 14-Inch Handles: Handles like the Rogue Loadable Dumbbell or similar Olympic variants weigh between 6 and 10 lbs empty. The 2-inch sleeves are massive. When you load rubber Olympic plates onto them, the dumbbell becomes incredibly wide and bulky. During a seated triceps extension, this bulkiness can force your wrist into ulnar deviation (bending outward) to avoid hitting your head, which compromises the isolation of the triceps and shifts unwanted strain to the elbow joint.
Step-by-Step Guide: The One Arm Seated Dumbbell Extension
The triceps brachii consists of three heads: the lateral, medial, and long heads. Because the long head crosses the shoulder joint and attaches to the infraglenoid tubercle of the scapula, it is only fully stretched and activated when the arm is raised overhead. As noted in ExRx.net's biomechanical breakdown of the exercise, the seated one-arm overhead extension is one of the most effective movements for targeting this stubborn muscle belly.
Step 1: Equipment Setup and Micro-Loading
Select a standard 1-inch loadable dumbbell handle. For beginners, start with just the handle (2.5 lbs) and add two 2.5 lb standard plates for a total of 7.5 lbs. Secure the collars tightly. Standard plates allow for incredibly cheap micro-loading, which is vital for isolation exercises where jumping up by 10 lbs is often too drastic.
Step 2: Seating and Posture Alignment
Sit on a bench with a back support set to 80 or 90 degrees. The back support is non-negotiable for beginners; it prevents you from using momentum and protects your lower spine. Press the dumbbell overhead with one hand using a neutral grip (palm facing inward toward your head). Support your working elbow with your free hand to stabilize the shoulder joint.
Step 3: The Eccentric Phase (Lowering)
Keeping your upper arm completely vertical and pointing toward the ceiling, slowly bend your elbow. Lower the dumbbell behind your head in a controlled arc. Crucial detail: Because standard plates are slimmer, you can achieve a deeper stretch behind your head without the weight plates physically colliding with your upper back or the bench. Lower the weight until you feel a deep, intense stretch in the belly of the triceps (usually a 90 to 110-degree elbow flexion).
Step 4: The Concentric Phase (Lifting)
Pause for one second at the bottom of the movement to eliminate the stretch reflex. Drive the weight back up along the exact same arc by contracting the triceps. Stop just short of full elbow lockout to maintain continuous tension on the muscle. Complete 3 sets of 10-15 repetitions per arm.
⚠️ Warning: The Olympic Handle Trap for IsolationMany beginners buy Olympic loadable dumbbell handles thinking 'bigger is better.' However, the massive 2-inch sleeve diameter and heavy steel collars throw off the center of mass for light dumbbells (under 25 lbs). This makes high-rep isolation exercises like the one arm seated dumbbell extension feel awkward, wrist-intensive, and unbalanced. Stick to standard 1-inch handles for pure arm isolation work until your working weight exceeds 50 lbs per hand.
Troubleshooting Common Beginner Mistakes
Even with the correct standard weight plates and a properly balanced dumbbell, form breakdowns can occur. Watch out for these frequent errors:
- Flaring the Elbow Outward: Your working elbow should point straight up to the ceiling, not flare out to the side. Flaring shifts the tension away from the triceps long head and places dangerous shearing force on the rotator cuff.
- Using Spinal Extension for Momentum: If you find yourself arching your lower back to push the weight up, the dumbbell is too heavy. The seated position with a backrest should eliminate this cheating mechanism.
- Partial Range of Motion: Stopping the dumbbell at ear-level robs you of the deep stretch required to trigger hypertrophy in the long head. If you cannot lower the weight fully behind your head, drop the weight plates down by 2.5 lbs.
Frequently Asked Questions
Can I use Olympic bumper plates for dumbbell extensions?
While technically possible if you have Olympic dumbbell handles, it is highly discouraged. Bumper plates have a uniform, massive diameter (17.7 inches for standard bumpers). Trying to lower a dumbbell loaded with bumper plates behind your head will result in the plate hitting the bench or your back long before your triceps reach a full stretch.
Are standard weight plates safe for heavy lifting?
Standard cast iron plates are perfectly safe for their intended load limits. A high-quality 1-inch steel dumbbell handle can safely hold up to 60 lbs. However, standard plates are not designed to be dropped, and the 1-inch sleeves on cheap handles can bend if subjected to heavy barbell deadlifts or cleans. For heavy, dynamic compound lifting, Olympic gear is mandatory.
How often should I perform the one arm seated dumbbell extension?
Because this is a strict isolation exercise that places high tension on the elbow tendon, it should be performed 1 to 2 times per week as an accessory movement at the end of your push or upper-body workouts. Allow at least 48 hours of recovery between sessions targeting the triceps.
More gear to consider
All reviews
Power Rack vs Squat Rack vs Stand: Dumbbell Only Leg Workout Guide

Olympic vs Standard Plates for Hamstring Exercises Dumbbell Only

Olympic vs Standard Plates: Setup & Dumbbell Slicey Guide
Rubber Hex vs Urethane for Dumbbell Jumping Squats: Expert Review

Dumbbell to Barbell Conversion: Comparing Olympic Bar Knurl & Weight