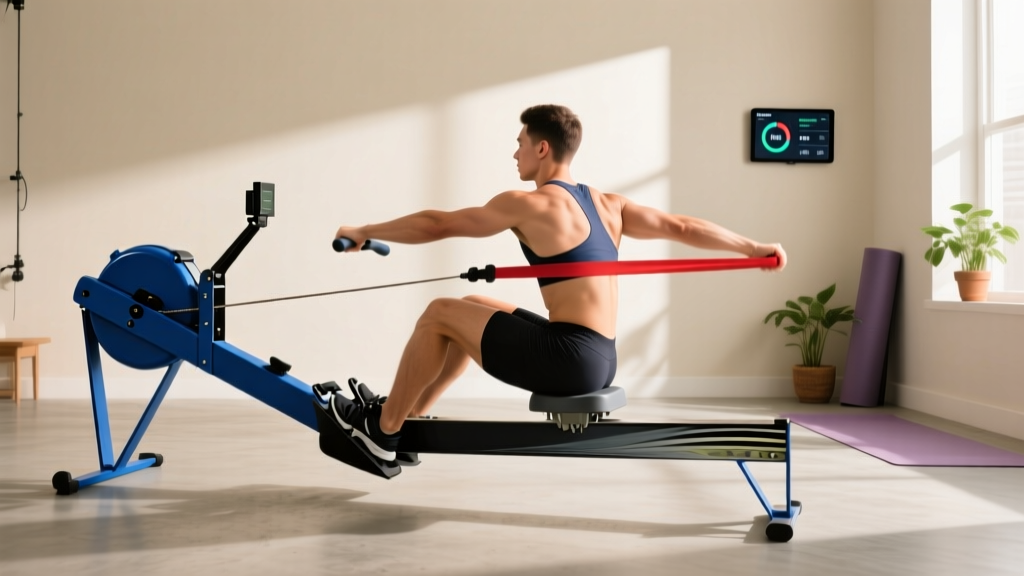
Rowing Machine Buying Guide: Technique vs Running on a Manual Treadmill
Master your rowing machine buying guide and technique. Learn step-by-step form, compare models, and see how it stacks up against running on a manual treadmill.

When building a well-rounded home gym, selecting the right cardiovascular equipment is critical for long-term joint health and muscular development. Many fitness enthusiasts start their journey with high-impact activities, but as training volume increases, the need for low-impact, full-body alternatives becomes apparent. This comprehensive rowing machine buying guide and technique breakdown is designed specifically for beginners looking to master the ergometer while understanding how it compares to other popular cardio modalities, such as running on a manual treadmill.
The Biomechanics: Rowing vs. Running on a Manual Treadmill
Before diving into specific rowing machine models, it is essential to understand why you might choose rowing over other forms of cardio. Running on a manual treadmill—specifically curved, non-motorized models like the AssaultRunner Elite ($3,499) or the TrueForm Trainer ($3,295)—requires you to power the belt with your own stride. This demands roughly 30% more energy than a motorized treadmill and heavily taxes the posterior chain, calves, and Achilles tendons. While excellent for athletic conditioning, the repetitive ground-reaction forces (which can reach 2.5 times your body weight per stride) can lead to overuse injuries over time.
Rowing, conversely, is a zero-impact, closed-chain kinetic exercise. According to the Mayo Clinic's guidelines on aerobic exercise, low-impact cardio is vital for sustaining cardiovascular health without degrading joint cartilage. Rowing engages 86% of the body's musculature, seamlessly blending the cardiovascular demand of running with the resistance-training benefits of weightlifting, all while your feet remain securely strapped to the footboards.
2026 Rowing Machine Buying Guide for Beginners
The indoor rowing market has expanded significantly. When shopping for your first machine, the primary differentiator is the resistance mechanism. Below is a breakdown of the three main types you will encounter.
| Resistance Type | How It Works | Noise Level | Feel & Maintenance | Average Price Range |
|---|---|---|---|---|
| Air | Flywheel with fan blades; resistance scales with your effort. | Loud (Whooshing) | Dynamic, smooth, infinite resistance. Requires occasional chain oiling. | $900 - $1,200 |
| Magnetic | Magnets apply friction to a metal flywheel without touching it. | Whisper Quiet | Consistent, easily adjustable via dial/screen. Virtually maintenance-free. | $400 - $2,500 |
| Water | Paddles spin inside a tank of water. | Moderate (Splashing) | Authentic 'on-water' catch feel. Requires water purification tablets. | $700 - $1,800 |
Top 3 Beginner-Friendly Rowing Machines
- Concept2 RowErg (Standard Legs): Priced at $1,100, this is the undisputed gold standard for air rowers. It features the PM5 performance monitor, which tracks your exact drag factor and split times. It is the machine used in official CrossFit competitions and Olympic training centers.
- Hydrow Row: At $2,495 (plus a $44/month membership), this magnetic rower offers an immersive, studio-style experience with a 22-inch HD touchscreen. The magnetic resistance provides a incredibly smooth, silent glide, making it ideal for apartment dwellers.
- ProForm Sport Rower: A budget-friendly magnetic option at $799. It includes basic interactive coaching and folds vertically for easy storage, though the footboards and pull strap lack the premium durability of the Concept2.
Step-by-Step Rowing Technique: The 4 Phases
Purchasing the right equipment is only half the battle. Poor technique on a rower can lead to lower back pain and inefficient power transfer. The official Concept2 technique guide breaks the stroke down into four distinct phases. Master these before attempting high-intensity intervals.
1. The Catch (The Setup)
Sit tall with your shins completely vertical (do not let your knees track over your toes). Your arms should be straight, shoulders relaxed and down, and your torso leaned forward at roughly an 11 o'clock angle. This is your position of maximum potential energy.
2. The Drive (The Power Phase)
The drive is a sequenced push, not a pull. Initiate the movement by driving your legs into the footboards. When your legs are about 75% extended, hinge your hips backward (opening to an 11 o'clock angle). Finally, draw the handle to your lower ribs using your lats and biceps. Power distribution: 60% legs, 20% core, 20% arms.
3. The Finish (The Anchor)
Your legs are fully extended (but not locked), your torso is leaned back slightly past vertical, and the handle is resting lightly against your solar plexus. Your wrists must remain perfectly flat—do not curl them inward.
4. The Recovery (The Reset)
The recovery is the exact reverse of the drive and should take twice as long. Extend your arms first, hinge your torso forward past your knees, and only then allow your knees to bend as you slide back to the Catch. Breathe in deeply during this phase.
Common Beginner Mistakes and How to Fix Them
Mistake 1: Setting the Damper to 10.
Many beginners assume a higher damper setting (1-10) equals a better workout. On an air rower like the Concept2, a setting of 10 mimics rowing a heavy, sluggish wooden boat. For optimal aerobic conditioning and proper biomechanics, set the damper between 3 and 5. This yields a drag factor of 110-130, closely mimicking the feel of a sleek racing shell on water.
Mistake 2: Rushing the Slide.
Beginners often equate a fast slide (recovery) with a faster workout. This ruins your rhythm and causes you to 'check' the boat (slamming into the front of the machine). Focus on a 1:2 ratio. If your drive takes 1 second, your recovery should take 2 seconds.
Mistake 3: Early Arm Pull.
Pulling with the arms before the legs have fully engaged shifts the load entirely to the lower back and biceps, leading to fatigue and potential injury. Remember the mantra: Legs, Core, Arms on the drive; Arms, Core, Legs on the recovery.
Structuring Your First 4-Week Beginner Rowing Plan
To build your aerobic base without overtaxing your central nervous system, follow this progressive 4-week plan. Focus on your split time (the time it takes to row 500 meters) rather than your stroke rate (strokes per minute, or s/m). A lower split time means you are generating more watts of power.
| Week | Focus | Workout Structure | Target Stroke Rate |
|---|---|---|---|
| Week 1 | Form & Consistency | 3 x 10 minutes (2 mins rest between sets). Focus purely on the sequence of the stroke. | 18 - 20 s/m |
| Week 2 | Aerobic Base | 2 x 15 minutes continuous rowing. Maintain a conversational pace. | 20 - 22 s/m |
| Week 3 | Power Endurance | 5 x 4 minutes hard effort (2 mins easy paddling rest). Focus on driving split time down. | 24 - 26 s/m |
| Week 4 | Milestone Test | 1 x 30 minutes continuous row for total meters. Record your average split time. | 20 - 24 s/m |
Final Thoughts on Cross-Training
Integrating a rowing machine into your home gym provides a phenomenal counterbalance to high-impact routines. While running on a manual treadmill remains an elite tool for building lower-body explosiveness and sprint mechanics, the rowing machine offers a sustainable, joint-friendly pathway to elite cardiovascular fitness and full-body muscular endurance. By selecting the right resistance type for your living space and strictly adhering to the four phases of the stroke, you will unlock a lifetime of pain-free, high-yield cardio training.
More gear to consider
All reviews
Treadmill Motor Guide: Sizing the LifeSmart 3-in-1 Treadmill HP

Curved Manual vs Motorized Treadmills: ProForm 505 CST Compared
Folding Treadmill Review: How Long to Walk 5 Miles on Compact Models
Rowing Machines vs Trimline Treadmills: Buying Guide & Technique

Can Incline on Treadmill Help You Lose Thigh Fat? Bike Budget Breakdown
