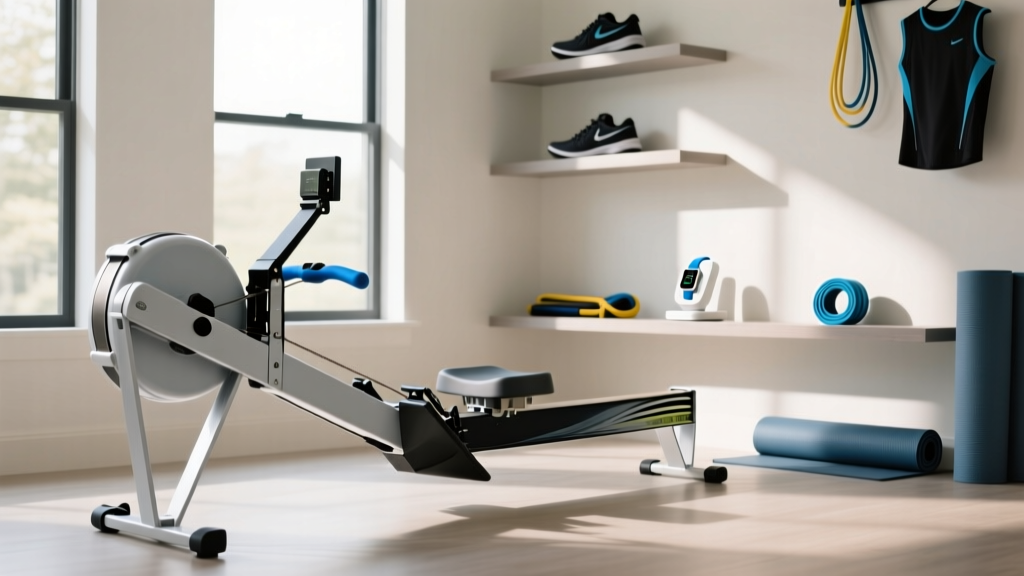
Rowing Machine Setup: Better Than Cheap Treadmills for Home
Master your rowing machine setup and technique. Discover why a proper rower installation beats cheap treadmills for home cardio in 2026.

The Home Cardio Dilemma: Why Rowers Outperform Budget Treadmills
Every January, millions of fitness enthusiasts flood the internet searching for cheap treadmills for home use, lured by sub-$250 price tags and the promise of effortless indoor walking. However, as we navigate the 2026 fitness equipment landscape, the reality of budget treadmills is stark: they typically feature underpowered 1.25 HP motors, narrow 15-inch running belts that alter natural gait, and high failure rates within the first six months. In contrast, investing in a rowing machine—whether it is the industry-standard Concept2 RowErg (approx. $1,100) or a budget-friendly magnetic option like the Sunny Health SF-RW5515 (approx. $250)—provides a vastly superior full-body cardiovascular stimulus with a fraction of the joint impact.
This comprehensive walkthrough will guide you through the complete setup, ergonomic calibration, and foundational technique of a rowing machine, proving why it remains the undisputed king of home cardio efficiency.
Head-to-Head: Rower vs. Budget Treadmill
| Feature | Standard Rowing Machine (e.g., Concept2) | Budget Treadmills for Home (Under $300) |
|---|---|---|
| Muscle Engagement | 86% of total body musculature | Lower body only (approx. 40%) |
| Joint Impact | Zero-impact, seated biomechanics | High-impact (2-3x body weight on knees) |
| Floorprint (In Use) | 9 ft x 4 ft (Stores vertically in 2 ft x 4 ft) | 6 ft x 2.5 ft (Cannot be easily moved) |
| Maintenance | Chain oiling, rail wiping (Zero electronics) | Belt lubrication, motor dusting, board replacements |
Pre-Installation Walkthrough: Space and Flooring Requirements
Before unboxing your rower, you must prepare the installation zone. Unlike a stationary bike, a rowing machine requires significant longitudinal clearance. You need a minimum dedicated space of 9 feet long by 4 feet wide to accommodate the rail and your arm span during the drive phase.
Critical Flooring Warning: Never place a rowing machine directly on hardwood or luxury vinyl plank (LVP) flooring. The repetitive forward-and-backward motion creates micro-vibrations that will scratch hardwood and dent LVP over time. Invest in a 3/4-inch thick rubber horse stall mat or a high-density PVC equipment mat cut to 4x8 feet. This absorbs acoustic vibration and prevents the front stabilizer from creeping during high-drag sprints.
Step-by-Step Rowing Machine Assembly & Setup
While magnetic and water rowers vary slightly, the assembly of a standard air rower like the Concept2 RowErg sets the benchmark for home installation. Follow these precise steps to ensure structural integrity and rail alignment.
- Attach the Front Stabilizer: Position the main frame over the front legs. Insert the four M8x20 hex head bolts with 1/4-inch flat washers. Using a 10mm hex key, tighten these to approximately 20 Nm of torque. Do not fully tighten until all four bolts are threaded to ensure the frame sits perfectly flush on your mat.
- Connect the Monitor Arm: Slide the PM5 (or equivalent digital monitor) arm into the receiver tube on the flywheel housing. Secure it with the provided locking knob. Ensure the display is angled at roughly 15 degrees upward for optimal viewing during the catch phase.
- Align the Seat and Rail: Slide the seat onto the monorail. Check the plastic seat rollers. They should glide silently. If you hear a grinding noise, the rail may have accumulated shipping debris. Wipe the stainless steel rail with a paper towel dampened with isopropyl alcohol before your first stroke.
- Secure the Foot Stretchers: Adjust the heel cups to match your shoe size. The pivot point of your heel should align with the bottom edge of the footpad to allow for proper ankle dorsiflexion at the catch.
Ergonomic Calibration: Finding Your True Drag Factor
The most common mistake beginners make is setting the physical damper lever to 10, assuming higher resistance equals a better workout. This is a fast track to lumbar fatigue and poor technique.
"The damper setting is like the gearing on a bicycle. A setting of 10 doesn't make you faster; it just makes the machine feel heavier. For 90% of cardiovascular conditioning, a drag factor between 110 and 130 is optimal, mimicking the feel of a sleek racing shell on water."
To calibrate your machine properly, access the 'More Options' menu on your monitor and select 'Display Drag Factor'. Begin rowing lightly. Adjust the physical lever on the side of the flywheel (usually between 3 and 5) until the screen reads between 110 and 130. According to Concept2's official training guidelines, this specific drag range allows for the highest power output while maintaining cardiovascular sustainability over a 2,000-meter test.
Mastering the Technique: The Four Phases of the Stroke
Proper installation means nothing if your biomechanics are flawed. Rowing is not an upper-body pulling exercise; it is a lower-body pushing exercise. A study published in the National Center for Biotechnology Information (NCBI) highlights that the legs generate approximately 60% of the power in a rowing stroke, while the core and arms contribute 30% and 10%, respectively.
1. The Catch (The Starting Position)
- Shins should be perfectly vertical (perpendicular to the floor).
- Arms are fully extended, lats engaged, shoulders relaxed away from the ears.
- Torso is hinged forward at roughly 11 o'clock.
2. The Drive (The Power Phase)
- Initiate the movement by driving through the heels and mid-foot.
- Keep the arms straight and the torso rigid until the legs are nearly fully extended.
- Once the knees are down, swing the hips open (hinge back to 11 o'clock).
- Finally, draw the handle to the lower sternum using the biceps and lats.
3. The Finish
- Legs are fully extended but not hyper-locked.
- Torso is leaning back slightly (1 o'clock position).
- Handle is hovering just above the belly button, wrists flat.
4. The Recovery (The Reset)
- Reverse the sequence strictly: Arms extend first, then the torso hinges forward (past vertical), and finally the knees bend to slide back to the catch.
- The recovery should take twice as long as the drive (a 1:2 ratio) to allow for cardiovascular recovery.
Troubleshooting Common Installation & Technique Flaws
Even with a perfect setup, users often encounter mechanical or biomechanical issues. Here is how to diagnose and fix the most common problems:
- Issue: The seat 'hitches' or jumps on the rail during the recovery.
Fix: This is rarely a manufacturing defect. It is usually caused by dust or pet hair embedding in the seat wheels. Clean the rail and wheels weekly with a non-abrasive glass cleaner. Never use steel wool or abrasive pads, as scratching the rail will permanently ruin the glide. - Issue: Chain slap (a loud rattling noise on the return).
Fix: The internal bungee cord that retracts the chain may have lost tension, or the chain is dry. Apply a teaspoon of purified mineral oil to a paper towel and run the chain through it. Avoid WD-40, which strips factory lubricants and attracts grit. - Issue: Lower back pain after 10 minutes of rowing.
Fix: You are likely 'opening the back' too early during the Drive phase. Focus on keeping your core braced and pushing with your legs before allowing your hips to swing open. Additionally, ensure your foot straps are not positioned too high, which restricts ankle mobility and forces you to round your lumbar spine at the catch.
Maintenance Schedule to Outlast Budget Cardio Machines
One of the primary reasons fitness enthusiasts abandon cheap treadmills for home use is the sudden failure of electronic control boards or the snapping of low-grade drive belts. A well-maintained rowing machine, however, can easily last 15 to 20 years with minimal upkeep. Follow this simple 2026 maintenance protocol:
- After Every Workout: Wipe down the monorail, handle, and seat with a damp cloth to remove sweat salts, which can corrode metal and degrade plastic over time.
- Every 50 Hours of Use: Inspect the chain for stiffness. Apply purified mineral oil if the links feel dry. Check the top roller for debris.
- Annually: Inspect the internal bungee cord for fraying (requires opening the flywheel housing on air rowers) and ensure all structural bolts are tightened to factory torque specifications.
By prioritizing a proper rowing machine setup and dedicating time to mastering the technique, you secure a lifetime of low-impact, high-yield cardiovascular training. It is an investment in biomechanical longevity that no budget treadmill could ever replicate.
More gear to consider
All reviews
How to Avoid the 'Fall Off Treadmill GIF': Feature Comparison & Troubleshooting
What Is a Walking Pad Treadmill? 2026 Compact Cardio Trends

Treadmill Starts Then Stops? 2026 Home Stair Climber Machine Guide

Horizon T81 Treadmill vs Under Desk Walkers: Office Use & Care

Treadmill and Knees: Rowing Machine vs. Treadmill for Joint Health
