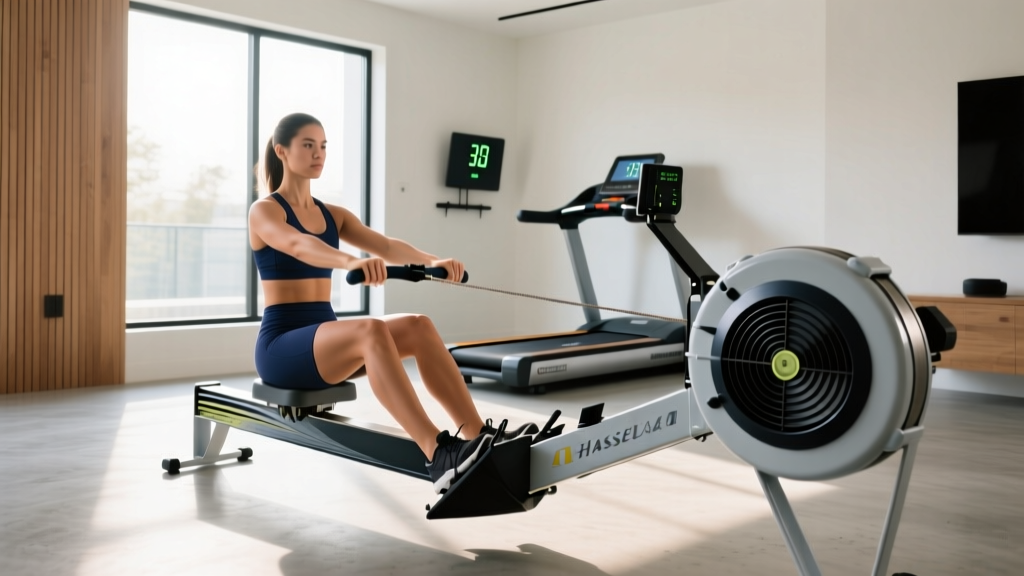
Rowing Machine Guide, Technique & Universal Safety Key for Treadmill
Master your home gym with our rowing machine buying guide, technique tips, and treadmill setup featuring the universal safety key for treadmills.

Building a comprehensive home cardio bay in 2026 requires more than just purchasing equipment; it demands precise spatial planning, biomechanical knowledge, and strict safety protocols. For many fitness enthusiasts, the ultimate dual-machine setup pairs the full-body conditioning of a rowing machine with the steady-state endurance of a treadmill. This complete setup and installation walkthrough covers everything from selecting the right rower and mastering the 4-phase stroke, to integrating your treadmill and sourcing a universal safety key for treadmill units when building a mixed-brand gym.
The 2026 Rowing Machine Buying Guide: Air vs. Magnetic vs. Water
Choosing the right rowing machine hinges on your noise tolerance, space constraints, and desired resistance curve. The market is currently dominated by three drive types, each offering distinct advantages for home use.
- Air Rowers: The gold standard for competitive rowers and CrossFit athletes. Resistance scales infinitely with your effort. They are loud but virtually indestructible.
- Magnetic Rowers: Utilizing electromagnetic brakes, these offer near-silent operation and precise, programmable resistance levels. Ideal for apartments or shared living spaces.
- Water Rowers: Featuring a polycarbonate tank and wooden or steel frames, they provide a soothing 'whoosh' sound and a highly realistic catch sensation, though they require periodic water purification.
| Model (2026) | Drive Type | Footprint (L x W) | Price Range | Best For |
|---|---|---|---|---|
| Concept2 RowErg | Air | 95" x 24" | $1,195 | Performance tracking, durability |
| Hydrow | Electromagnetic | 86" x 25" | $2,495 | Immersive classes, quiet operation |
| WaterRower Natural | Water | 84" x 22" | $1,699 | Aesthetics, realistic water feel |
| Sunny Health SF-RW5515 | Magnetic | 82" x 19" | $249 | Budget setups, beginners |
Complete Rowing Machine Setup & Installation Walkthrough
Proper installation is critical for both machine longevity and injury prevention. Follow these steps to prepare your cardio bay for a rowing machine.
- Calculate Clearance: You need a minimum of 9 feet in length and 4 feet in width. Crucially, ensure there is at least 2 feet of clearance behind the flywheel to prevent recirculating air from hitting walls, which can cause overheating on magnetic models.
- Install Sub-Floor Matting: Do not place rowers directly on hardwood or carpet. Use a 3/8-inch thick vulcanized rubber horse stall mat (typically 4x6 feet, costing around $50-$70). This absorbs the dynamic downward force of the 'catch' and prevents the rail from micro-shifting during high-stroke-rate sprints.
- Level the Rail: Assemble the front stabilizer and rear legs. Use a 24-inch spirit level along the aluminum monorail. Adjust the threaded leveling feet on the rear stabilizer until the bubble is perfectly centered. An unlevel rail causes the seat carriage to drift, leading to uneven wheel wear.
- Secure the Monitor Arm & Bungee: When attaching the PM5 or digital monitor, ensure the internal ribbon cable is not pinched. For air and water rowers, check the internal bungee cord tension; the handle should retract smoothly to the catch position without sagging.
Rowing Technique: Mastering the 4-Phase Stroke
According to Cleveland Clinic experts, rowing engages 86% of the body's musculature, but only if the biomechanical sequence is correct. The stroke is not a simultaneous pull; it is a sequential transfer of power.
The Phase Breakdown
- The Catch: Shins are vertical (or as close as ankle mobility allows), torso is hinged forward at 11 o'clock, and arms are completely straight. Shoulders should be relaxed, not shrugged.
- The Drive: This is the power phase. Initiate with a forceful leg push. When the legs are 70% extended, swing the core open to 1 o'clock. Finally, draw the handle to your lower ribs with your arms. (Power split: 60% legs, 30% core, 10% arms).
- The Finish: Legs are fully extended but not hyperextended. Core is braced at 1 o'clock. Handle rests lightly against the sternum/lower ribs. Elbows are drawn back and down.
- The Recovery: The exact reverse of the drive. Arms extend first, core pivots back to 11 o'clock, and finally, the knees bend to slide back to the catch. The recovery should take twice as long as the drive (a 1:2 ratio).
⚠️ Troubleshooting Failure Mode: Lumbar Pain'The most common error we see in home gym setups is 'shooting the slide'—where the hips extend before the handle moves, resulting in a massive loss of power transfer and excessive lower back shear.' — Concept2 Technique Guide
If you experience lower back pain after 2,000 meters, check your 'catch' position. Overreaching past your toes to grab extra inches forces the lumbar spine into flexion under load. Stop the slide when your shins are vertical, even if it feels like a shorter stroke.
Treadmill Integration: Sourcing a Universal Safety Key for Treadmill
When outfitting the second half of your dual-cardio bay, the treadmill requires strict safety protocols, particularly regarding the emergency stop mechanism. If you are integrating a refurbished or second-hand treadmill (such as a used NordicTrack T Series 5, ProForm Performance 800i, or Sole F63) into your gym, you will likely find the magnetic safety lanyard is missing.
Searching online for a universal safety key for treadmill units will yield hundreds of generic 3-prong plastic inserts or magnetic pucks priced between $8 and $15. However, as a domain expert, I must warn you: true universality is largely a myth due to proprietary console designs and varying reed switch depths.
The Reed Switch Hack for Treadmill Safety Keys
Most modern treadmills use a magnetic reed switch hidden behind the console's red safety circle. The 'key' itself contains no electronics; it is simply a magnet that completes the circuit. Before you waste money on an overpriced OEM replacement or a poorly fitting 'universal' insert, perform this diagnostic test:
- Plug in the treadmill and turn on the master power switch.
- Take a standard neodymium magnet (even a strong fridge magnet will work) and hold it directly against the red safety circle on the console.
- Press 'Start' on the console. If the belt begins to move, your reed switch is functioning and only requires magnetic activation.
- You can now safely purchase a basic generic magnetic puck with a lanyard clip, completely bypassing the need for a brand-specific plastic insert.
When routing the treadmill lanyard, do not clip it to your waistband directly in front of the belt. Clip it to the side hem of your shorts. This ensures that if you drift backward or stumble, the lateral pull will cleanly rip the magnet away from the console without tangling in your arm swing.
Cardio Bay Maintenance Checklist
To keep both your rowing machine and treadmill operating at peak performance in 2026, implement this monthly maintenance routine:
- Rower Rail Care: Wipe the aluminum monorail with a damp microfiber cloth and a mild glass cleaner. Never use silicone lubricants on the rail, as they attract dust and create a grinding paste that destroys the seat rollers.
- Rower Chain Maintenance: For Concept2 and other chain-driven models, apply a teaspoon of purified mineral oil or 20W motor oil to a paper towel and run it along the chain every 50 hours of use.
- Treadmill Belt Alignment: Stand behind the treadmill while it runs at 3 MPH. If the belt drifts left, turn the left rear roller bolt clockwise by a quarter turn. Always make micro-adjustments and let the belt run for 30 seconds before adjusting further.
- Treadmill Deck Lubrication: Check your owner's manual. Most modern Sole and Horizon treadmills require 100% silicone lubricant applied under the belt every 150 miles or 6 months to prevent motor overheating and board friction.
By carefully selecting your equipment, mastering the biomechanics of the rowing stroke, and intelligently managing safety mechanisms like the treadmill magnetic lanyard, you will build a home cardio bay that rivals any commercial facility in both safety and performance.
More gear to consider
All reviews
Curved Manual vs Motorized: Gold's Gym Crosswalk 570 Treadmill Guide

NordicTrack C2000 Treadmill vs Home Stair Climbers: 2026 Guide

Stair Climber vs. Treadmill and Belly Fat: 2026 Home Cardio Guide
Walking Pad vs. Treadmill: Fixing 8 Incline on Treadmill Mistakes
NordicTrack T Series 5 Starter Treadmill for Real Results: Troubleshooting
