Resistance Band Storage: Upgrading Your Dumbbell Rack Stand
Maximize resistance band longevity by integrating smart storage with your dumbbell rack stand. Learn mounting hacks, maintenance, and material care.

The Hidden Enemy of Resistance Band Longevity
When outfitting a home gym, lifters invest heavily in cast-iron and steel, knowing these materials will outlast them. Resistance bands, however, are a completely different beast. Unlike a set of hex dumbbells resting securely on a dumbbell rack stand, elastomeric bands are highly susceptible to environmental degradation, tension fatigue, and improper storage. In fact, improper storage is the leading cause of catastrophic band snapping—a dangerous failure mode that can result in severe facial or ocular injuries.
Most home gym owners toss their bands into a plastic bin or hang them on cheap, narrow door hooks. Both methods drastically reduce the lifespan of the equipment. Plastic bins cause bands to tangle, kink, and develop permanent stress fractures, while narrow hooks concentrate resting tension on a microscopic surface area, accelerating micro-tears. The most effective, space-efficient, and structurally sound solution? Integrating a dedicated, wide-diameter band peg system directly into your existing heavy-duty dumbbell rack stand.
⚠️ Safety Warning: The Ozone ThreatNever store natural latex resistance bands near electric treadmill motors, air purifiers, or large fans. Electric motors generate trace amounts of ozone gas. According to TheraBand's clinical guidelines, ozone exposure causes rapid surface cracking and structural failure in natural latex elastomers. Always position your dumbbell rack stand and band storage hub at least 10 feet away from your cardio zone.
The Science of Elastomer Degradation
To understand why storage matters, you must understand the materials. As of 2026, the market is dominated by two primary band materials: Natural Latex and Thermoplastic Elastomer (TPE).
- Natural Latex: Offers superior elongation (up to 600% stretch) and snap-back memory. However, it is highly vulnerable to UV radiation, ozone, and extreme temperature fluctuations.
- TPE Blends: More resistant to UV and ozone, but highly susceptible to 'tension memory.' If left stretched or folded tightly over a long period, TPE loses its elastic recovery and becomes permanently deformed.
Hanging bands on a 1.25-inch to 2-inch diameter peg distributes the resting loop tension evenly, preventing the localized stress fractures that occur when bands are folded in a drawer or hung on a 1/4-inch nail.
Why Your Dumbbell Rack Stand is the Ultimate Storage Hub
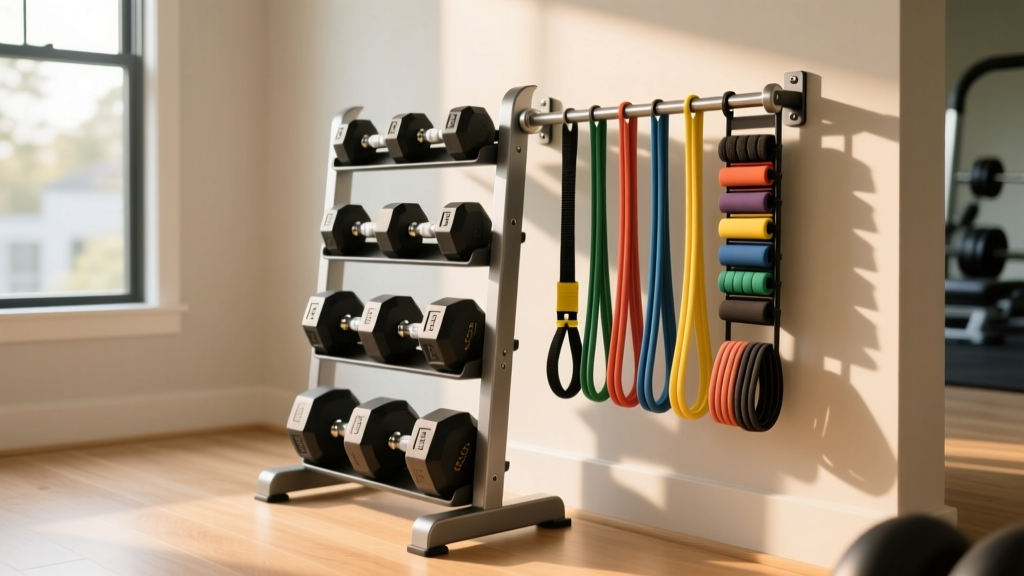
A high-quality dumbbell rack stand (such as a 3-tier A-frame or a horizontal tiered rack) is engineered to hold hundreds of pounds of dead weight. It is bolted to the floor or features a wide, anti-tip footprint. This makes it the perfect anchor point for a band storage annex. By mounting band pegs to the uprights or the rear gussets of the rack, you achieve three critical goals:
- Elevation: Keeps bands off the floor, away from moisture, sweat drips, and pet damage.
- Organization: Allows you to sort bands by thickness and resistance level (e.g., 15 lbs to 200 lbs) from left to right.
- Space Optimization: Utilizes the 'dead air' space above or behind the dumbbells without requiring additional wall drilling or floor footprint.
Storage Method Comparison Matrix
| Storage Method | Longevity Impact | Space Efficiency | Risk of Tangling |
|---|---|---|---|
| Floor Bin / Drawer | High Degradation (Kinking) | Low | Severe |
| Over-Door Hooks | Moderate (Stress Points) | Medium | Low |
| Rack-Mounted Pegs | Optimal (Even Distribution) | High | None |
Step-by-Step: Mounting Band Pegs to a Dumbbell Rack Stand
Integrating pegs into your dumbbell rack stand requires precision to avoid compromising the rack's structural integrity or voiding the manufacturer's warranty. Follow these professional installation steps:
1. Identify the Mounting Zone
Locate the rear vertical uprights or the horizontal cross-braces of your rack. Never drill into the primary load-bearing weld joints or the angled gussets that support the dumbbell trays. Aim for the flat, unobstructed sections of the 2x2 or 3x3 steel tubing, ideally 12 to 18 inches above the top tier of dumbbells.
2. Select the Right Hardware
Do not use wood screws or cheap drywall anchors. You need hardware that can withstand the lateral pull of a 150 lb tension band being unhooked forcefully.
- For Bolt-On Pegs: Use 3/8-inch Grade 8 zinc-plated or stainless steel hex bolts.
- For Steel Dowel Pegs: Use 5/8-inch solid steel hitch pins with locking clips.
- Protection: Always use 1-inch nylon or rubber fender washers between the bolt head and the rack's powder coat to prevent scratching and galvanic corrosion.
3. Drilling and Tapping (If Required)
If your dumbbell rack stand does not have pre-spaced holes (like the 1-inch Westside spacing found on power racks, but rare on dumbbell racks), you will need to drill. Use a cobalt drill bit designed for hardened steel. Apply cutting fluid to keep the bit cool, and drill at a low RPM. Once the hole is clean, insert a steel rivet nut (nutsert) using a rivet nut tool to create a flush, threaded insert that won't strip under repeated use.
💡 Pro-Tip: The Teflon Tape TrickWrap the base of your steel band pegs with 3-4 layers of PTFE (Teflon) plumber's tape before inserting them into the rack holes. This eliminates the 'metal-on-metal' rattle when bands are yanked off, and prevents the pegs from scratching the interior of the rack tubing.
The Maintenance Routine: Cleaning and Inspection
Even with perfect storage on a dumbbell rack stand, bands require a strict maintenance protocol to ensure safety. The National Strength and Conditioning Association (NSCA) recommends inspecting elastic equipment before every single use, but a deeper monthly maintenance routine is vital for home gym owners.
'The most common mistake athletes make is using alcohol-based cleaners or harsh chemical disinfectants on resistance bands. These solvents break down the molecular bonds in both latex and TPE, leading to dry rot and sudden snapping. Stick to pH-neutral cleaners.' — Equipment Maintenance Protocols, NSCA Guidelines
The Monthly Inspection Checklist
- The Visual Scan: Look for white, powdery residue (a sign of UV/ozone degradation) or shiny, discolored patches (indicating stretched, stressed material).
- The Stretch Test: Stretch the band to 200% of its resting length. Run your fingers lightly along the edges. If you feel any micro-nicks, divots, or tears, destroy and discard the band immediately. Do not attempt to cut the damaged section off.
- The Cleaning Wipe: Use a microfiber cloth dampened with warm water and a single drop of mild dish soap (like Dawn). Wipe the band down to remove body oils and sweat salts, which are highly corrosive to elastomers.
- The Drying Phase: Pat dry with a clean towel. Never hang wet bands in direct sunlight or use a hair dryer to speed up the process.
Recommended Rack-Mountable Band Organizers (2026 Market)
When upgrading your dumbbell rack stand, you don't always need to drill. Many modern home gym brands offer modular, bolt-on accessories. According to Rogue Fitness's equipment specifications and current market offerings, here are the top-tier solutions:
- Rogue Monster Band Pegs (Approx. $45): Designed for 3x3 tubing with 5/8-inch holes. Machined from solid steel with a black powder coat. The 2-inch diameter is perfect for wide loop bands, preventing edge-folding.
- Rep Fitness 1.25" Band Pegs (Approx. $25): Ideal for 2x2 tubing racks. These feature a slight upward angle and a flared tip to prevent bands from sliding off when bumped.
- DIY UHMW Pegs (Approx. $15 for materials): For those with a lathe or a friend who does, turning Ultra-High-Molecular-Weight (UHMW) polyethylene rods into custom pegs is the ultimate upgrade. UHMW is incredibly slick, meaning bands slide off effortlessly without catching or tearing, and it will never rust or scratch your bands.
Frequently Asked Questions
Can I hang resistance bands on the same pegs as my lifting chains?
No. Lifting chains are made of hardened steel and often feature sharp burrs or rust spots from being dropped on the floor. Hanging elastomeric bands on the same peg will cause micro-abrasions on the inner loop of the band. Dedicate separate, smooth pegs on your dumbbell rack stand exclusively for bands.
How long should a high-quality resistance band last?
With proper storage on a wide-diameter peg, away from UV light and ozone, and regular cleaning, a premium natural latex band should last 1 to 2 years of heavy use. TPE bands may last slightly longer but will lose their peak elastic tension profile sooner.
Final Thoughts
Treating your resistance bands with the same respect as your iron is a hallmark of a mature home gym setup. By leveraging the robust framework of your dumbbell rack stand to create a dedicated, elevated, and organized storage zone, you not only keep your training space pristine but actively protect your investment—and your physical safety. Implement the mounting hardware standards and maintenance routines outlined above, and your bands will deliver consistent, reliable tension for years to come.
More gear to consider
All reviews12 High-Impact DIY Value Ideas That Boost Home Gym Functionality and Resale Appeal

Horizontal vs Vertical Barbell Racks & Cybex Dumbbell Rack Review

Home Gym Weight Storage: Dumbbell Rack Setup & Installation Guide

Small Space Home Gym Storage Ideas: Mistakes & Fixes

How to Build a DIY Vertical Dumbbell Rack & Weight Plate Tree